How to Permanently Delete a Page in Word
Delete a page in Microsoft Word by stopping the Track Changes
- You may experience difficulty deleting pages in Word due to page layouts and breaks.
- Word-tracking changes or comments on the document can prevent you from deleting the page.
- You can also try stopping the Track Changes option and deleting the page from the draft.

Many users have complained about how difficult it’s been to delete a page in Microsoft Word. It makes it impossible for users to remove blank pages and clear unneeded document parts. However, this article will discuss some steps for fixing the problem.
Alternatively, you can go through our detailed guide about Word documents being blank when opened and some steps for fixing the issue.
Why can’t I delete one page in Word?
- Word might consider section breaks or page breaks on the page you’re trying to delete as a separate section and prevent its deletion.
- If the content on the page extends beyond the visible area, Word may not allow you to delete it.
- Some protection settings enabled, such as Read-only or Password-protected, can prevent you from deleting pages.
- If tables, images, shapes, or other objects are on the page, they can sometimes interfere with deletion.
- Sometimes, Word might track changes or comments on the document, causing it to preserve those elements on the page and prevent its deletion.
- The Word document might be corrupted or problematic due to transfer, leading to deletion issues. Check the best tool for fixing corrupt documents in Microsoft Word.
How do I completely delete a page in Word?
1. Delete a page manually
- Place your cursor at the beginning of the page you want to delete.
- Press and hold the Ctrl key on your keyboard.
- While holding the Ctrl key, press the Shift and right arrow keys simultaneously. This will select the entire page.
- Once the page is selected, press the Delete key on your keyboard. The entire page, including its content, should be deleted.
Alternatively, you can use the Backspace key instead of the Delete key to achieve the same result. Note that this method assumes no section breaks, page breaks, or other elements on the page that might prevent its deletion.
2. Turn off Track changes and delete the page from the Draft view
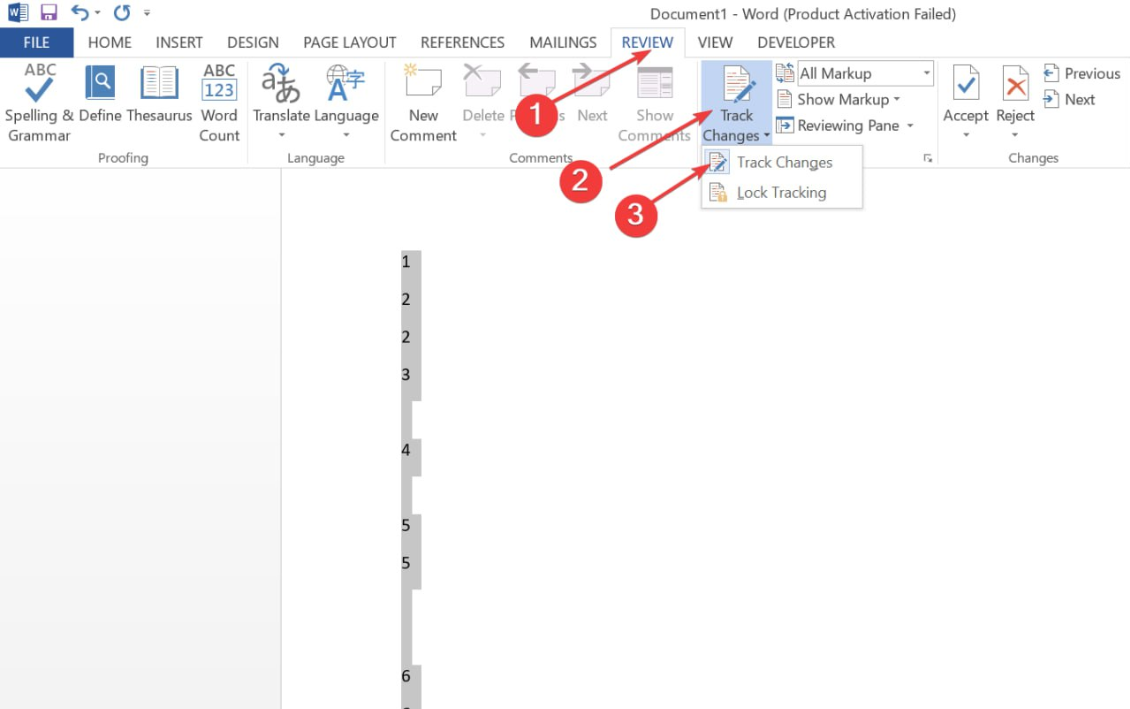
- Click the Review tab in the ribbon.
- Select Track Changes from the Tracking group. Then, select Track Changes from the drop-down menu to turn tracking off the feature.
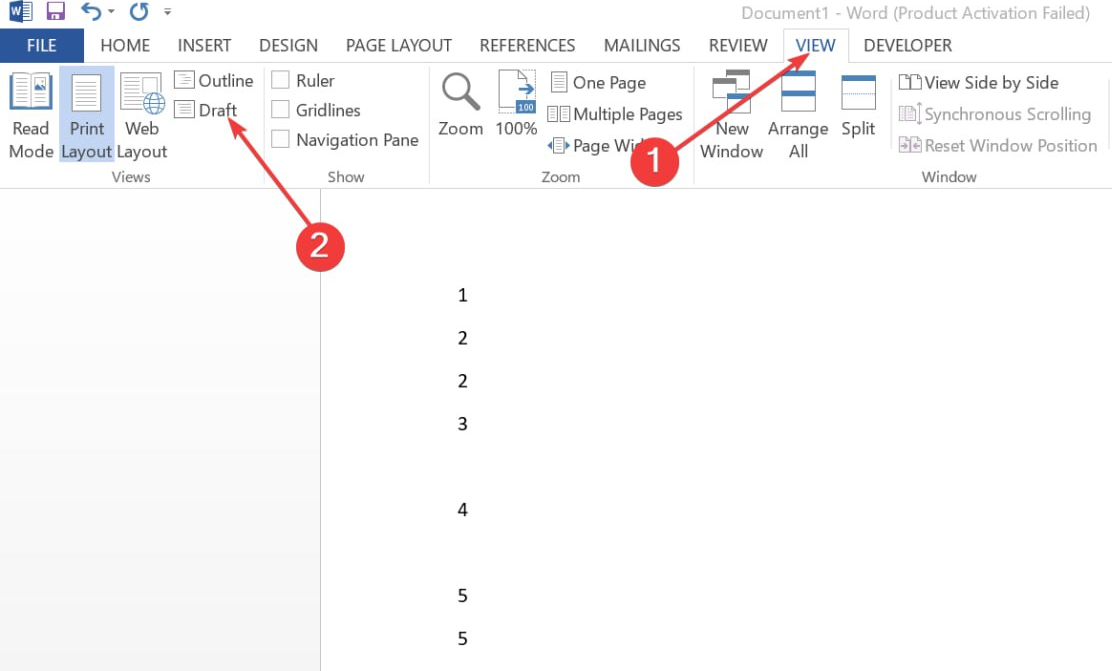
- Click the View tab in the Ribbon and select Draft in the Views group.
- Tap on the page and or section break you want to delete.
- Press the Delete or Backspace button.
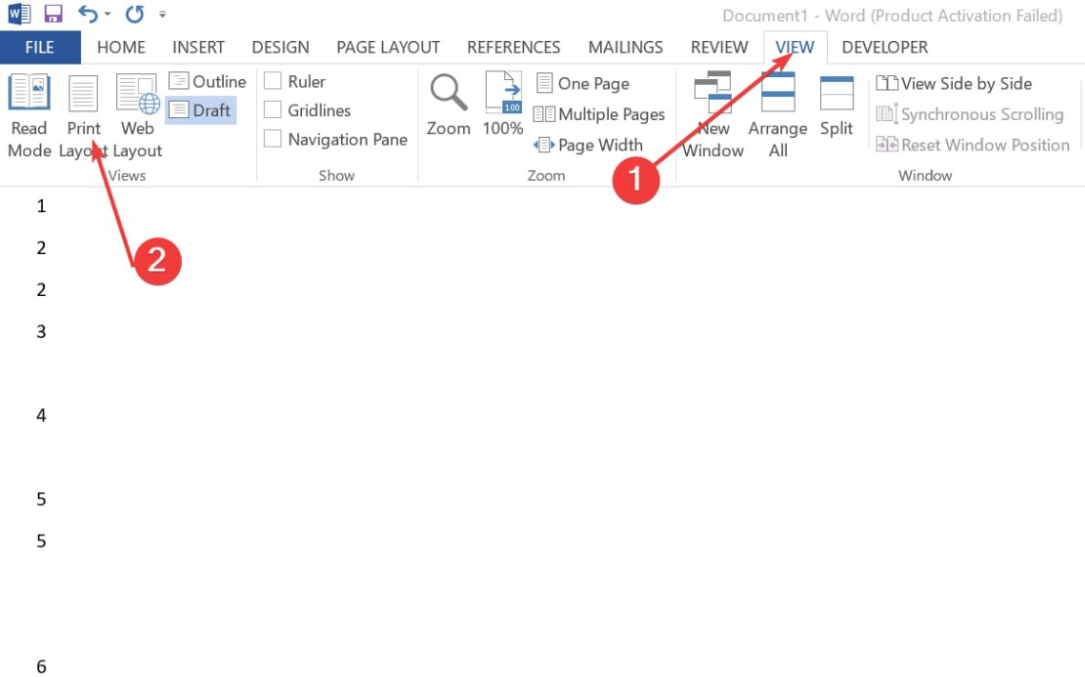
- Click the View tab in the Ribbon, then select Print Layout to return to the default view in Word.
The above steps will help you resolve difficulties in selecting and deleting a section or page break. Check our article about what to do if Microsoft Word has stopped working on your PC.
3. Delete a page using the Navigation pane
- Click the View tab in the Ribbon.
- Select or check Navigation Pane in the Show group.
- Click Pages on the task pane that appears on the left with the Headings, Pages, and Results tabs to display all the pages in the document.
- Click the thumbnail of the page you want to delete in the Navigation pane.
- Press Delete or Backspace to remove the page.
The above steps will remove extra or blank pages using the navigation pane.
In addition, you may be interested in our article about how to fix errors Word experiences when opening the file on your PC.
Also, you can check our detailed article about how to remove watermarks in Word in a few steps.
Still experiencing issues?
SPONSORED
If the above suggestions have not solved your problem, your computer may experience more severe Windows troubles. We suggest choosing an all-in-one solution like Fortect to fix problems efficiently. After installation, just click the View&Fix button and then press Start Repair.


