Microsoft Word Won’t Spell Check? 4 Ways to Turn it Back on
Select the correct language for editing and proofreading
- Ensure the correct language settings are configured on Microsoft Word.
- Always check if spell check is enabled to see if that's the reason behind the error.
- Add-Ins can conflict with Microsoft Word, preventing some of its features from functioning correctly.
The spell checker is a useful feature in Office 365 apps; it allows you to spot and correct wrongly spelled words without using external grammar or spelling software. Further, if this feature stops working, errors in your document won’t be highlighted.
This article briefly discusses the common causes of Microsoft spell-check errors and provides four ways to help you fix the error.
Why is Microsoft Word not checking the spelling?
Some of the causes of this issue are:
- Incorrect language settings – If you’re typing in English and the language settings are set to French, Spanish, etc., the spell check won’t work.
- Manually disabled spell check – Spell check is enabled by default, but the feature will stop working if you accidentally turn it off.
- Document exception – If you enabled document exception for the file you’re working on, spell check won’t function once that document is opened.
- Microsoft Word add-Ins – Sometimes, the add-ins you add to your Word app can conflict with its functionality leading to errors like spell check not working.
Regardless of the cause, try to follow the steps below to troubleshoot.
How do I fix Windows Spelling checker in Word?
Before proceeding with more advanced solutions, here are a couple of quick fixes you should try:
- Close and relaunch Microsoft Word.
- Restart your PC.
- Repair Office 365 to fix bugs affecting the spell check.
If the error remains unfixed, the following are advanced troubleshooting steps to help you fix the Word spell check error:
1. Make sure the correct language is selected
- Firstly, press the Windows key, type Microsoft Word, and hit Enter to launch the application.
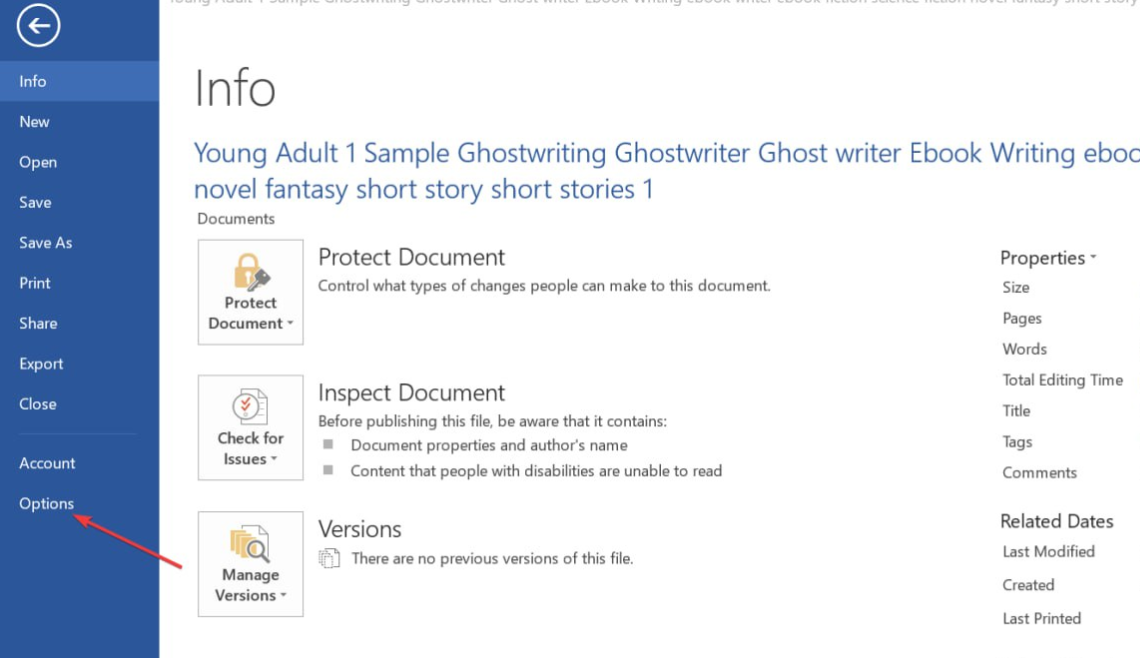
- In Word, click File, and then click on Options.
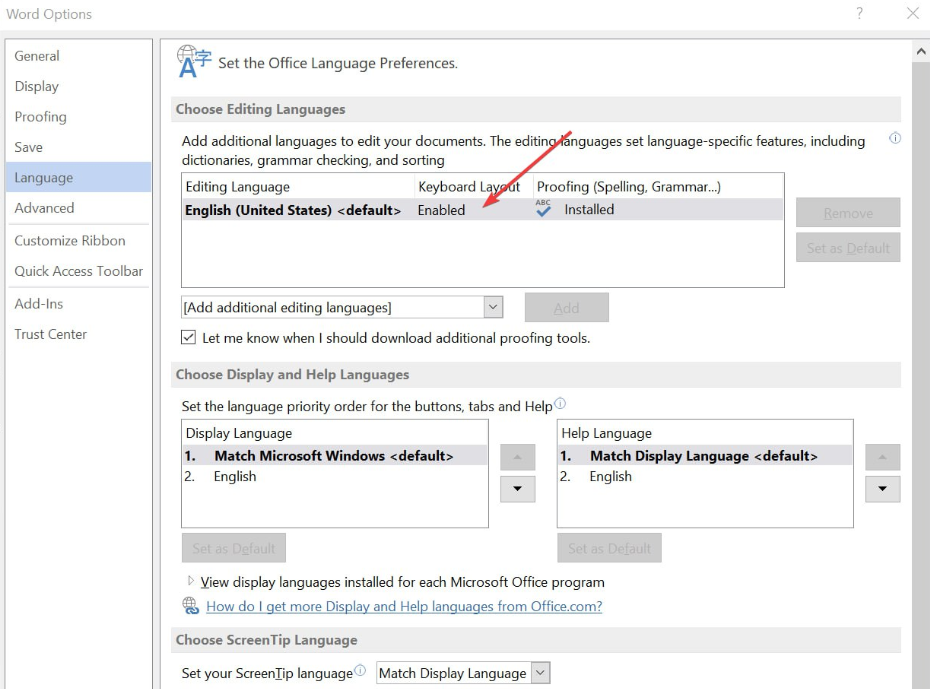
- In the Options window, click Language.
- Then, under the Choose editing language section, ensure that the language displayed is your preferred language.
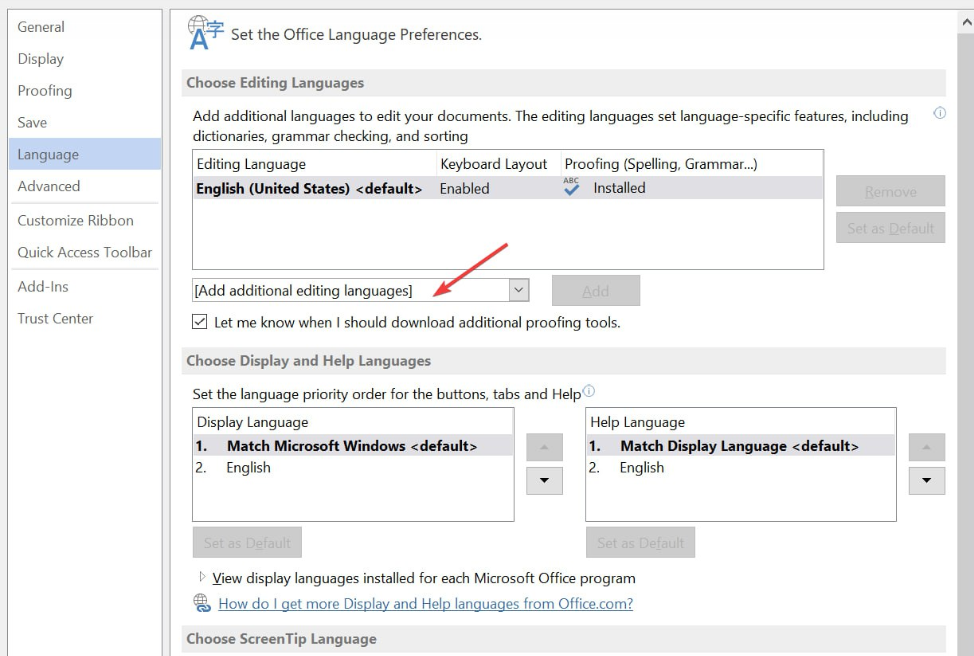
- If there are no installed languages, click Add additional editing language, and click on your preferred option from the list.
- Click OK to finalize your changes and restart Word to check if the spell check error is fixed.
If your Word document contains multiple languages, you have to select your preferred language to be used by the spell check; this will help you fix the spell check not working in Word.
Expert tip:
SPONSORED
Some PC issues are hard to tackle, especially when it comes to missing or corrupted system files and repositories of your Windows.
Be sure to use a dedicated tool, such as Fortect, which will scan and replace your broken files with their fresh versions from its repository.
Also, you can also check out how to change the language settings in Windows.
2. Enable the Spell check feature
- In Word, click File, and then click Options.
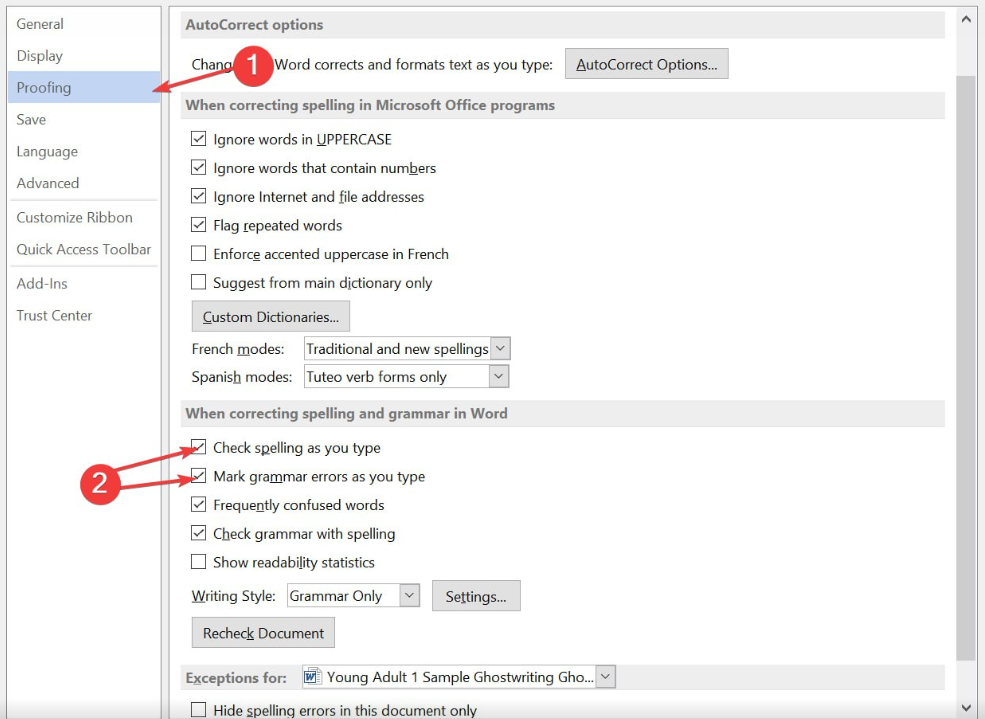
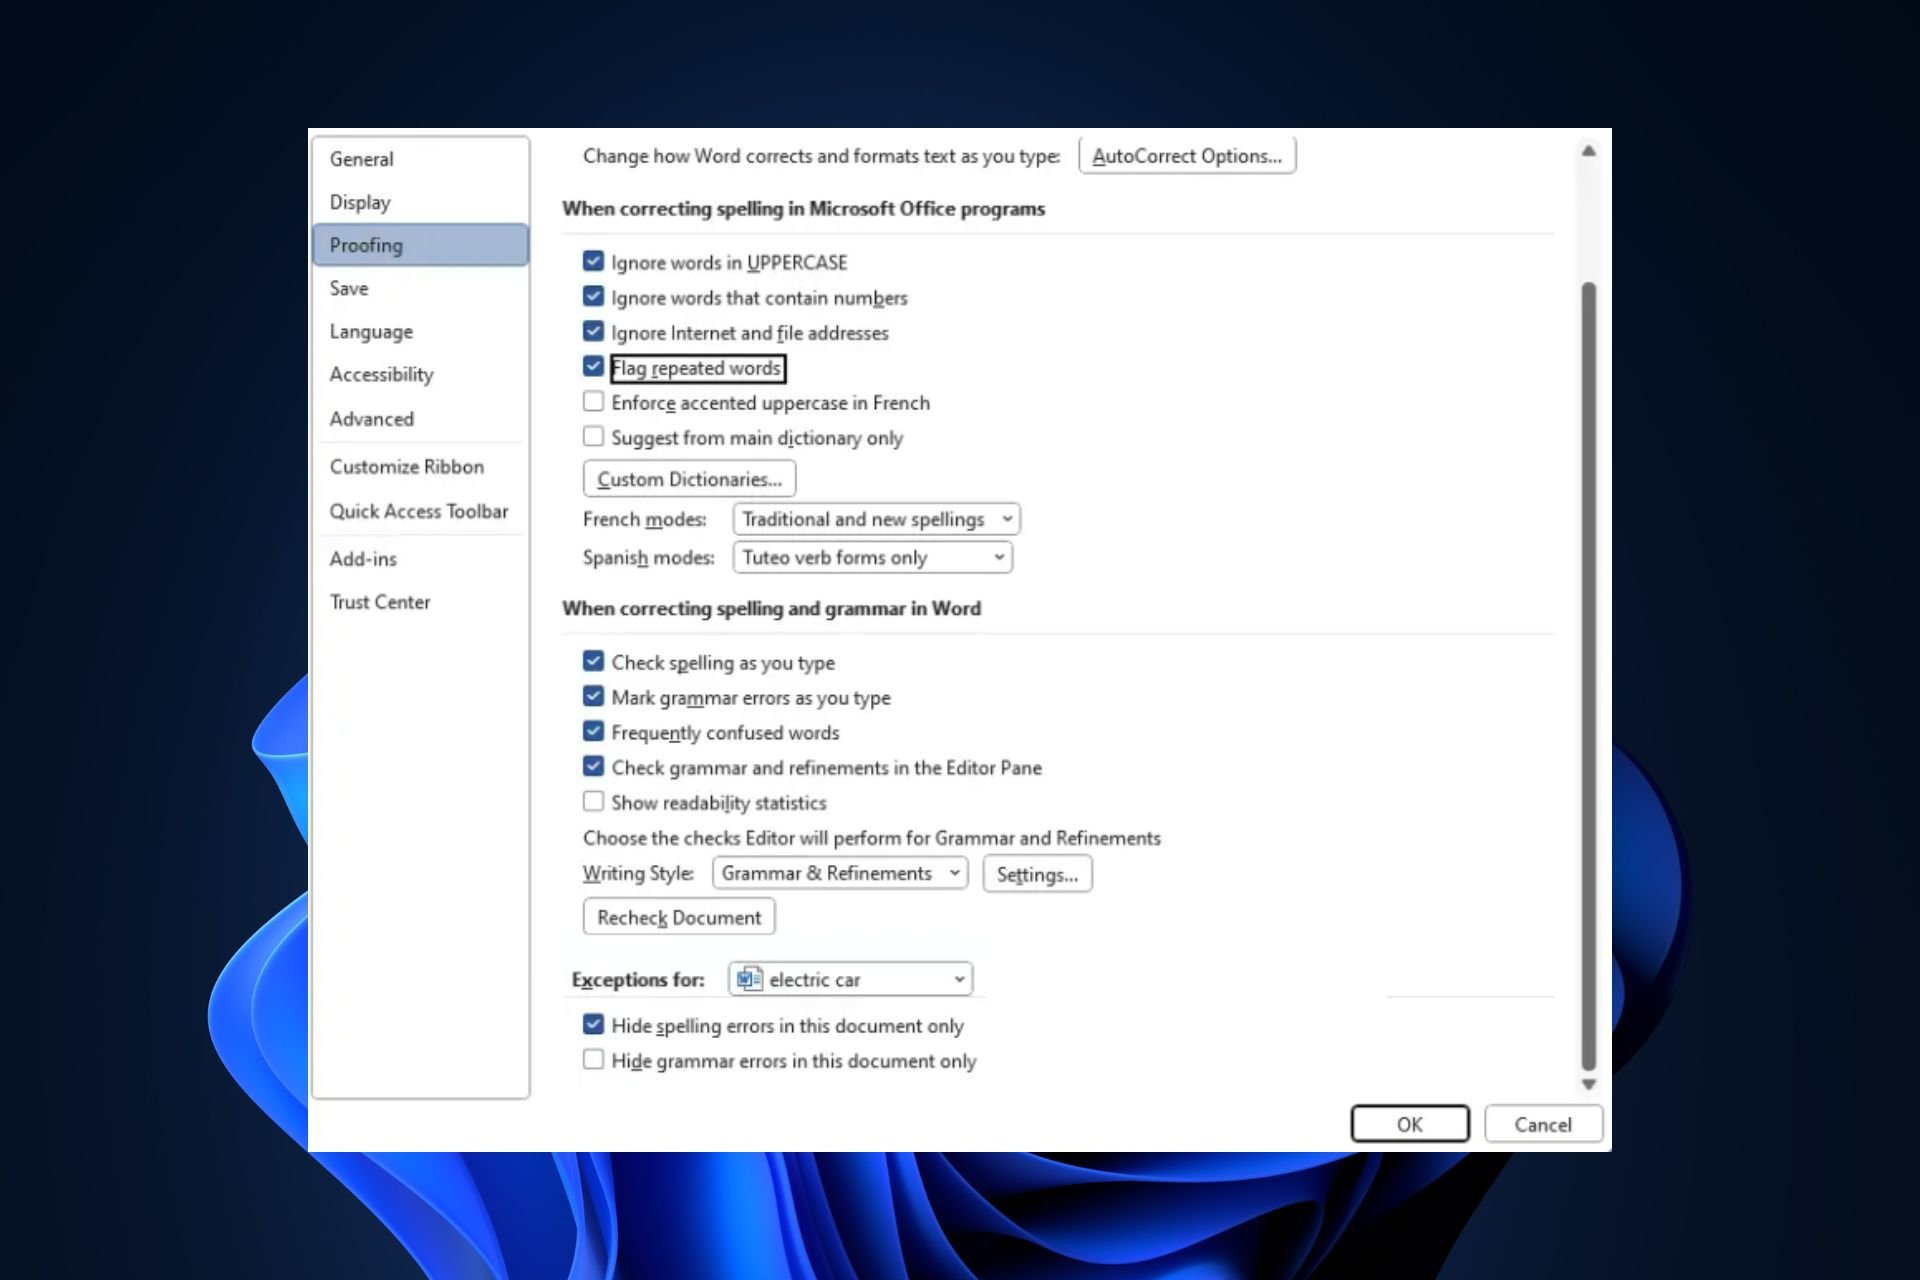
- Then, click on Proofing in the Options window.
- In the next window, locate the When correcting spelling and grammar section, and ensure Check spelling as you type and Mark grammar errors as you type are both checked.
- Click OK to save your changes, and restart Word to check if the error persists.
If you’re sure the correct language is set in Word, you’ll have to check if spell check is enabled. By default, the feature is automatically turned on, but sometimes, it can be disabled manually by you or other users.
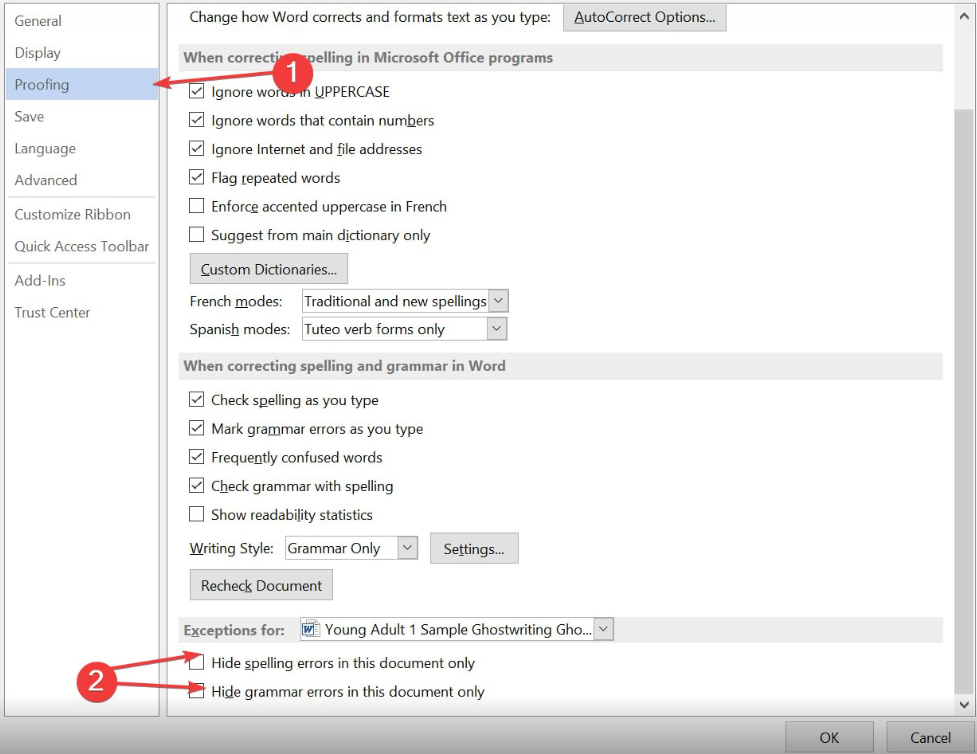
3. Disable the spelling exceptions
- Launch Word, click File, and then click on Options on the left pane.
- In the Options window, click Proofing and scroll to the bottom to locate the Exceptions for section.
- Then, ensure that the check boxes next to Hide spelling errors in this document only and Hide grammar errors in this document are not enabled.
- Click OK, and restart Word to check if the error is fixed.
Microsoft Word allows users to set proofing exceptions for selected documents; spell check won’t function on that page if your current document belongs to that exception list.
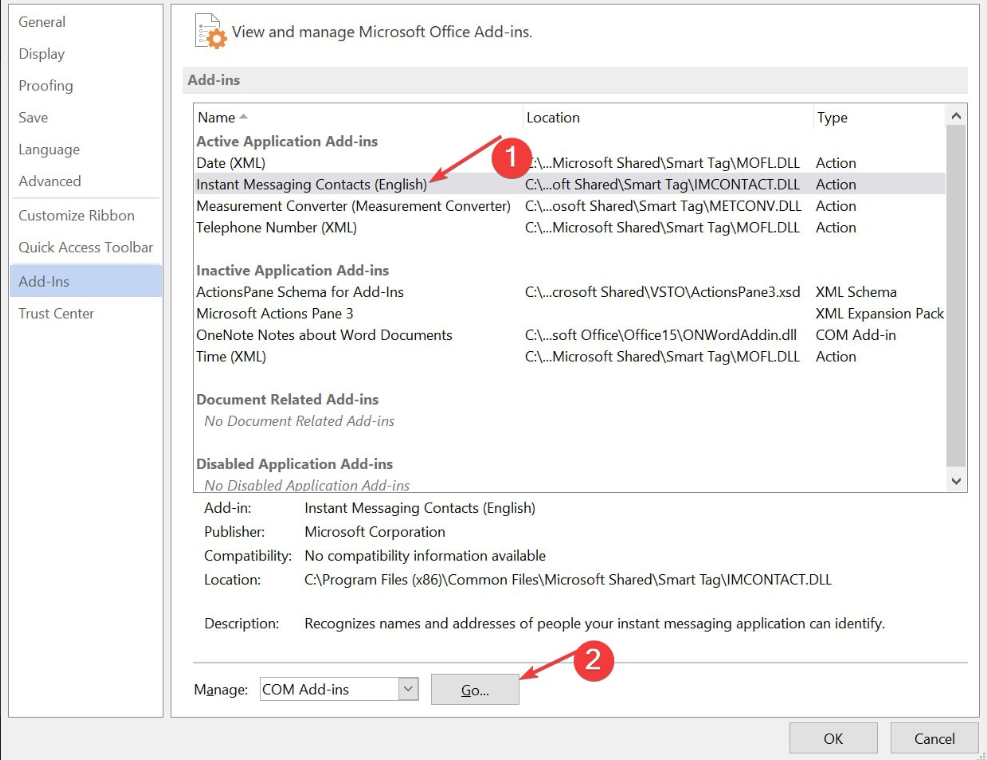
4. Disable the add-ins
- While in Microsoft Word, click File, and then click on Options.
- In the Options window, click Add-ins.
- Then, select any suspicious add-ins, click on it, and then click Go.
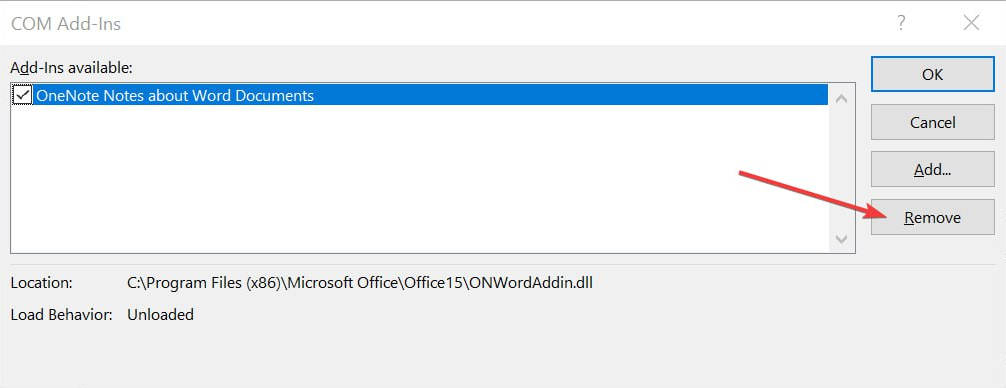
- Click the add-in, and click on Remove.
- Then, repeat this step till you turn off all the add-ins you wish to remove, and check if it’ll fix the spell check error.
If you have third-party tools like Grammarly installed in Word, it can prevent the Word spell check from functioning correctly.
Here is a guide showing you how to fix Office 365 unable to acquire add-ins.
Spell check is a cool feature of Microsoft Word that improves your productivity by reducing the time spent editing documents.
If the feature is not working, we hope the steps listed in this article should get it up and running quickly.
Should you have further suggestions, feel free to drop them in the comments section.
Still experiencing issues?
SPONSORED
If the above suggestions have not solved your problem, your computer may experience more severe Windows troubles. We suggest choosing an all-in-one solution like Fortect to fix problems efficiently. After installation, just click the View&Fix button and then press Start Repair.
