Fix: Windows 11 Taskbar is Not Disappearing in Full Screen
The reason could be a bug in File Explorer
- The Windows 11 Taskbar is not disappearing in full-screen error occurs if notifications are enabled, File Explorer is not working, or there are corrupted files.
- To fix the error, check the Personalization Settings, restart Windows Explorer, run SFC and DISM scan, or check for Windows Updates.
One of the notable features of the Windows 11 Taskbar is its ability to auto-hide, allowing users to maximize their screen real estate when working with full screen applications or media.
However, some Windows 11 users have reported an issue where the taskbar fails to auto-hide when they enter full screen mode, causing an unwanted distraction and reducing the immersive experience.
In this guide, we will explore the possible causes behind this behavior and provide you with effective solutions to resolve the issue.
Why is my Windows 11 Taskbar not going away in full screen?
The issue of the Taskbar not disappearing in full screen mode on Windows 11 can be caused by several factors. Here are some possible reasons for this behavior:
- Taskbar settings – If the auto-hide feature is disabled or if the taskbar is set to be always visible, it will remain on the screen even when you enter full screen mode.
- Software compatibility – Certain software applications or utilities running on your computer can conflict with the Taskbar auto-hide feature.
- File Explorer not working – If the File Explorer is not working properly, it could cause the Taskbar to behave unnaturally. Try restarting Windows Explorer.
- System glitches or bugs – Windows 11, like any operating system, may have its own glitches or bugs that affect the behavior of certain features, including this one. Ensure your Windows is updated.
Now that you know the causes, move to the troubleshooting methods to fix the problem.
How do I make the Taskbar go away in full screen?
Expert tip:
SPONSORED
Some PC issues are hard to tackle, especially when it comes to missing or corrupted system files and repositories of your Windows.
Be sure to use a dedicated tool, such as Fortect, which will scan and replace your broken files with their fresh versions from its repository.
Before engaging in advanced troubleshooting steps, you should consider performing the following checks:
- Restart your computer.
- Ensure your Windows is up to date.
- Try to use the F11 key to enter full screen and see if the taskbar is still present.
- Check if there are any notification alerts on the app icon on Taskbar.
Once you are through, check out the solutions mentioned to resolve the issue.
1. Restart Windows Explorer
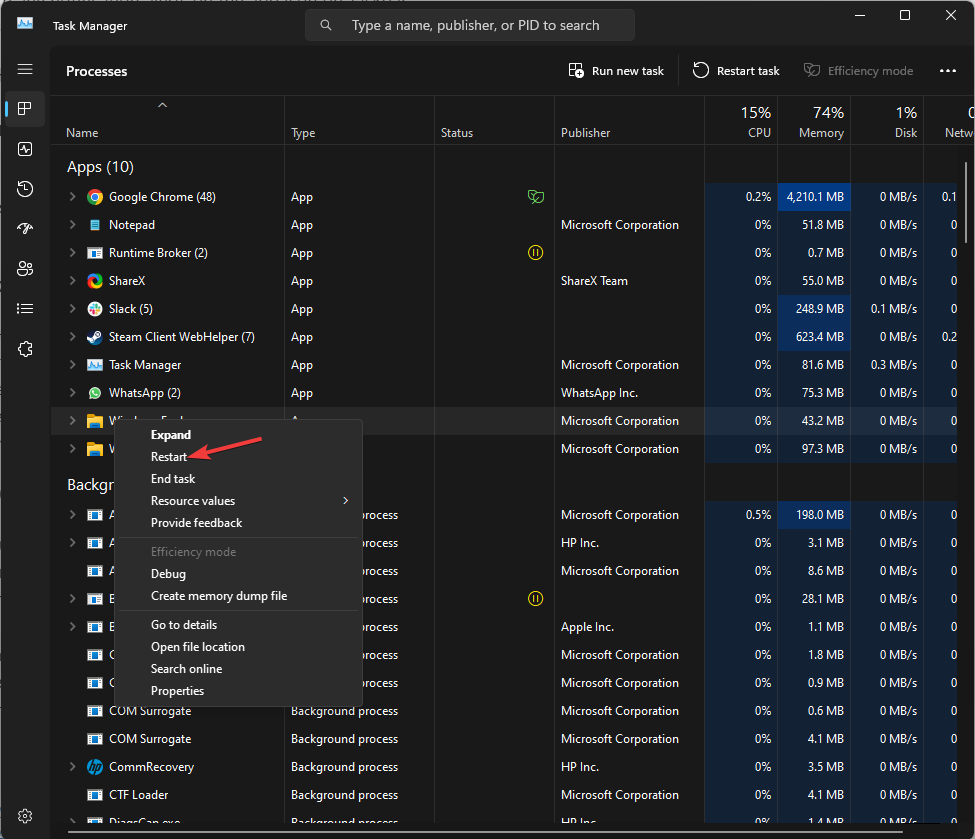
- Press Ctrl + Shift + Esc to open the Task Manager app.
- Go to the Processes tab, locate and right-click Windows Explorer, then select Restart.
- The Taskbar and other File Explorer windows will disappear, then appear.
2. Check the Taskbar settings
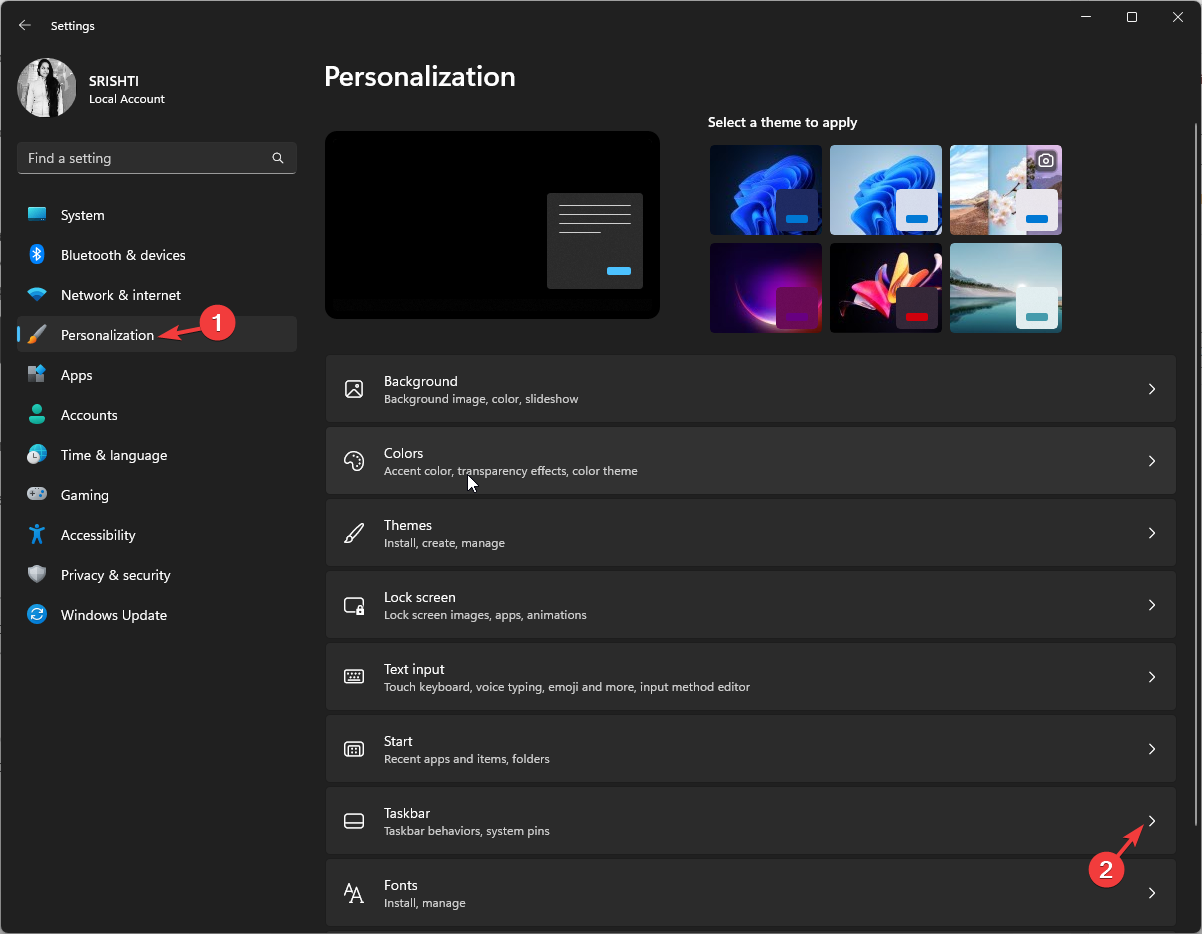
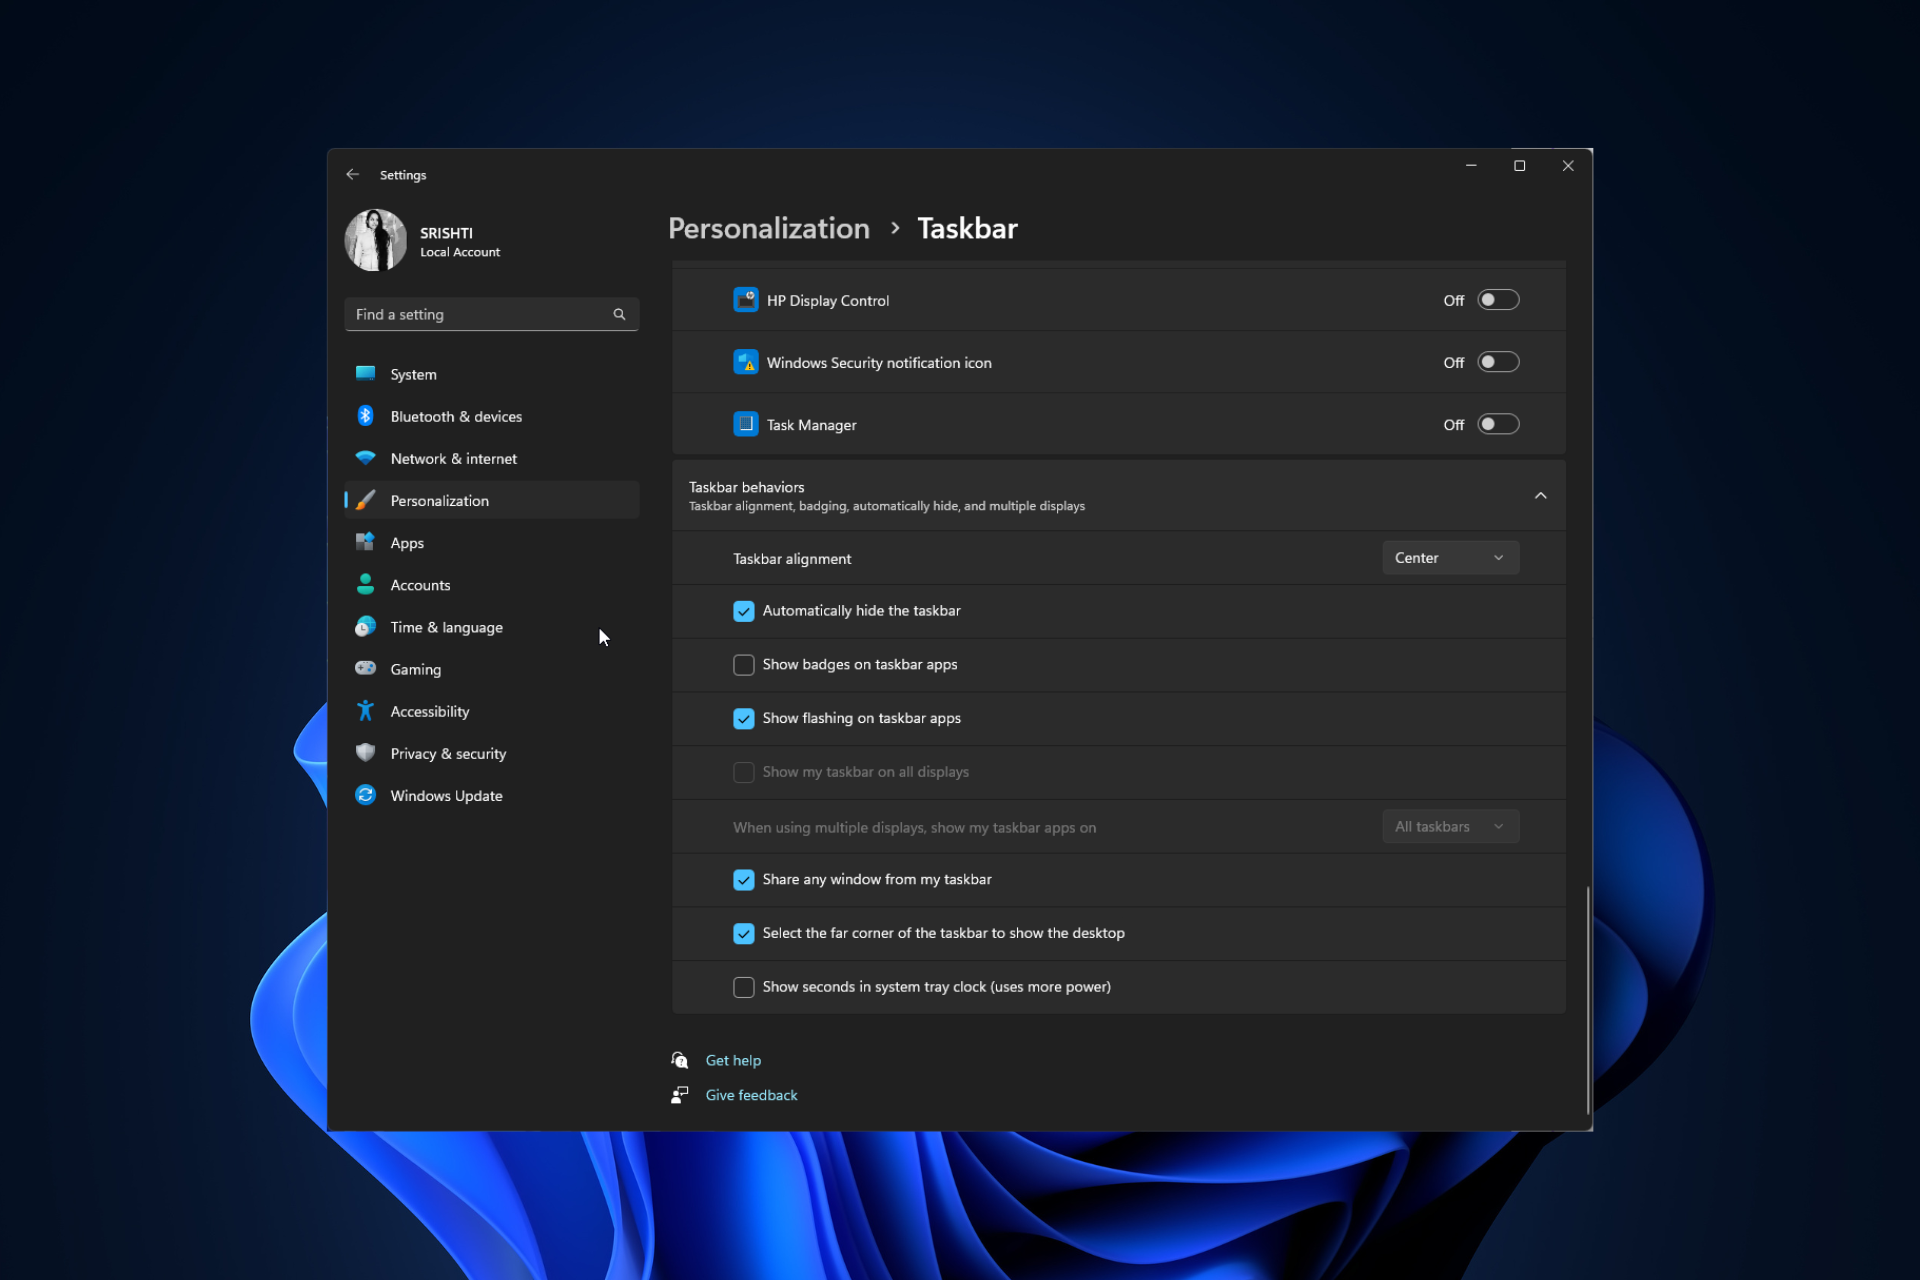
- Press Windows + I to open the Settings app.
- Go to the Personalization tab and select Taskbar.
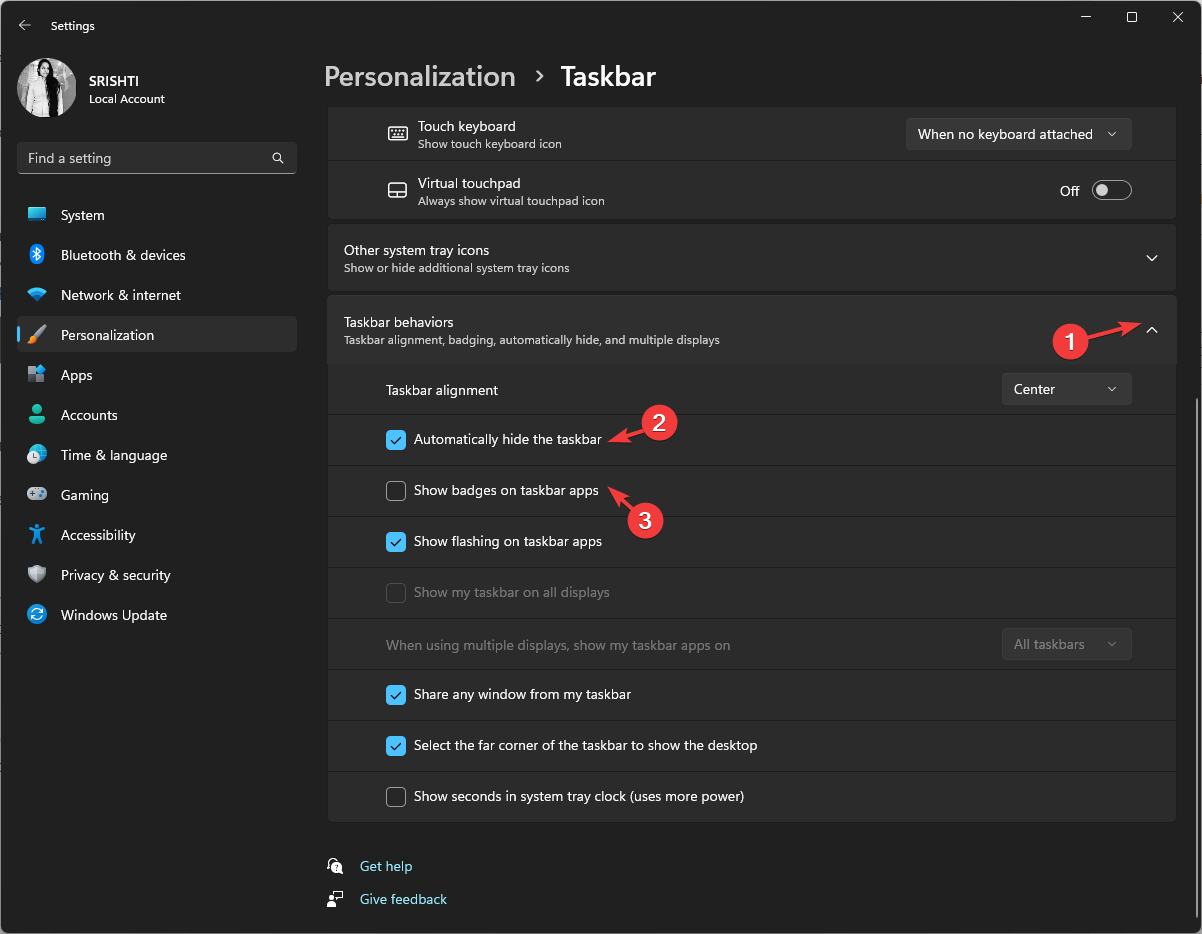
- Go to Taskbar behaviors, check if there is a checkmark next to Automatically hide the taskbar. If not, then place a checkmark.
- Also, uncheck Show badges on taskbar apps.
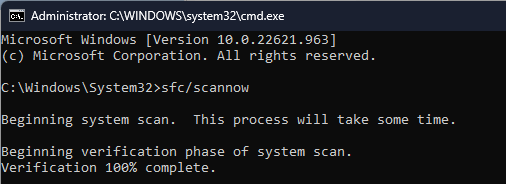
3. Run SFC and DISM scans
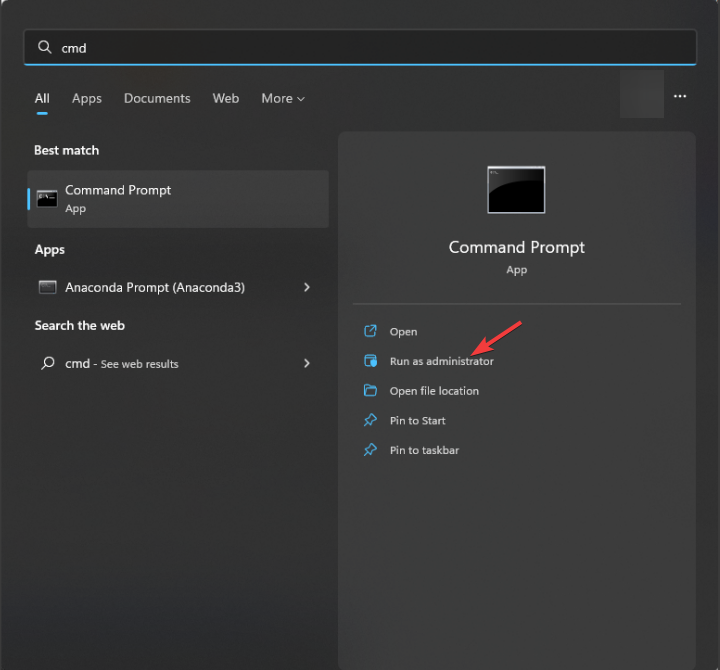
- Press the Windows key, type cmd, and click Run as administrator.
- Type the following command to detect and repair problems with system files with a cached copy located in a compressed folder called the Windows component store (WinSxS folder) and hit Enter:
sfc/scannow - Copy & paste the following command to repair the Windows image and restore system health and press Enter:
Dism /Online /Cleanup-Image /RestoreHealth - Wait for the command to complete and restart your computer to confirm the changes.
You can execute this process easier and faster to prevent multiple stability errors from occurring ever again by using reliable third-party repair software.
4. Remove a registry key related to Taskbar
- Press the Windows key, type cmd, and click Run as administrator.
- Copy & paste the following command to delete the registry and hit Enter:
reg delete HKCU\SOFTWARE\Microsoft\Windows\CurrentVersion\IrisService /f && shutdown -r -t 0 - Now reboot your computer to let the changes take effect.
5. Use Group Policy Editor
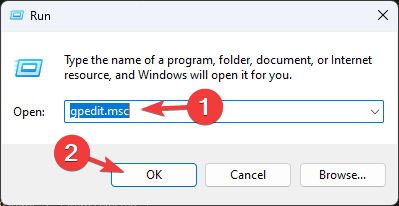
- Press Windows + R to open the Run box.
- Type gpedit.msc and click OK to open the Group Policy Editor.
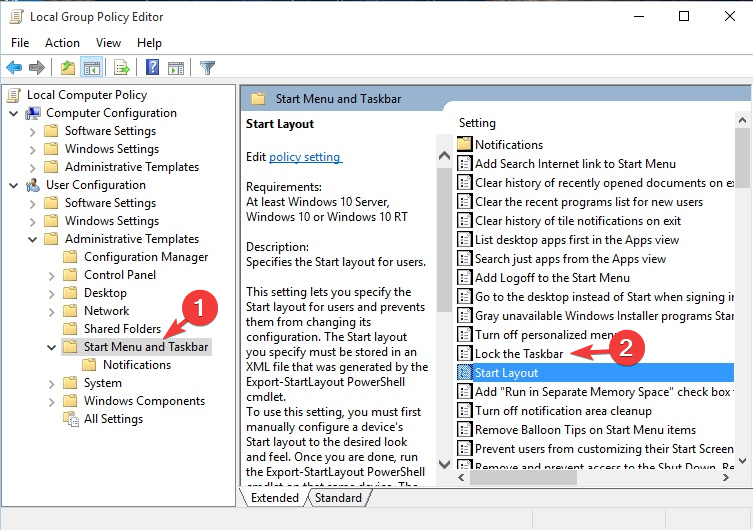
- Go to User Configuration, then select Administrative Templates.
- In the next window, choose Start Menu and Taskbar.
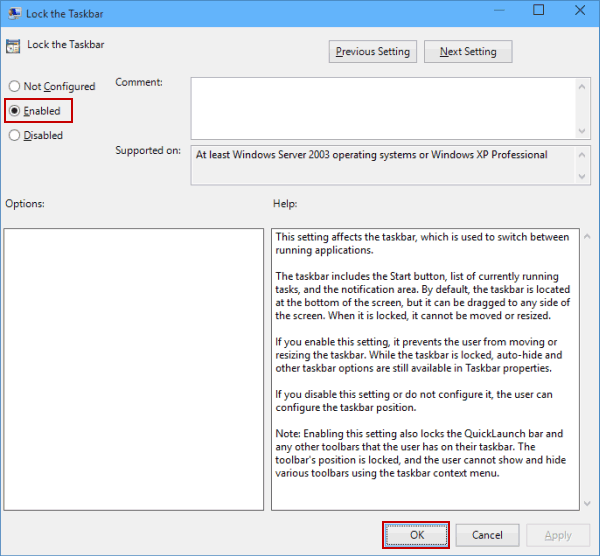
- Locate Lock the Taskbar, double-click it, and select Disabled.
- Click Apply, then OK to save the changes.
6. Re-register the Taskbar package
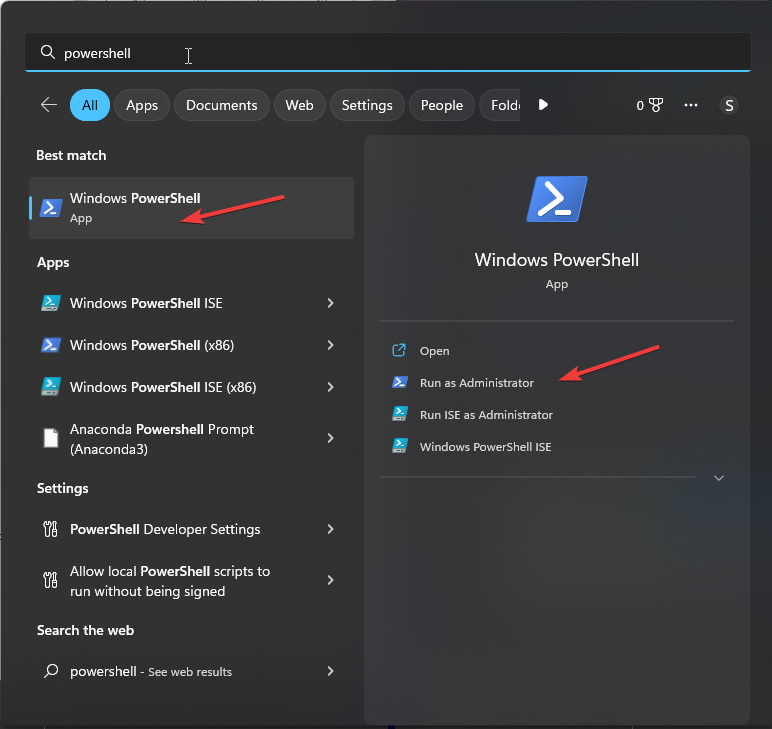
- Press the Windows key, type powershell, and click Run as administrator.
- Type the following command to re-registry taskbar package and hit Enter:
Get-AppXPackage -AllUsers | Foreach {Add-AppxPackage -DisableDevelopmentMode -Register"$($_.InstallLocation)AppXManifest.xml"} - Reboot your computer once done.
So, these are methods that you can use to fix Windows 11 Taskbar is not disappearing in full screen.
If you are facing issues like Taskbar not working on Windows 11, we recommend you check out the solutions mentioned in this guide,
Please feel free to give us any information, tips, and your experience with the subject in the comments section below.
Still experiencing issues?
SPONSORED
If the above suggestions have not solved your problem, your computer may experience more severe Windows troubles. We suggest choosing an all-in-one solution like Fortect to fix problems efficiently. After installation, just click the View&Fix button and then press Start Repair.
