Clear Guide on What is nvxdsync.exe & Fix Related Errors
Nvxdsync.exe is a component of the Nvidia GeForce Experience
- Nvxdsync.exe is a non-essential Windows system file associated with the Nvidia driver software.
- Reinstalling your Nvidia drivers usually fixes errors caused by nvxdsync.exe.
- This file is not a virus but a legitimate application process that appears in the Task Manager.
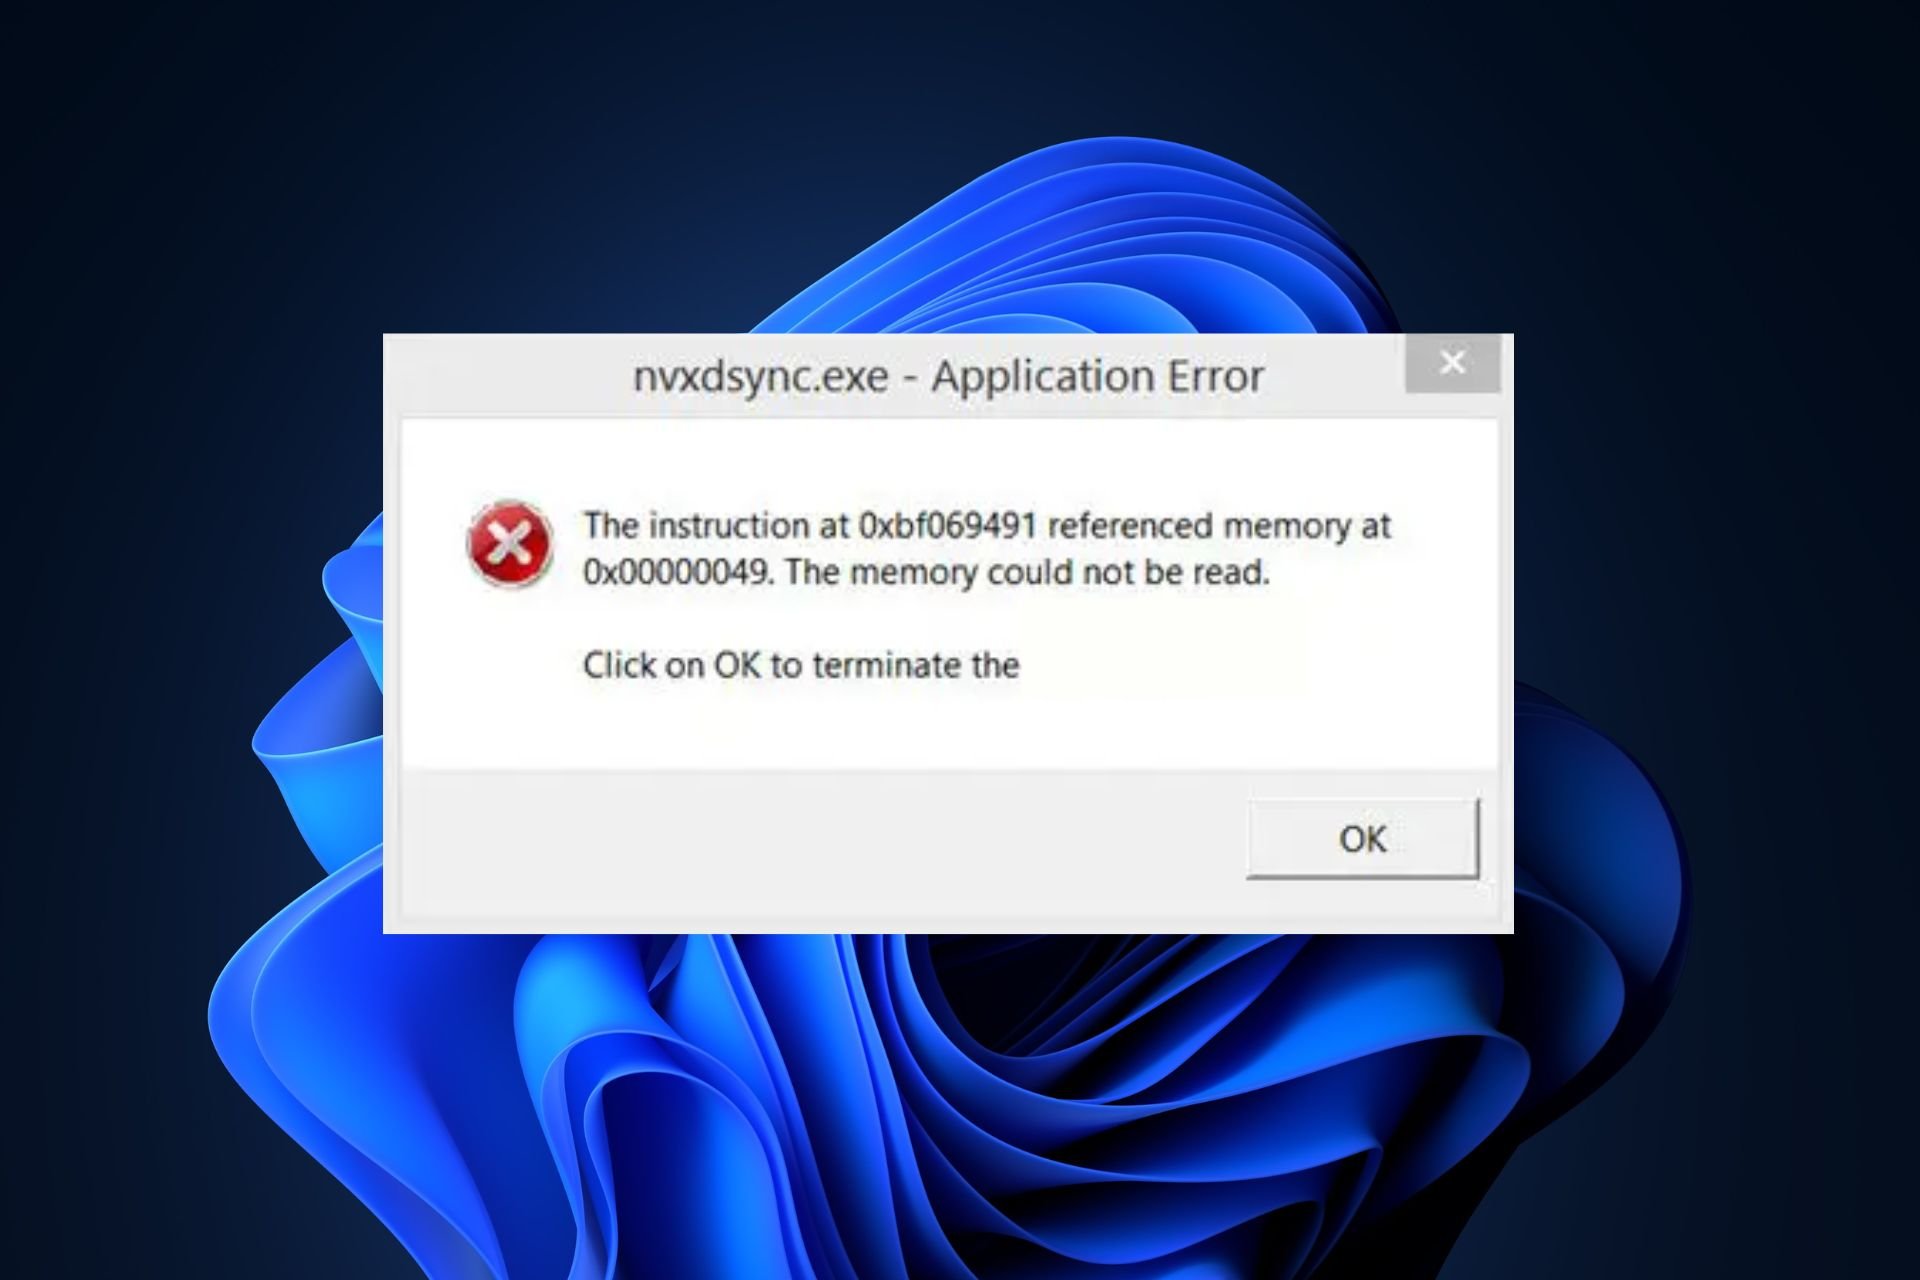
In your Task Manager, many processes and services co-exist to ensure apps function correctly. One such process is the nvxdsync.exe. It is an Nvidia driver component that manages and renders 3D graphics.
Considering the amount of exe files that can be exploited as viruses, you might have conflicting thoughts about leaving the file on your PC. Thus, this article will clarify what the nvxdsync.exe mean and help you fix any related errors.
What is nvxdsync.exe?
Nvxdsync.exe is a software component of the Nvidia GeForce Experience developed by Nvidia. The executable file is an important background process that manages a significant proportion of actions on the Nvidia driver.
- The file is not a Windows system file but remains a legitimate Nvidia process, and you may face difficulties playing 3D games or using 3D files.
- If the nvxdsync.exe is missing or corrupt, it can prevent the graphics card from functioning properly.
- The file location is in this path:
C:\ProgramFiles\NvidiaCorportation\Display - Further, the file size ranges from 1.20 MB to 1.29 MB.
However, the program can also use massive amounts of memory, leading to a system crash if not terminated.
Is nvxdsync.exe a virus?
Barring any irregularities, the nvxdsync.exe is not a virus or a harmful file but rather a legitimate process responsible for managing the Nvidia driver software. To check its security risk rating, follow these steps:
- File name – Anything that differs from nvxdsync.exe, as a spelling, should be considered malicious. Malware disguised as this file may appear in these variations: NVxdSync.exe, nVxDSync.exe.
- High resource usage – Another way to check for legitimacy is when the process actively consumes excess CPU and memory.
- Also, multiple files running in the Task Manager can indicate that one of the processes is a virus.
- Digital signature – Ensure the file has NVIDIA Corporation as the digital signatory to ensure it is safe.
If all these have been confirmed, you can proceed to check various ways to troubleshoot application errors affecting its proper functioning.
How do I fix common nvxdsync.exe errors?
Before proceeding with advanced solutions, here are a couple of quick fixes that might help you resolve the error:
- Click OK to terminate the error and restart your PC.
- Update your Windows OS.
- Perform a system restore.
- Try to run a malware scan with the Windows Defender. Check here to fix it if it’s not scanning.
If the error remains unfixed, attempt the following troubleshooting solutions:
1. Update the Nvidia drivers
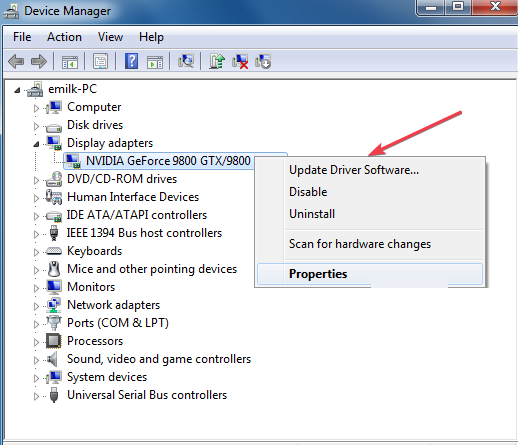
- Press the Windows key, type device manager, and hit Enter.
- Expand Display Adapter, right-click on the Nvidia driver, and select Update driver software.
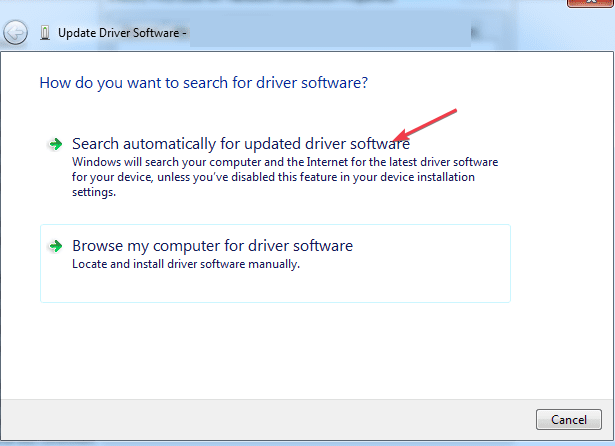
- Click search automatically for updated driver.
- Wait for Windows to search for available drivers, and restart your PC once the drivers are installed.
A simple driver update may effectively troubleshoot this issue since issues with outdated drivers may affect the Nvidia control panel.
- Download and install Outbyte Driver Updater.
- Launch the software.
- Wait for the app to detect all faulty drivers.
- Now, it will show you all the malfunctioning drivers listed to select the ones to Update or Ignore.
- Click on Update & Apply Selected to download and install the newest versions.
- Restart your PC to ensure the applied changes.

Outbyte Driver Updater
Secure your Windows PC with Outbyte from various errors caused by problematic drivers.2. Reinstall the Nvidia drivers
- Press the Windows key, type device manager in the search bar, and hit Enter.
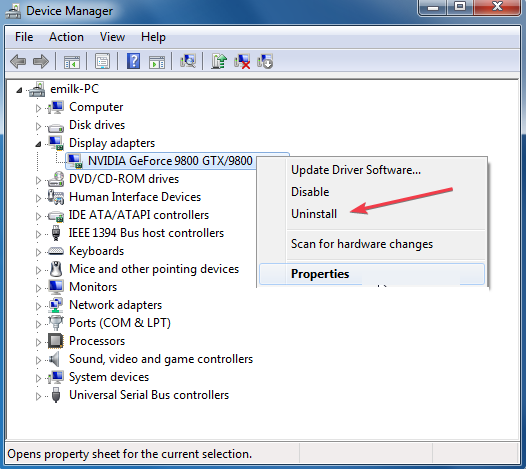
- Expand the Display Adapter, right-click on the Nvidia driver from the drop-down menu, and click on Uninstall.
- Click Uninstall to confirm your actions in the confirmation prompt.
- Once the drivers are removed, navigate to Nvidia’s driver downloads page, and re-download your driver.
- Run the installer once the driver is downloaded, and follow the instructions to finalize the process.
Check out our guide on how to manually install drivers.
How do I fix high CPU usage by nvxdsync.exe?
As earlier stated, virus or malware camouflaging as ncxdsync.exe often leads to high CPU usage. This occurs when the process is active when not in use. So, fix it by following these steps:
- Open the Task Manager and go to Processes.
- Right-click on all running instances of this process and click End task.
- Then, restart your PC.
Should the Task Manager fail to open, follow the steps in our article to troubleshoot it.
How do I disable nvxdsync.exe?
- Left-click the Start menu, type services, and click Run as administrator.
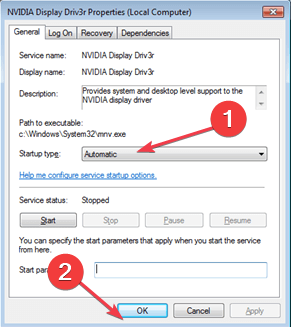
- Locate the Nvidia Display Driver service and double-click on it.
- Select Startup-type, click on Disabled, and click OK.
Nvxdsync.exe is a legitimate Windows process that belongs to the Nvidia driver software. It facilitates the synchronization and rendering of 3D graphics on an Nvidia-backed PC. The process is safe and not a virus, but if you notice multiple running instances, it could be a sign of malware infection.
The solution above will help you disable the Nvidia Display Driver Service startup, ending its process.
If you’ve encountered nvxdsync.exe in the past, this guide should provide a well-rounded overview of the file and help you decide what to do with it.
In case you decide to upgrade to the latest OS, here’s a guide on how to update the Nvidia drivers on Windows 11.
You can also suggest your take on the nvxdsync.exe process in the comments section below.
Still experiencing issues?
SPONSORED
If the above suggestions have not solved your problem, your computer may experience more severe Windows troubles. We suggest choosing an all-in-one solution like Fortect to fix problems efficiently. After installation, just click the View&Fix button and then press Start Repair.
