Dell Command Update Won’t Open: 3 Tested Solutions to Fix It
Fix the my Dell app not updating error and start getting automatic updates again
- The Dell Update application automatically updates critical updates on Dell laptops.
- If the Dell Update application is not working, you can repair it from your settings or reinstall it from Control Panel.
- You can as well use dedicated driver software that will update your old drivers automatically.
Dell is one of the best laptop brands, thanks to many of its built-in features. One of its powerful features is Dell Update.
This application automatically updates critical fixes and important device drivers as they become available. However, several users have reported the dell Update to be broken.
Irrespective of the cause of the issue, this guide will show you how to fix it for good.
Why my Dell update is not opening?
The Dell Update for Windows 10 not working issue can occur if the application files are corrupted. In some instances, you may experience the problem if multiple instances of the app are running on your system.
This can also happen due to glitches with the app itself, or some driver incompatibilities that hinder the update from opening and applying itself.
Moreover, here are some error variations you might encounter:
- Dell command update won’t open Windows 10, 11, 7
- Dell command update won’t open after update
- Dell command update opens and closes
- Can’t open Dell command update
- Dell command update not showing up, not starting, not working, not opening, won’t launch
- Dell command update disappeared
Does Dell Command update work on Windows 11?
The straightforward answer is YES! Users of the new OS will need the Universal Windows Platform version for Windows 11, however, the Dell update application exists for Windows 10.
This standalone application for client computers called Dell Command Update offers updates for Dell-released system software.
The firmware, BIOS, driver, and application update process for Dell client devices is made simpler by this application. The CVE (Common Vulnerabilities and Exposures) are addressed in this release.
There are two downloads available for the Update: The Windows Universal Application and the Windows 32 and 64 bits version for Microsoft Windows 8.1 and 10. You can download the Dell Update from the official website.
How do I open Dell update if it won’t launch?
1. Repair the Dell Update app
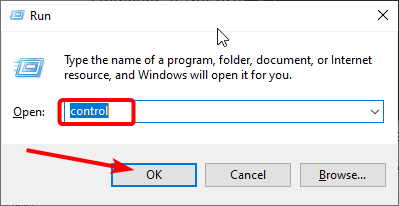
- Press the Windows key + R to open Run.
- Type control and click OK. This will open the Control Panel.
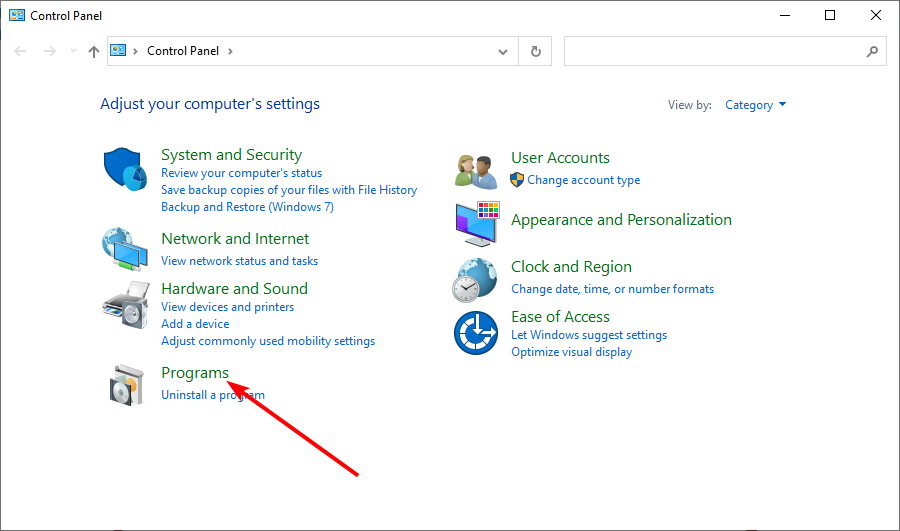
- Select the Programs option.
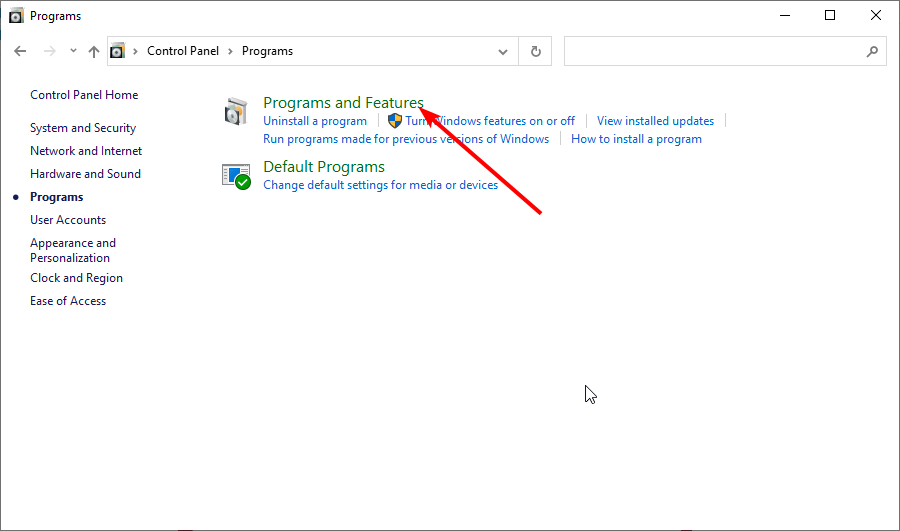
- Now, choose Programs and Features.
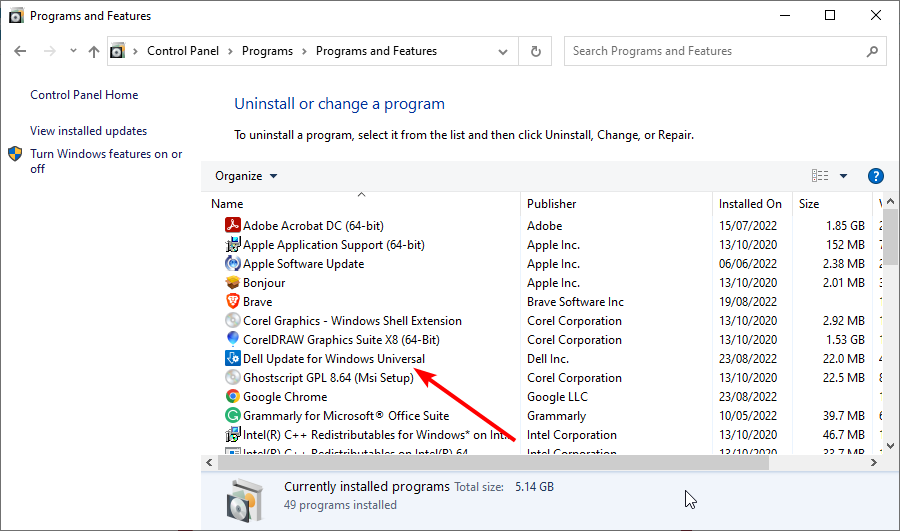
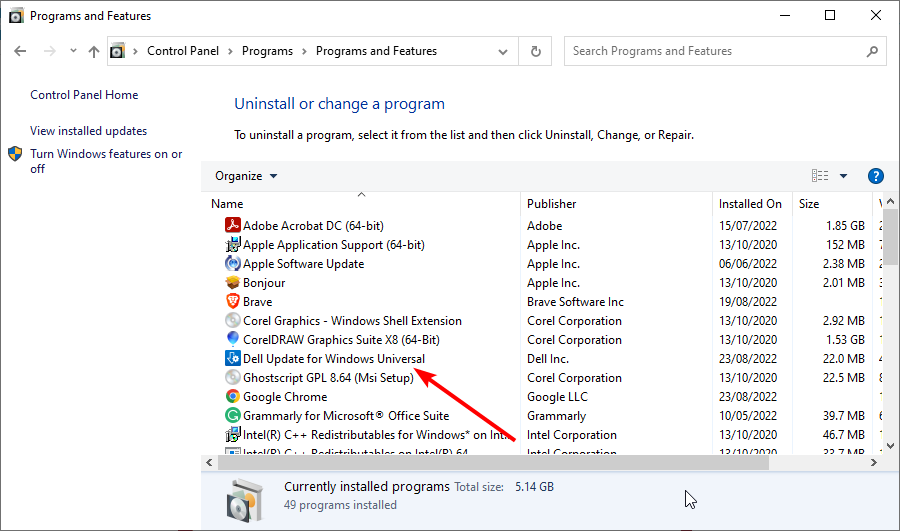
- Locate and select the Dell Update or Dell Update for Windows Universal app from the list of installed apps.
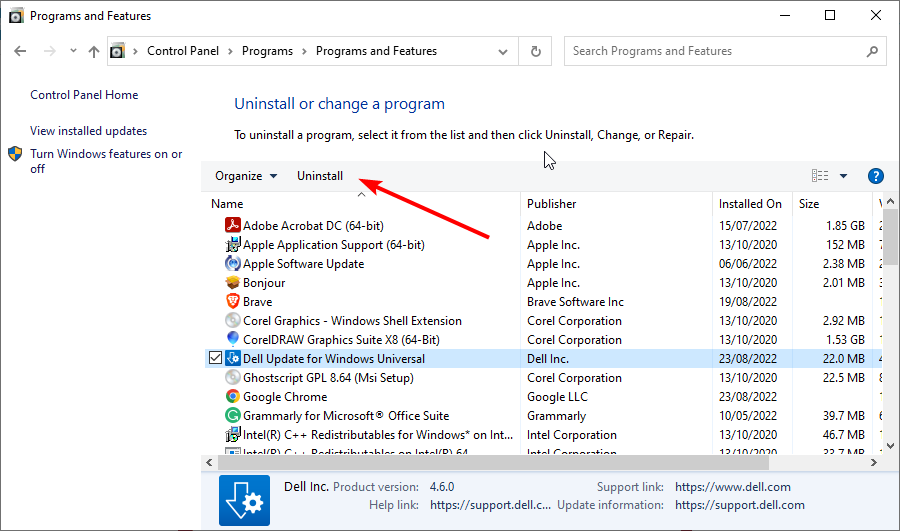
- Click on Uninstall and then click Yes when prompted by UAC.
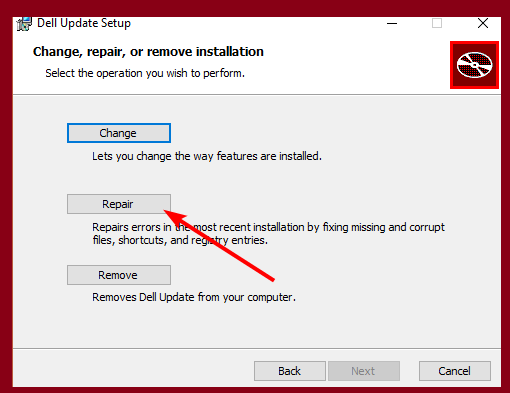
- In the Setup screen, click the Repair button.
- The repair tool will scan the system for missing and corrupted files and apply the required fixes.
- Once finished, close the troubleshooter and restart your system.
After the restart, launch the Dell Update application if it does not start automatically. Check if the app is working again.
The built-in repair function can fix any issues with the app, including the Dell Update not working problem, as it can be due to corrupted or missing files.
2. Reinstall the Dell Update app
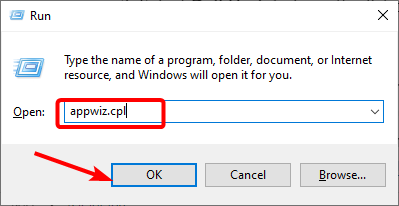
- Press the Windows key + R.
- Type appwiz.cpl and click OK to open Control Panel.
- Select Dell Update or Dell Update for Windows Universal from the list of installed apps.
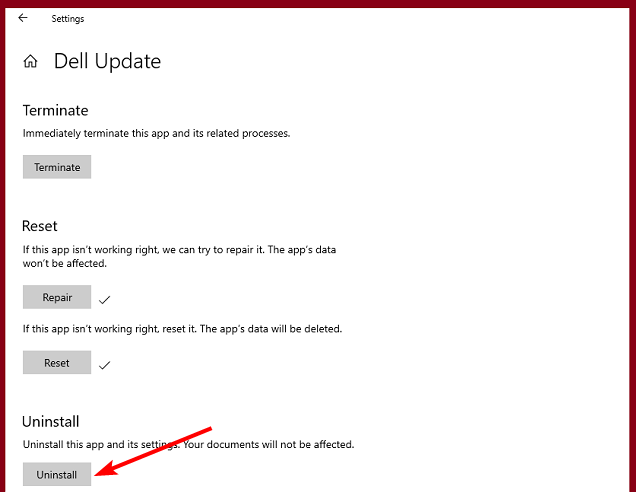
- Click on Uninstall.
- Click Yes when prompted by User Account Control.
- In the Setup screen, click on Uninstall/Remove.
- Follow on-screen instructions to uninstall the app completely.
- Once uninstalled, restart the computer.
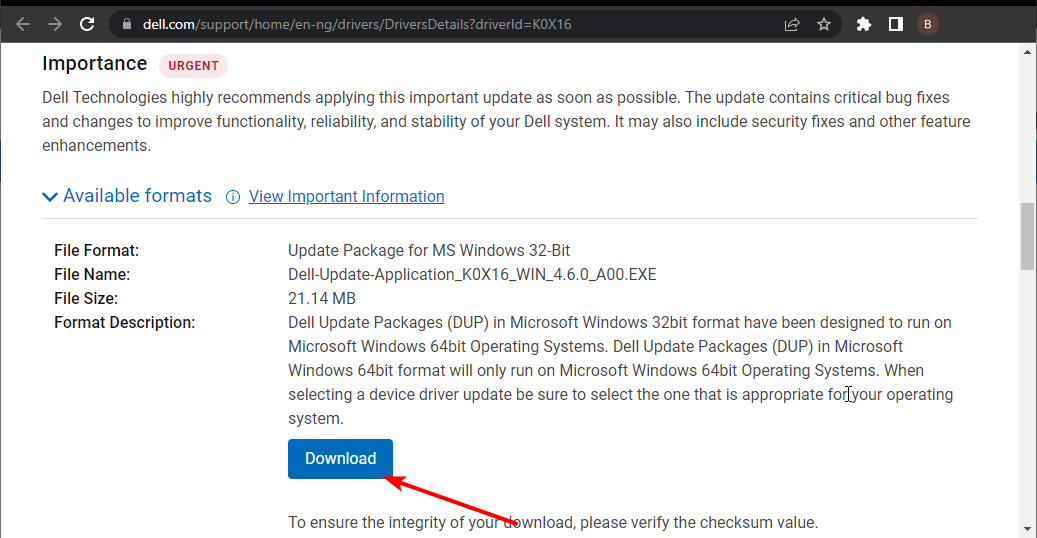
- After the restart, go to the Dell Update page and download the file.
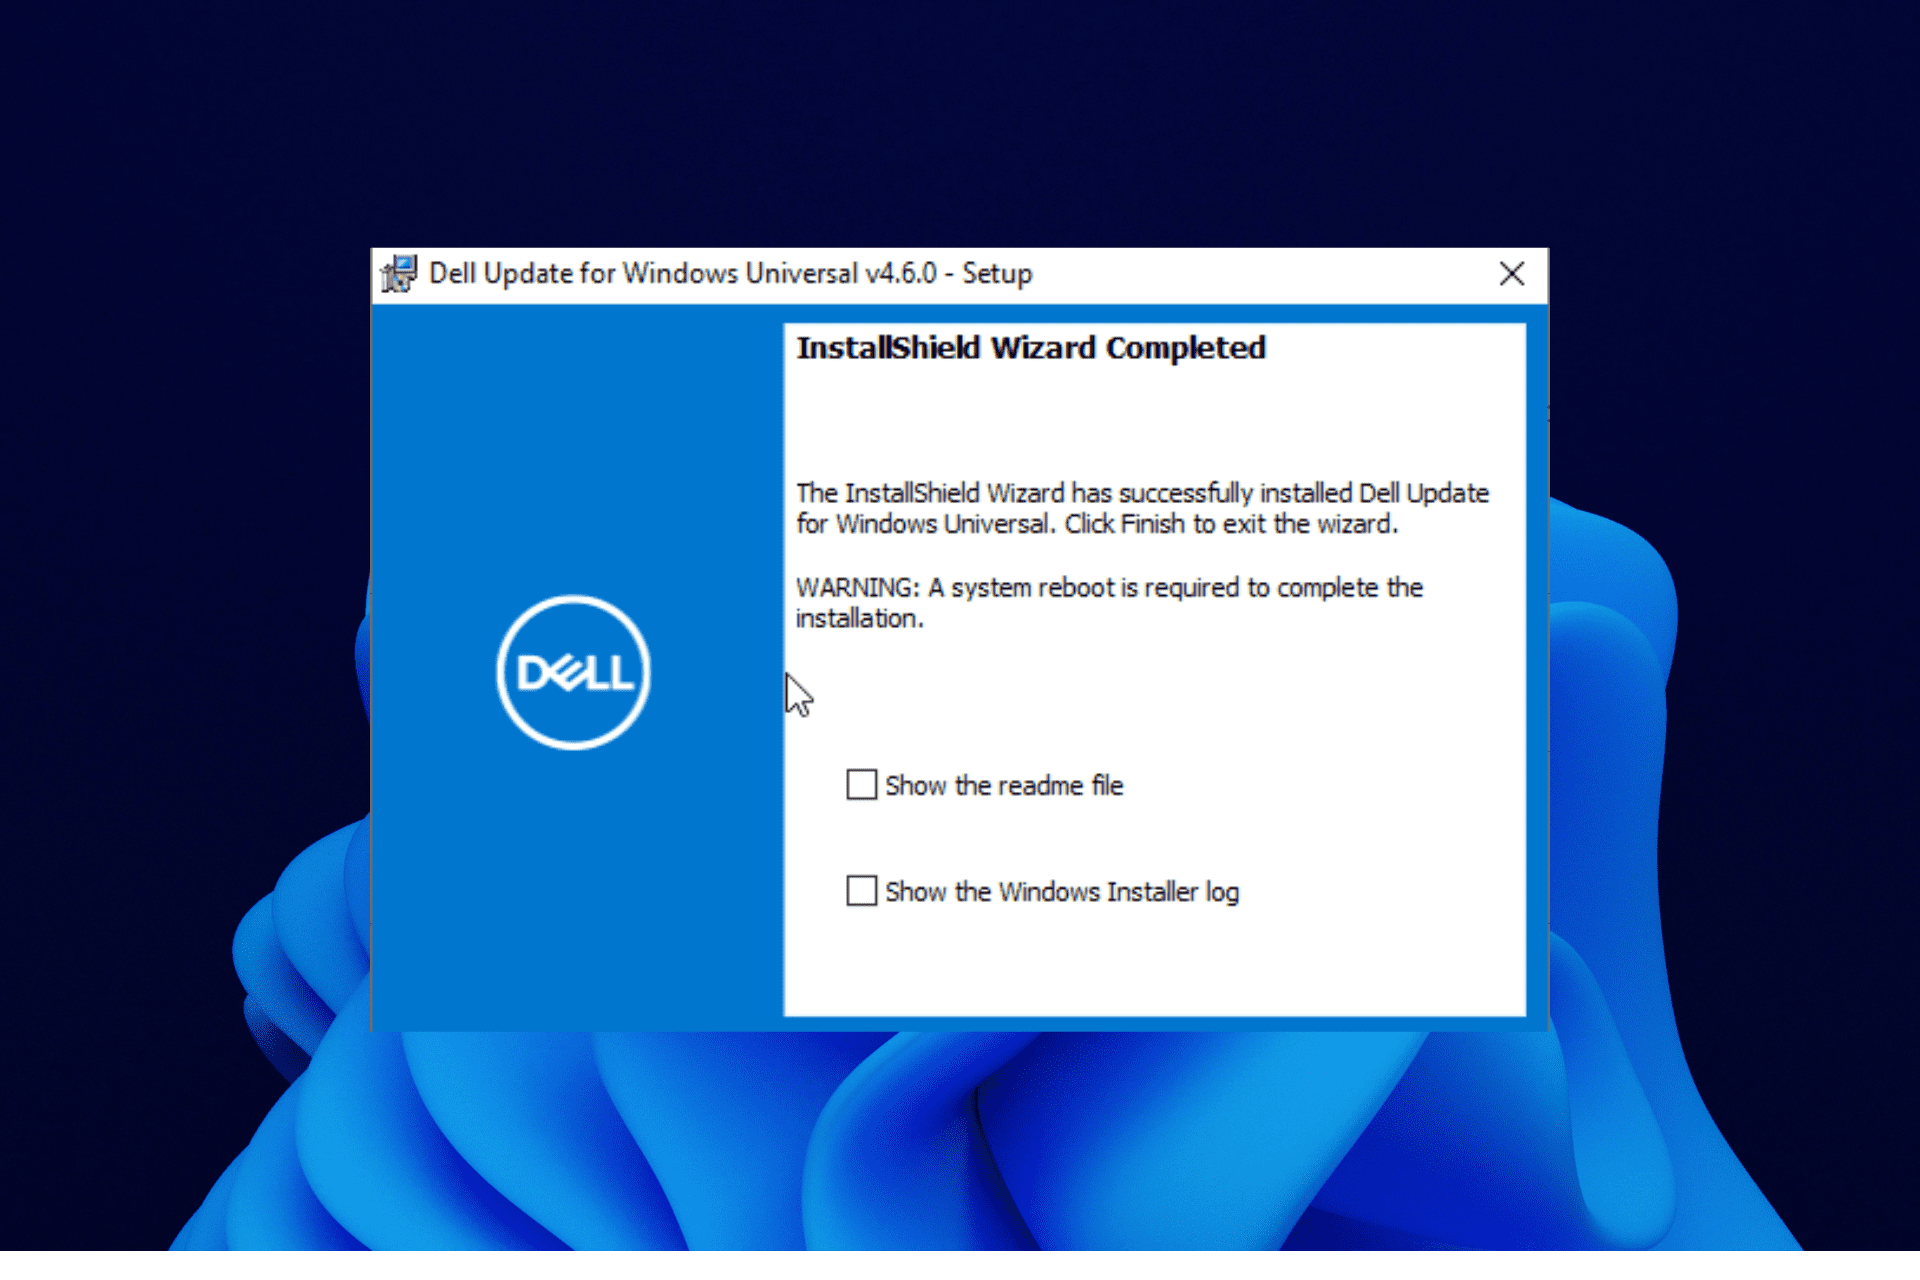
- Run the installer and wait for it to complete.
- Relaunch the app and check if the issue is resolved.
Reinstalling the app seems to have fixed the Dell Update not working or won’t open for many users. However, if the problem persists, uninstall the app using one of the best uninstaller software.
Expert tip:
SPONSORED
Some PC issues are hard to tackle, especially when it comes to missing or corrupted system files and repositories of your Windows.
Be sure to use a dedicated tool, such as Fortect, which will scan and replace your broken files with their fresh versions from its repository.
Does the problem persist? Try running the app as an administrator. Run the app with administrative privilege. To do this, right-click on the app’s desktop shortcut and select Run as Administrator.
Still not working? If the problem occurs after updating the app, uninstall the latest version, and install the previous version from Dell’s support center.
3. Use a driver update software
A great way to fix this issue with your Dell Update app is to install or update your drivers automatically.
With Outbyte Driver Updater, you can first scan your PC for outdated or missing drivers and have a detailed report in a very short time.
The software provides an extensive database with millions of official driver files that can be downloaded within the platform.
Additionally, there is a download manager and a driver backup feature that will deliver practical support to secure your driver files and see the progress of each driver file.
Another great workaround to fix this problem on your Dell app is with automated software that will update any drivers in minutes.
Hence, using Outbyte Driver Updater can efficiently repair your broken update program by updating old drivers or missing ones that may generate this kind of issue on your Dell PC.

Outbyte Driver Updater
Use this driver manager tool to resolve any app malfunctions and boost your PC performance.Does Dell automatically update drivers?
The Dell Update app is designed to receive drivers and application updates automatically. What it does with this update depends on your preference.
If you have a business client platform, you can use the Dell Command Update, which can help install updates automatically depending on your settings.
The Dell Update for Windows 10 not working issue can occur due to a glitch in the app. You can fix the problem by repairing the installation.
If the issue persists, install the Dell Update application using an uninstaller. These, with the other fixes in this guide, should help you solve the problem.
Feel free to let us know if you were able to make Dell Update work again on your PC.
Still experiencing issues?
SPONSORED
If the above suggestions have not solved your problem, your computer may experience more severe Windows troubles. We suggest choosing an all-in-one solution like Fortect to fix problems efficiently. After installation, just click the View&Fix button and then press Start Repair.
