How to Prevent Word From Reducing Image Quality in Documents
Try these easy steps to reduction in image quality on Word
- Disabling image compression in Microsoft Word ensures maximum picture quality but increases the document size.
- You can disable image quality reduction for a particular or all new documents.
- Upload high-quality images to Word to ensure the pictures don’t appear blurry on the document.

Like most Windows Word Processors, Microsoft Word has a feature that allows it to compress images after saving your document. The feature helps save space but often reduces the quality of your pictures.
If you’d like to preserve the quality of your images in Microsoft Word, this article will show you how to prevent Word from reducing image quality in Documents.
Why does Word reduce image quality?
The standard resolution for images is about 300 ppi unless they are screenshots; images in Documents must be at least 300 ppi to prevent the images from appearing blurry. However, after saving documents in Word, images are compressed to 220 ppi.
The image compression feature isn’t peculiar to Microsoft Word alone; the feature is present in virtually all Office products, e.g. Excel and Powerpoint. The feature was designed to help users minimize the size of documents containing images.
Ultimately, the image compression feature was developed to help users save more space on their system. However, if your document requires pictures of the highest quality, it’ll be best to turn the feature off.
How to prevent Word from reducing image quality in documents?
- Press the Windows key + S, type in Microsoft Word, and hit Enter.
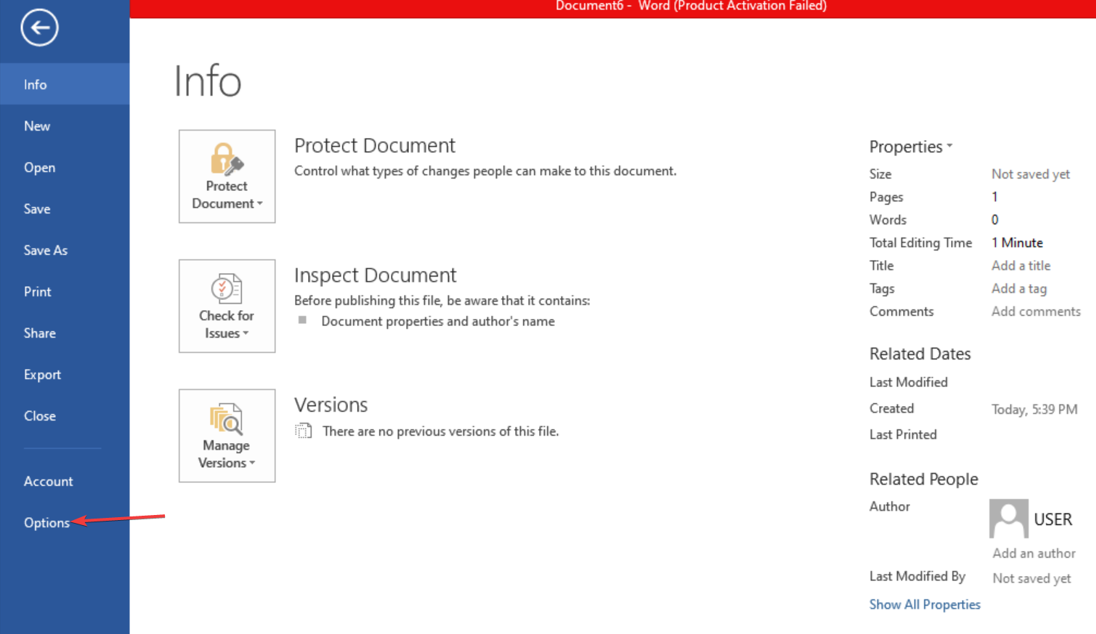
- Click on the File tab at the window’s top-left corner and select Options.
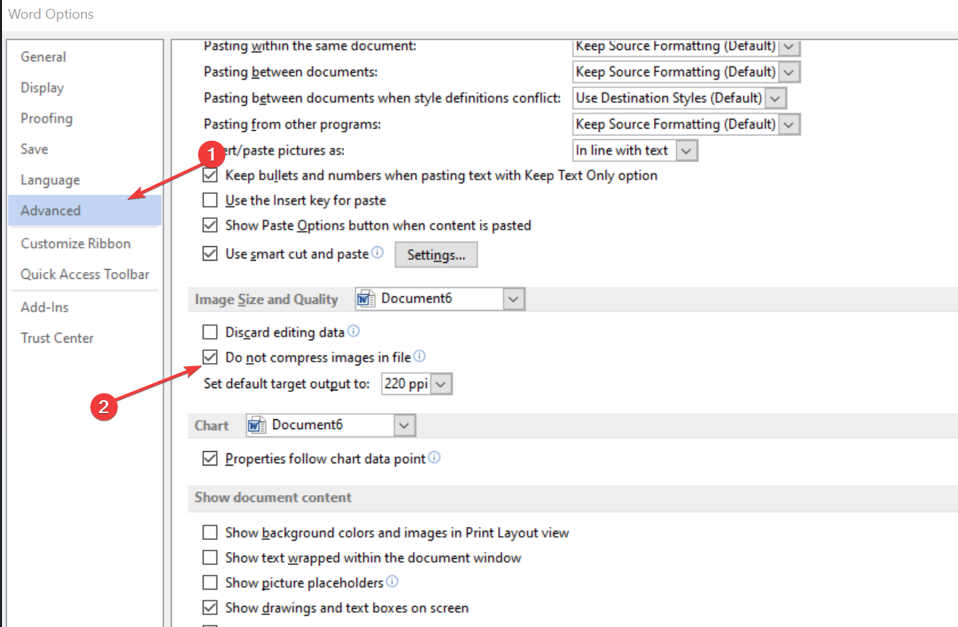
- Navigate to the Advanced tab, scroll down, and locate Image Size and Quality.
- Now, enable the checkbox in the Do not compress images option.
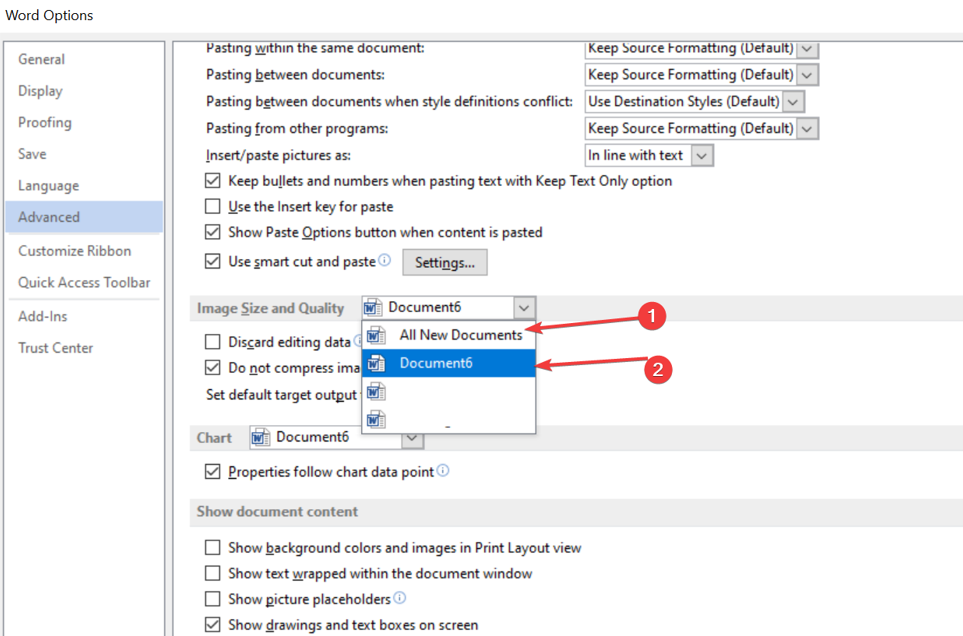
- Click on the drop-down menu next to the Image Size and Quality and select whether you wish to apply the current settings to just the opened document or All New Documents.
- Close the Microsoft Word Advanced tab.
- Delete the pictures earlier uploaded in the document and reinsert them using the Insert feature in Word.
Disabling the image reduction feature in Word is essential if your document requires specific image resolutions. Disable the image reduction feature to ensure you get the maximum resolution of your images after inserting them into Microsoft Word.
File compression is a neat feature in most applications dealing with file upload. The raw data uploaded to the application is usually large, which doesn’t support swift file transfer. However, file compression lowers image quality and could prove detrimental if you require pictures with maximum graphics.
If you’re looking for more tips, here’s a guide on how to move a picture in Microsoft Word.
If you’ve been searching for a way to prevent Word from reducing the image quality of your documents, read through our guide; it has everything you need to stop image compression in Microsoft Word.
Still experiencing issues?
SPONSORED
If the above suggestions have not solved your problem, your computer may experience more severe Windows troubles. We suggest choosing an all-in-one solution like Fortect to fix problems efficiently. After installation, just click the View&Fix button and then press Start Repair.


