RAV Endpoint Protection: How to Uninstall in 4 Steps
Try our solutions to easily solve this RAV issue
- RAV antivirus is often automatically installed when you are running the installer for other apps, for instance, uTorrent.
- There are four ways you can remove the antivirus and delete every trace from the system.
- Also, find out if you should choose to uninstall the RAV antivirus.
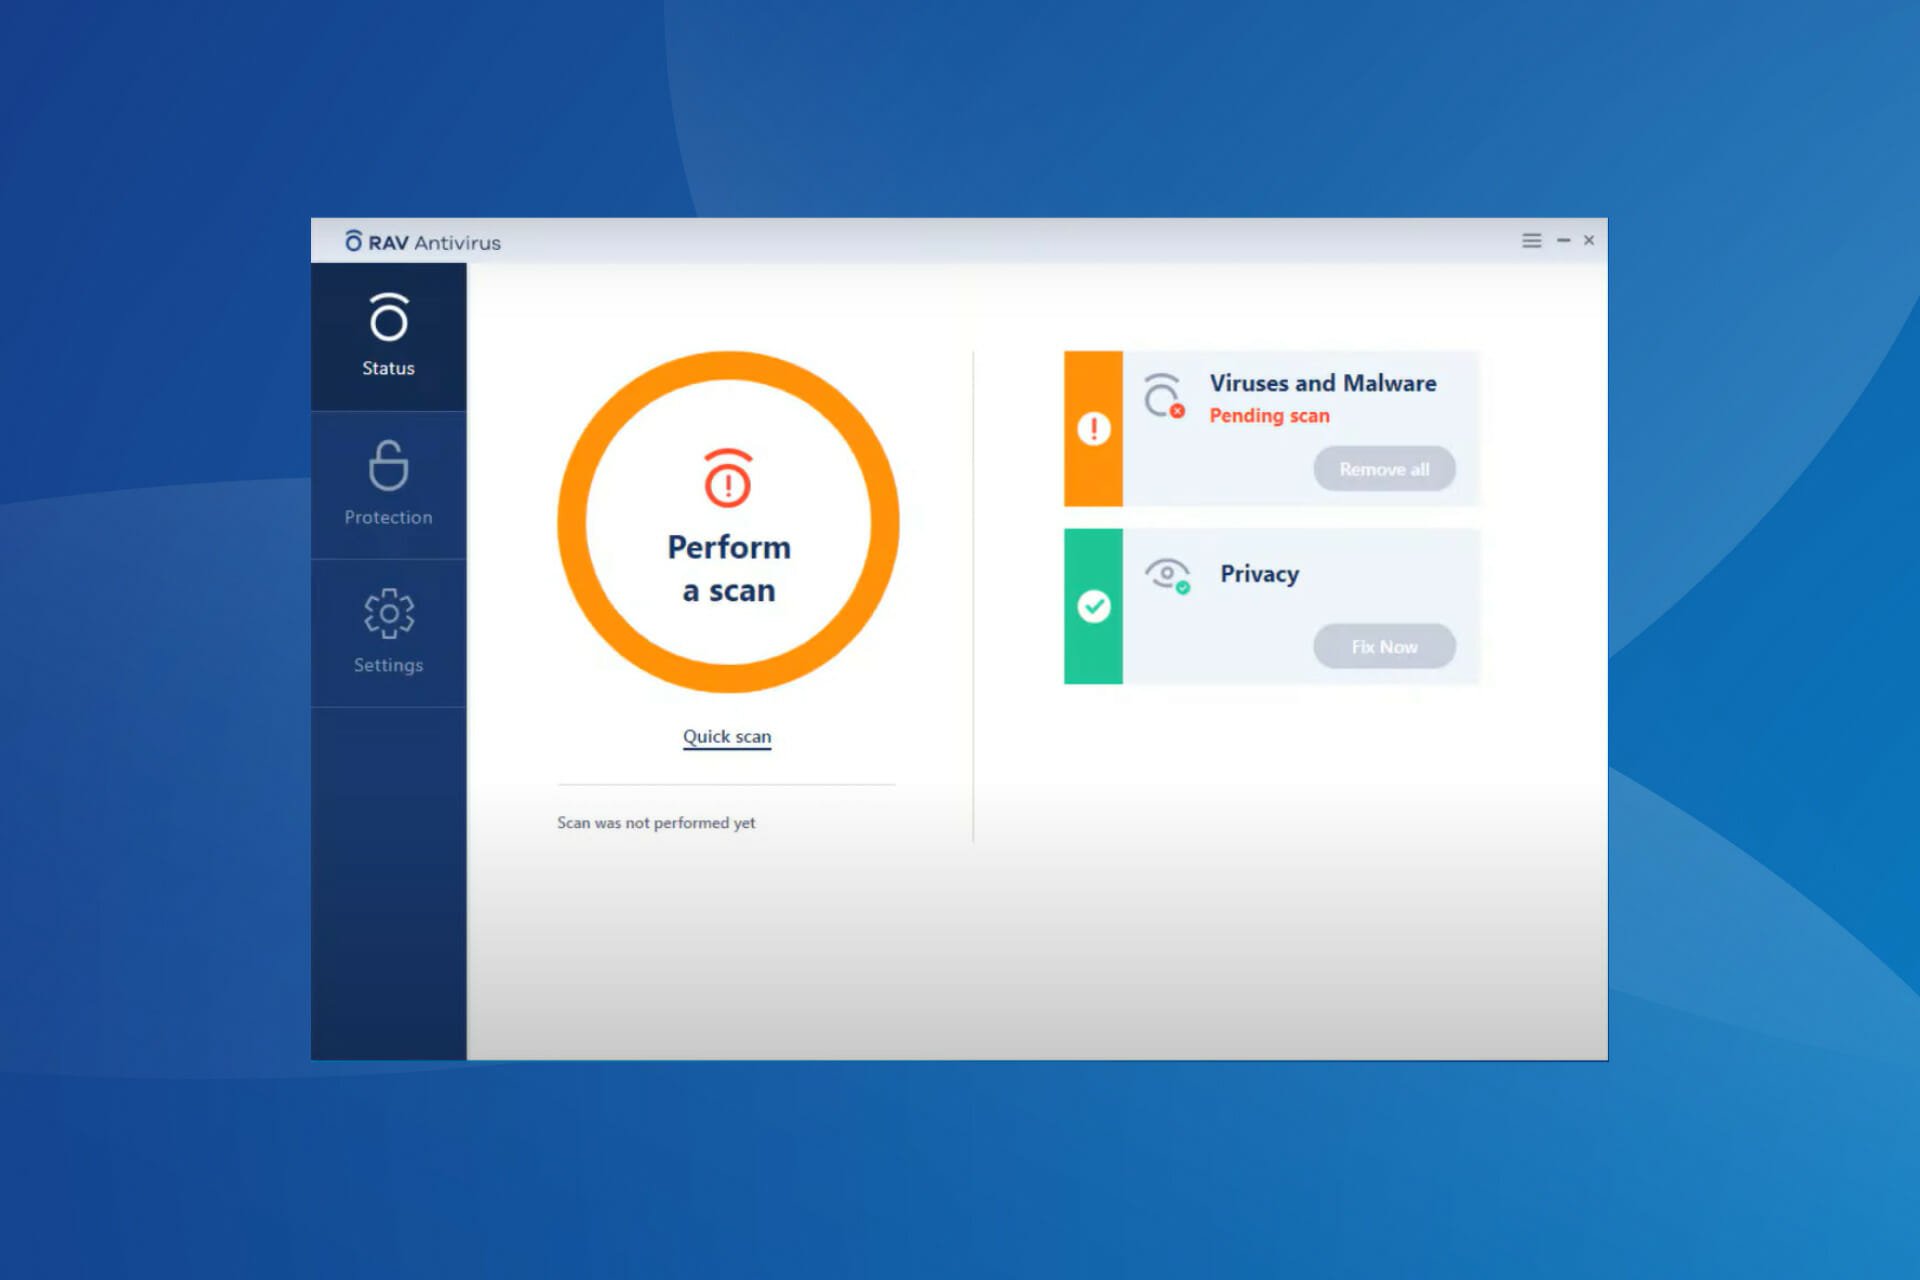
Some readers complained that the RAV antivirus was automatically installed even when another one is running, and they look for ways to remove it. In this article, we will understand how RAV antivirus was automatically installed and how to uninstall it.

Secure your devices with award-winning cybersecurity technology.

Maximize your PC's security and performance with top-notch digital threat detection.

Keep secure with groundbreaking AI detection and prevention technology.

Browse the web securely for up to 3 devices across Windows, Mac, iOS or Android systems.

Best security tool for intense browsing activity.
Why do I have RAV antivirus?
This is a very efficient antivirus, but if you don’t remember installing the RAV Endpoint Protection antivirus, it most likely got added with another application. Other reasons might be that:
- You mistakenly installed it with other programs or games, such as CheatEngine
- The antivirus was installed with the uTorrent application
By now, you know how the RAV antivirus automatically got installed on the computer. Let’s head straight to the methods you can remove it.
How do I remove the RAV antivirus?
1. Use Settings
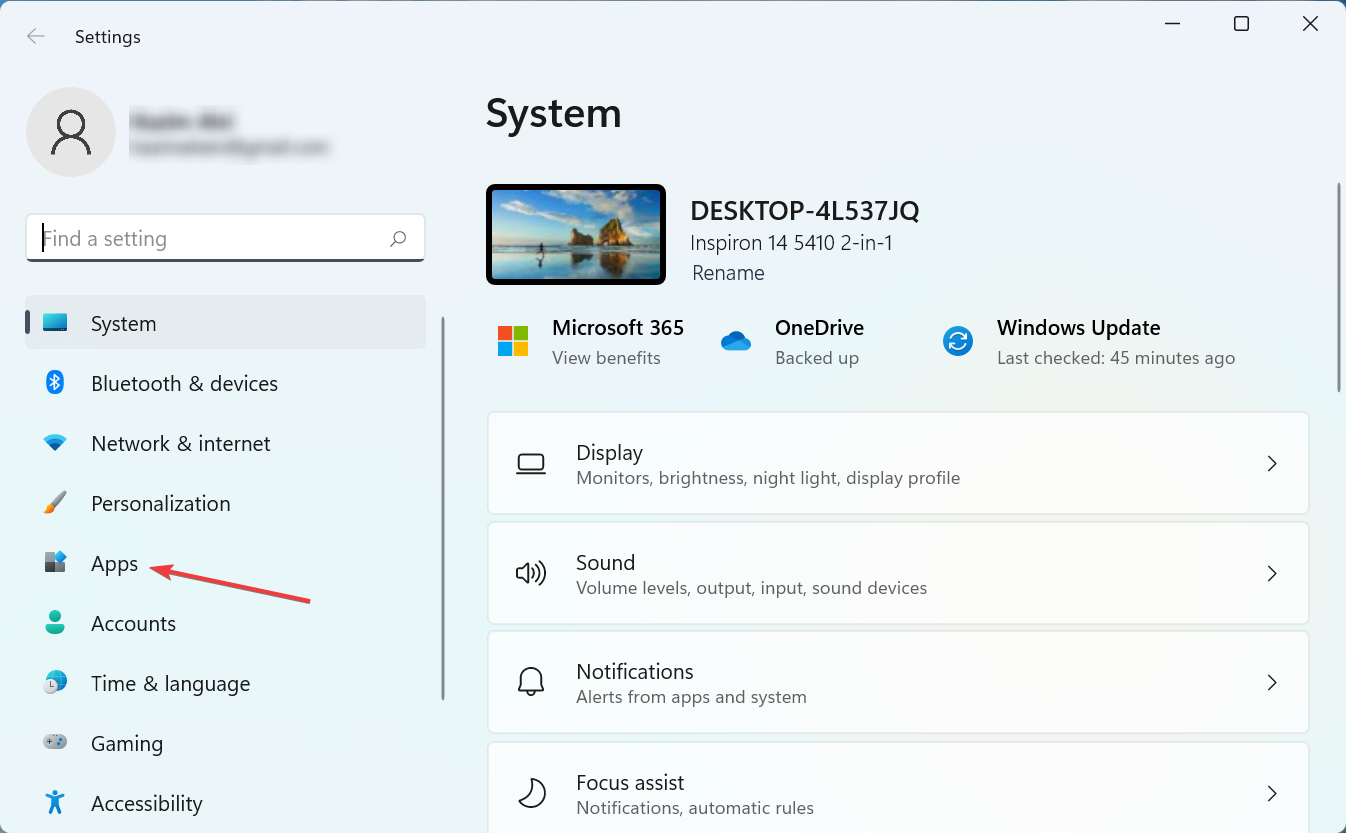
- Press Windows + I to launch Settings and select Apps from the tabs listed in the navigation pane on the left.
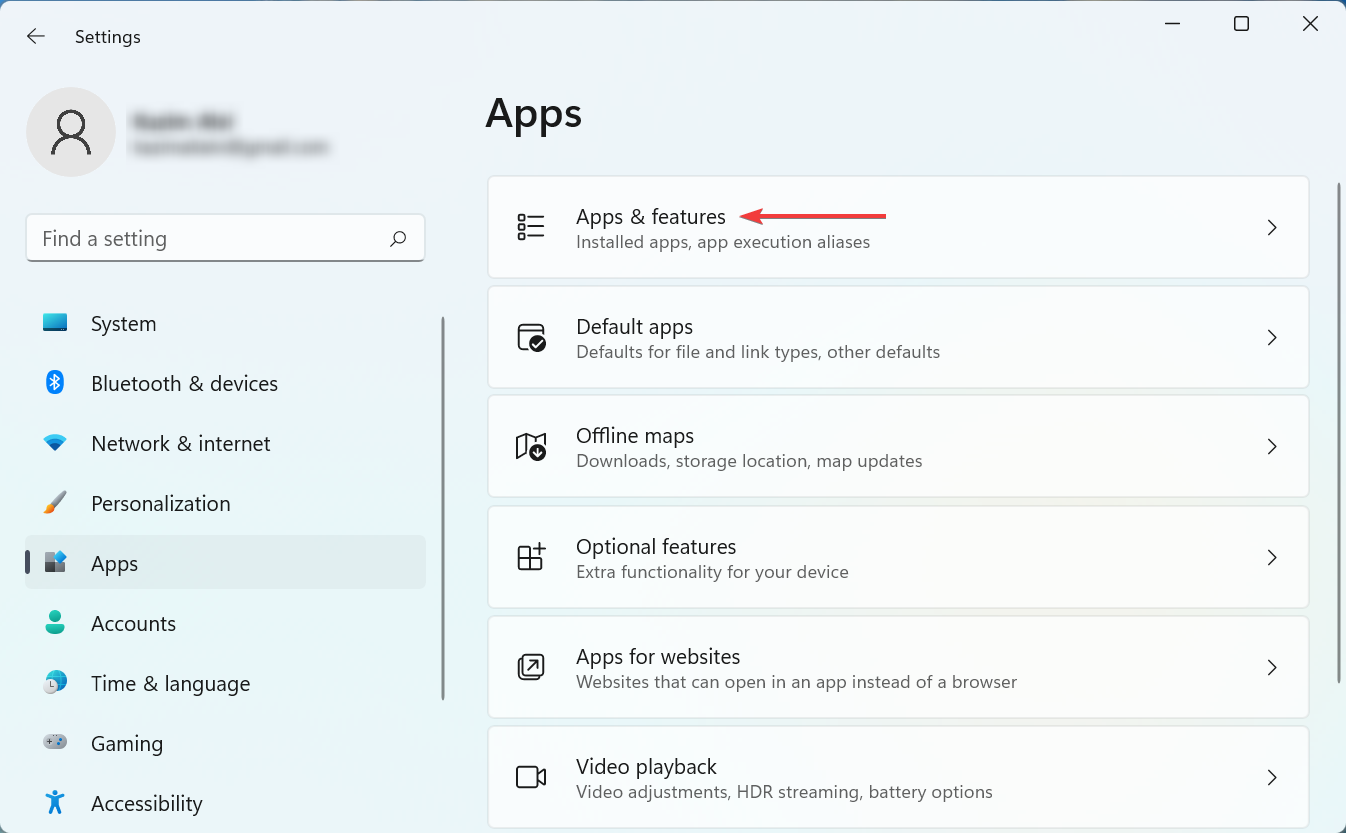
- Click on Apps & features on the right.
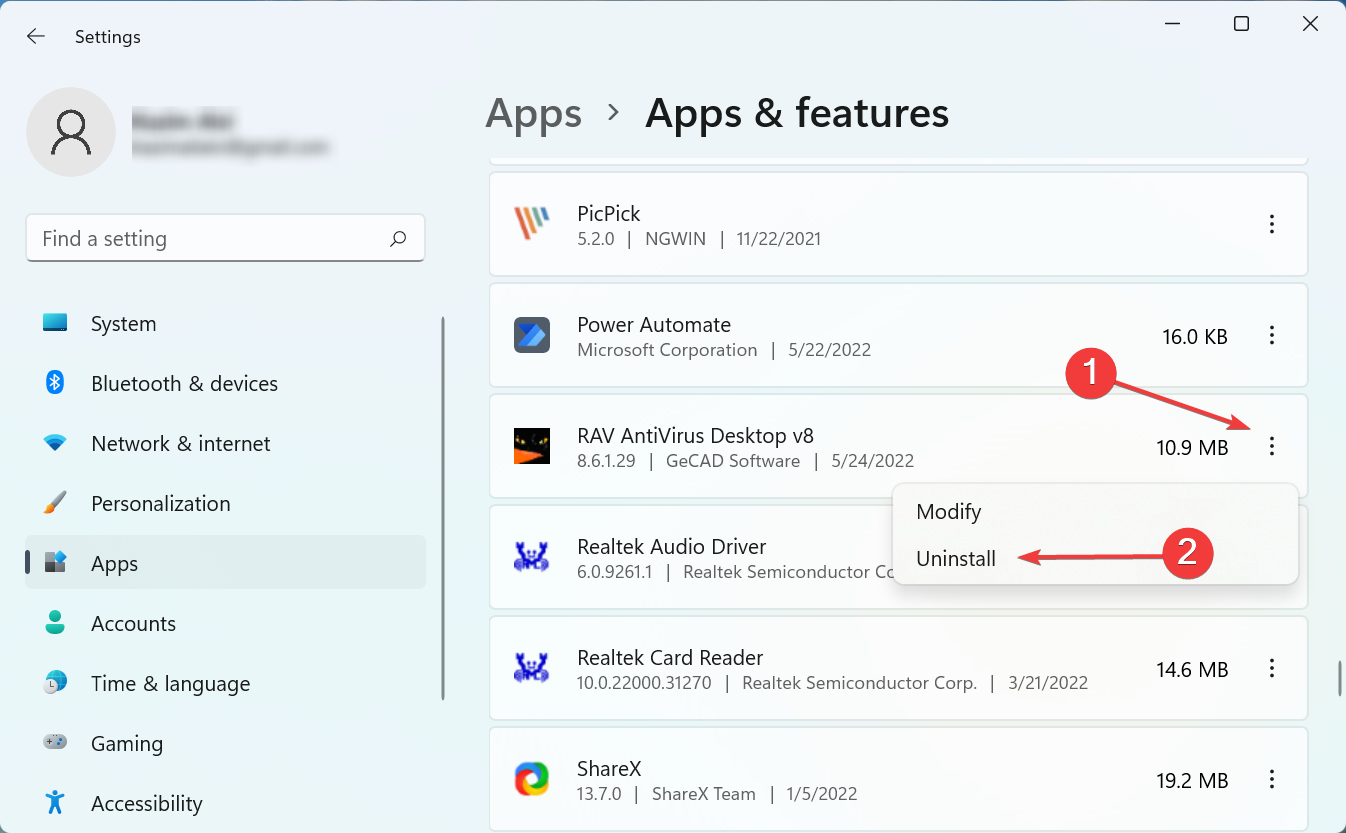
- Locate the RAV antivirus entry here, click on the ellipsis next to it, and select Uninstall from the flyout menu.
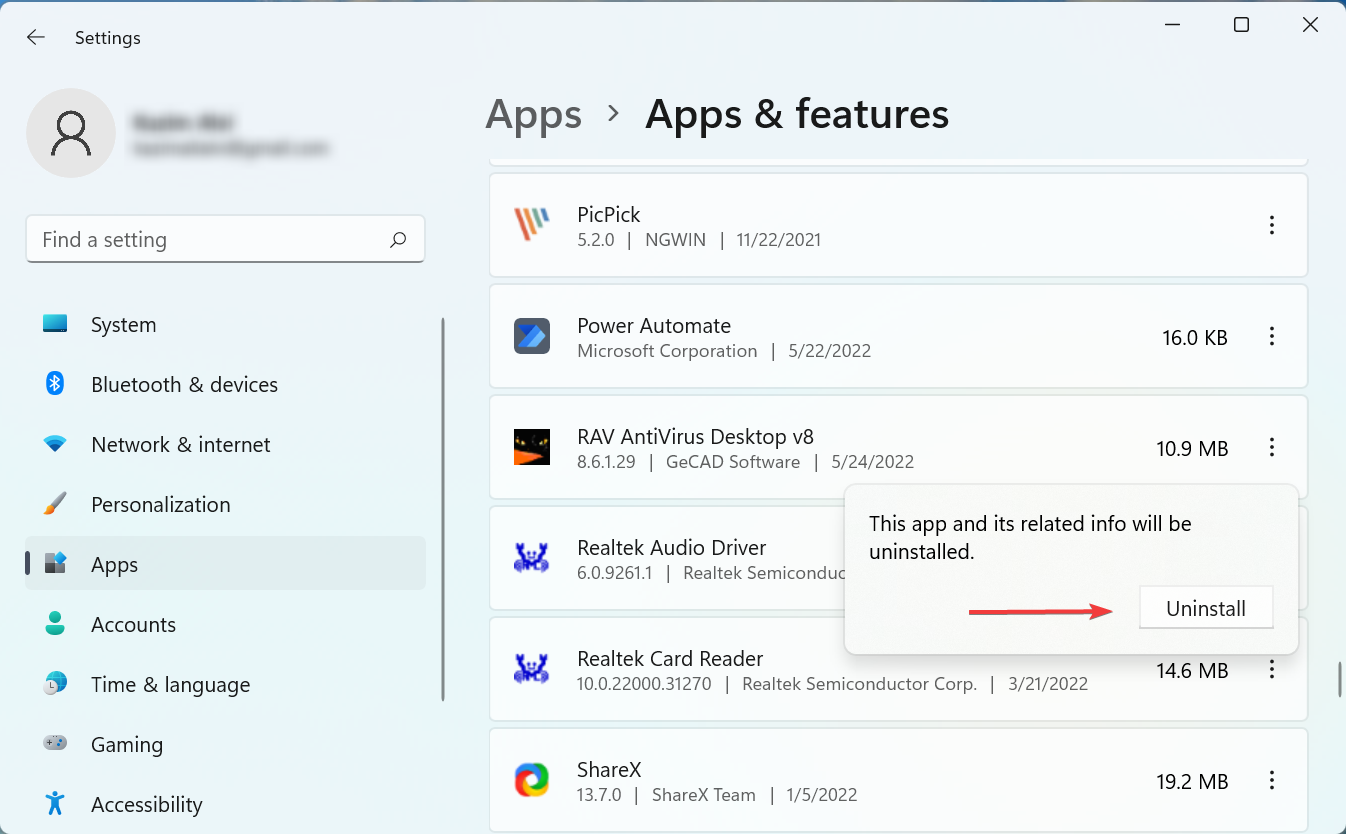
- Again, click Uninstall in the confirmation prompt that pops up.
A simple and effective method to remove RAV antivirus if it’s automatically installed is to go with Settings. In some rare cases, clicking Uninstall might not work on the first attempt, and you will have to hit it a few times.
2. Use the Control Panel
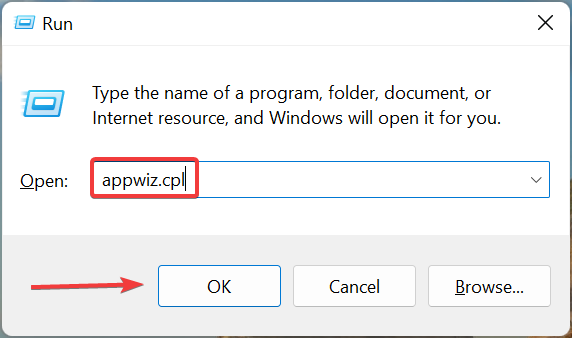
- Press Windows + R to launch the Run command dialog box, enter appwiz.cpl in the text field, and either click on OK or hit Enter to launch the Programs and Features window.
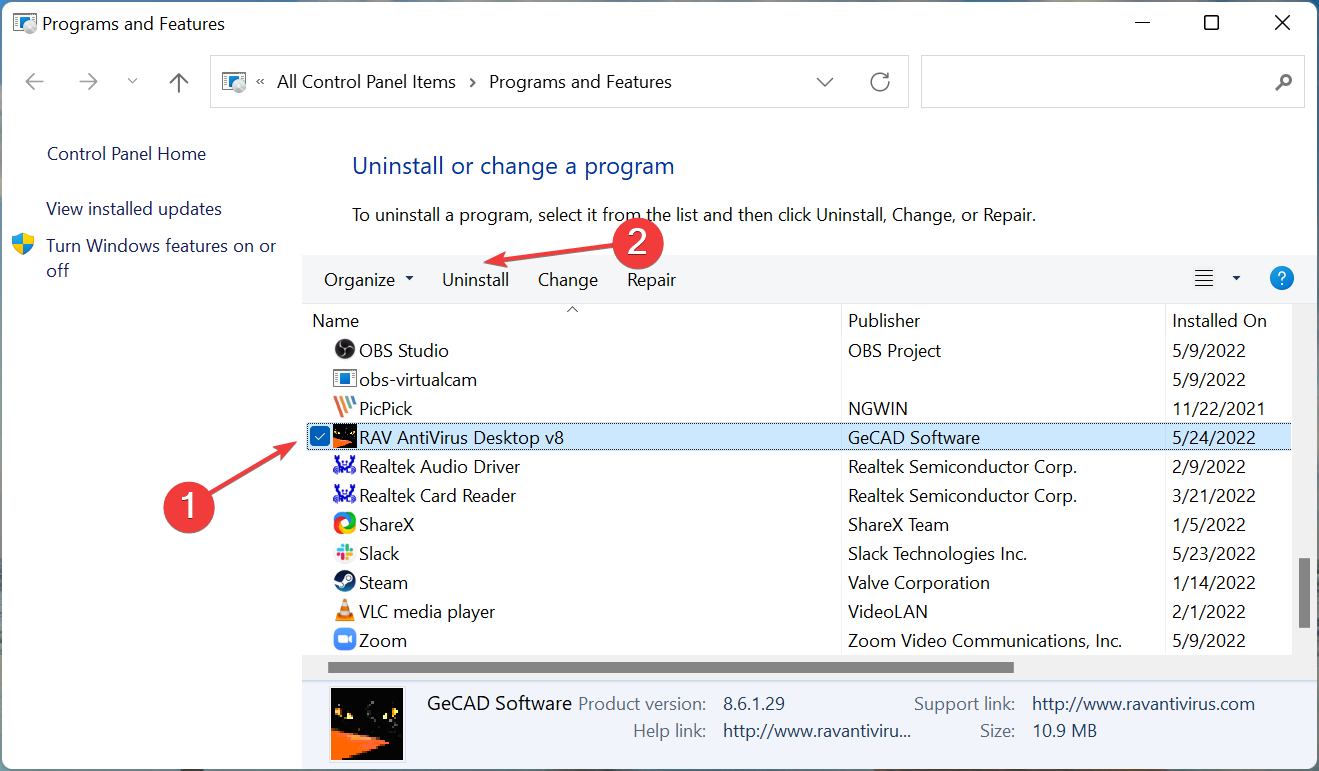
- Next, select the RAV antivirus entry here, and click on Uninstall.
- Click Yes in the confirmation prompt that appears.
- Now, follow the on-screen instructions to complete uninstall process.
This is another quick way to remove the RAV antivirus when it’s automatically installed on the system. Just make sure to properly follow the on-screen instructions in the app uninstaller.
3. Use a third-party uninstaller software
Though the built-in app removal mechanism for Windows works just fine, there are cases when certain files are left behind, or changes to the Registry are not corrected. And these changes have to be reverted after uninstalling RAV Endpoint Protection.
This is where an effective third-party uninstaller software comes into the picture. An uninstaller software will completely remove the app and ensure no trace of it is left behind.
In all, it doesn’t just make the removal process simpler but also helps save considerable storage in the long run. You can use it to remove the RAV antivirus if it got automatically installed.
A reputable tool that will help you uninstall and clean all remnants of the RAV Antivirus is IOBit Uninstaller. It has a simple Uninstaller feature similar to the Windows inbuilt one.
You have to select the app you want to uninstall from a list and wait for the process to complete. Then you can run the Registry Cleaner and even a Custom Clean to ensure all the files are gone.
4. Perform a System Restore
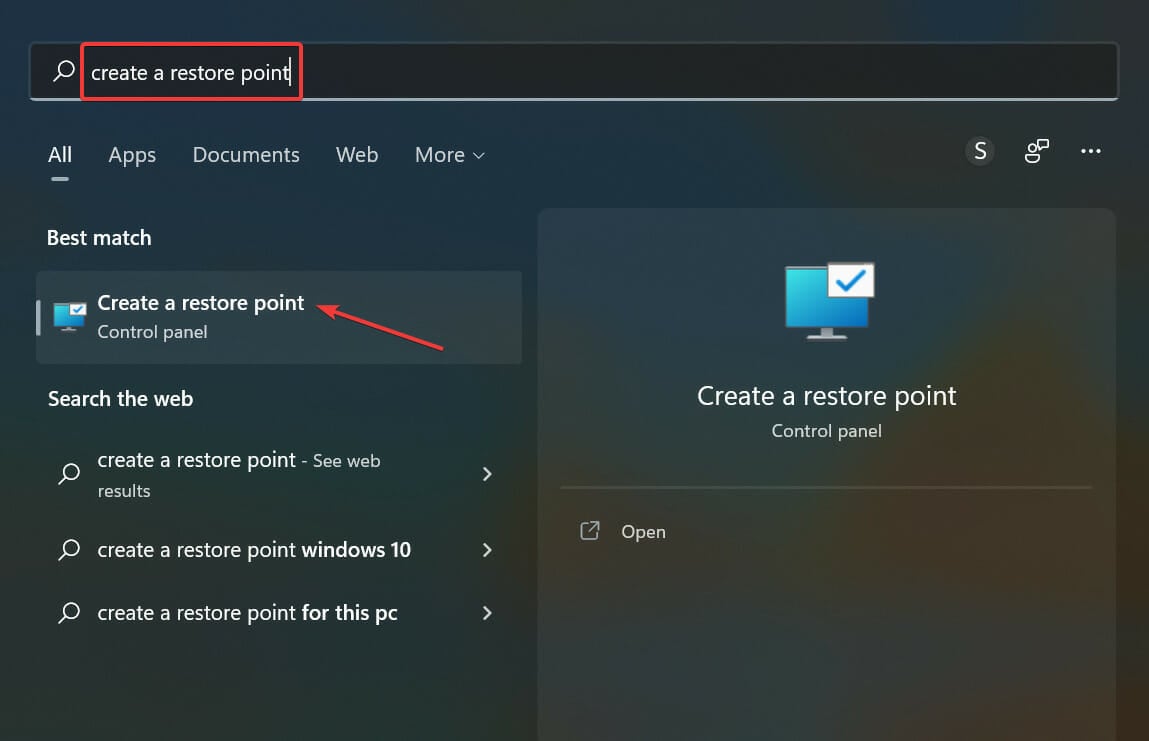
- Press Windows + S to launch the Search menu, enter Create a restore point in the text field at the top, and click on the relevant search result.
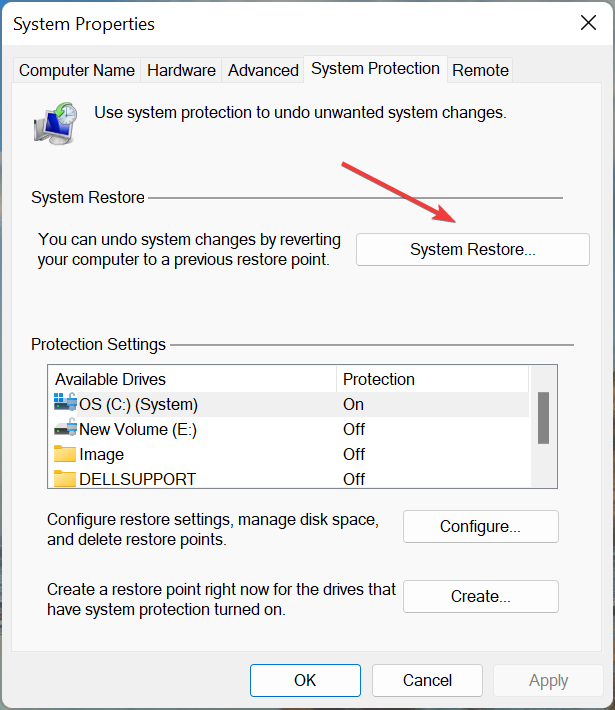
- Now, click on the System Restore button.
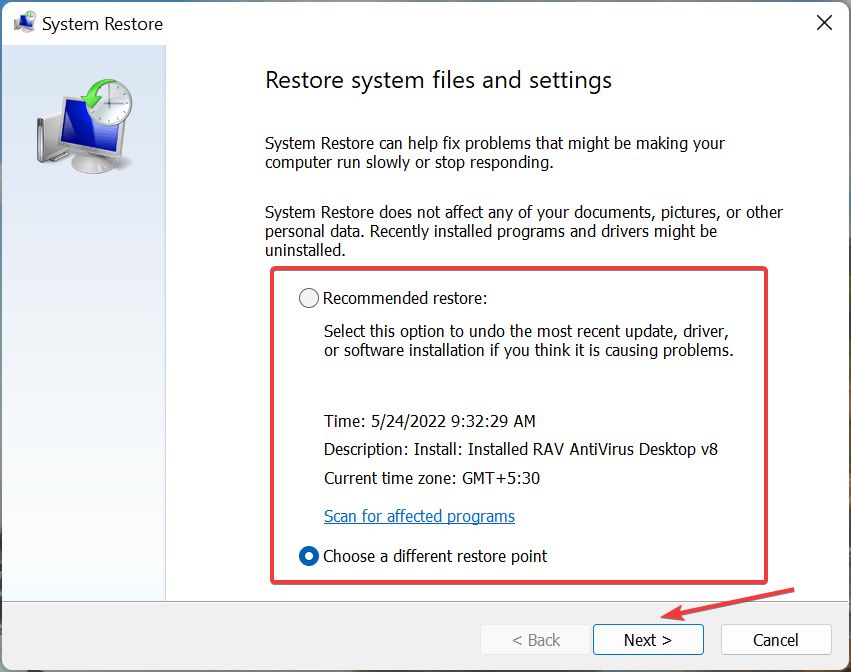
- You can either proceed with the recommended restore point or choose a different one manually. Select the relevant option here and click on Next to proceed.
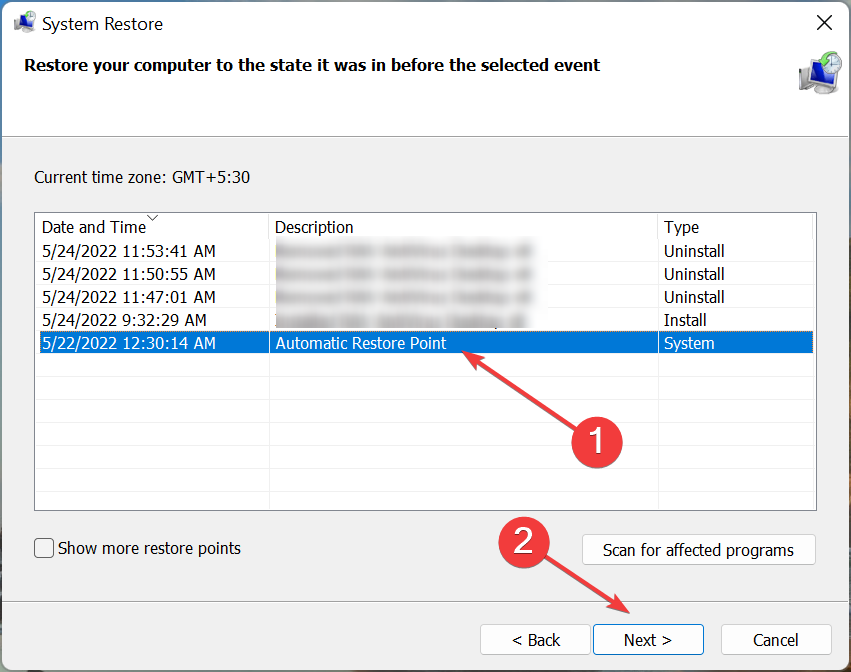
- If you selected the Choose a different restore point option earlier, select one from the list and click Next.
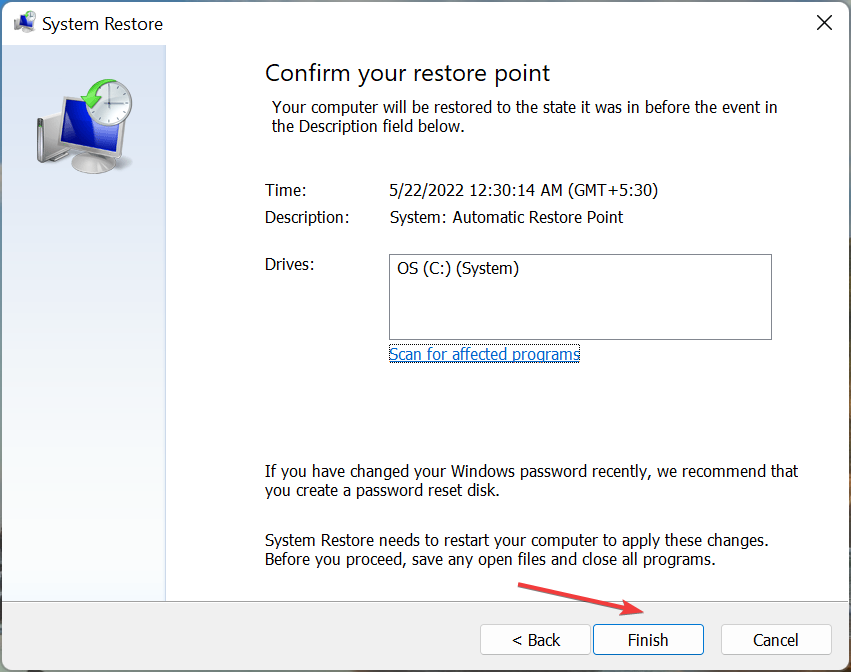
- Finally, verify the details and click on Finish at the bottom to start the restore process.
When nothing else works, there’s always the option to perform a system restore. When you do that, the state of the computer is reverted to a previous point, referred to as the Restore point.
Any changes made to the computer during the period will be reverted, be it the addition of new applications or modifications to settings. But your personal files won’t be affected.
To automatically uninstall RAV antivirus using System Restore, choose a restore point created before the antivirus got installed. And once the process is complete, it will be removed.
Should I remove the RAV antivirus?
It depends on whether you intended to use it or not. In the latter’s case, the solutions above provided the means to remove them.
These are all the ways you can remove the RAV antivirus after it is automatically installed on your system. The process is really simple, and it shouldn’t take more than a few minutes to finish it. Also, the methods here would help remove RAV antivirus in Windows 10.
Besides, if you are wondering, find out if Windows 11 needs a third-party antivirus or whether the built-in Windows Defender works just fine.
If you have any other queries, do not hesitate to comment in the section below.
