Windows Security shows Unknown? Here’s Why
Restart the Windows Security service
- Windows Security shows unknown status for some users, and it is not possible to run any scan.
- Repairing the system files and reinstalling Windows Defender will help solve the problem.
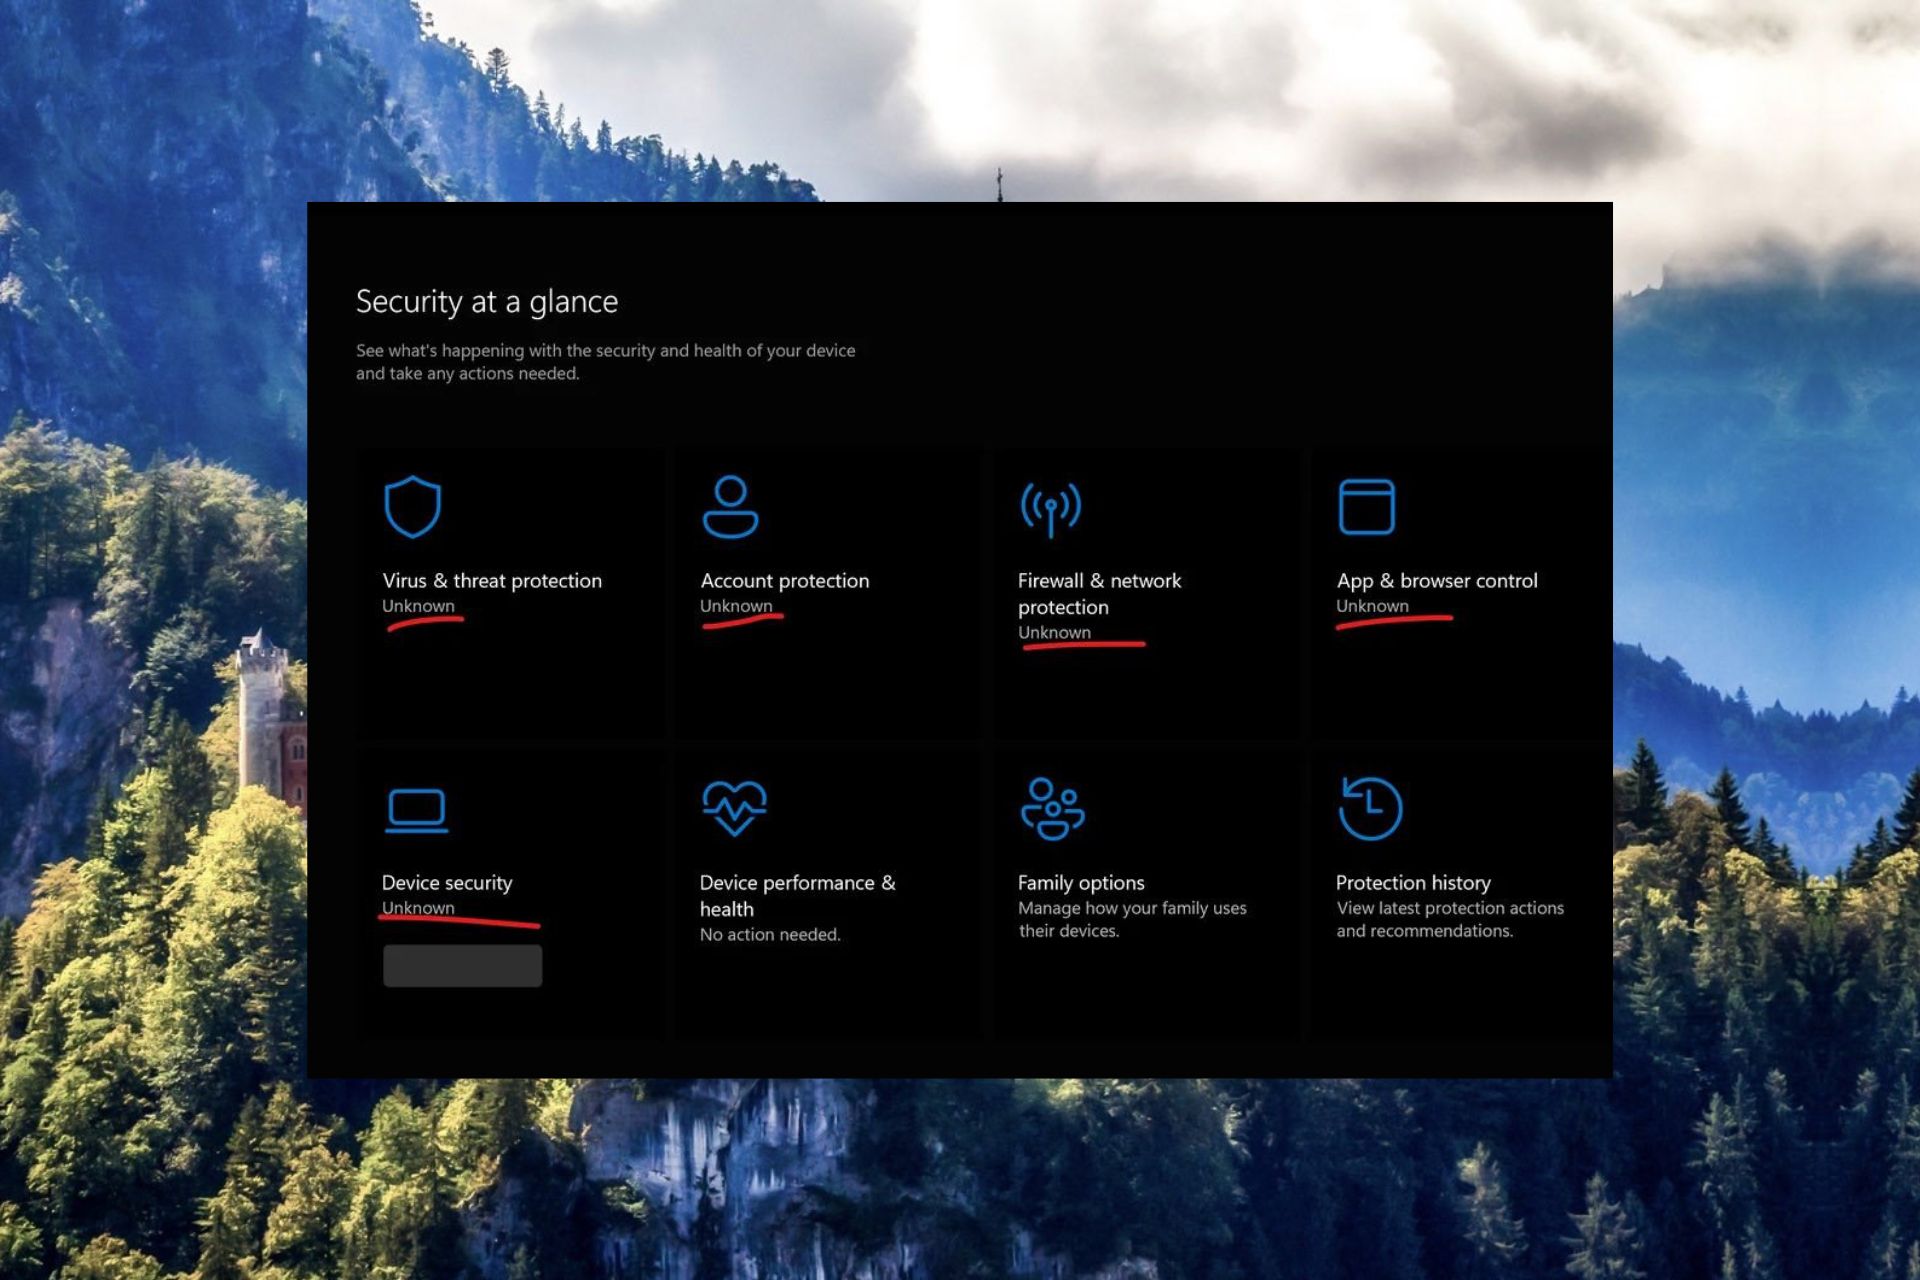
Several Windows users have reported that Windows Security shows Unknown status out of nowhere for various security features.
Apart from this, the Local Security Authority Protection within Core Isolation selection is disabled despite being turned on, and it is impossible to scan your PC to identify and eliminate viruses and malware.
If a similar case happens to you as well, try the solutions listed below to remove the unknown status from Windows Security to get it back to its normal state.
Why is Windows security showing unknown status?
There can be several reasons why Windows security is suddenly showing unknown status:
- Viruses and malware – A PC infected with viruses and malware beings to malfunction and encounters weird issues like the one at hand.
- Third-party antivirus – A third-party antivirus installed on your PC often interferes with the native Windows Security app of Windows.
- Problematic update – A recently installed Windows update may be buggy causing this problem in the Windows Defender app.
- Corrupt system files – If the system files get corrupted or broken, such issues are likely to occur.
How do I fix the unknown status in Windows Security?
Try these simple tricks before moving on to the complex solutions:
- Uninstall or disable the thirty-party antivirus software.
- Scan your PC for viruses and malware.
- Uninstall the recently installed Windows update.
If the issue is not resolved yet, implement the methods listed below.
1. Run SFC and DISM scans
- Press the Windows key to launch the Start menu, type cmd in the search bar on top and choose Run as administrator from the results section.
- Press Yes on the User Action Control prompt to launch Command Prompt with elevated permissions.
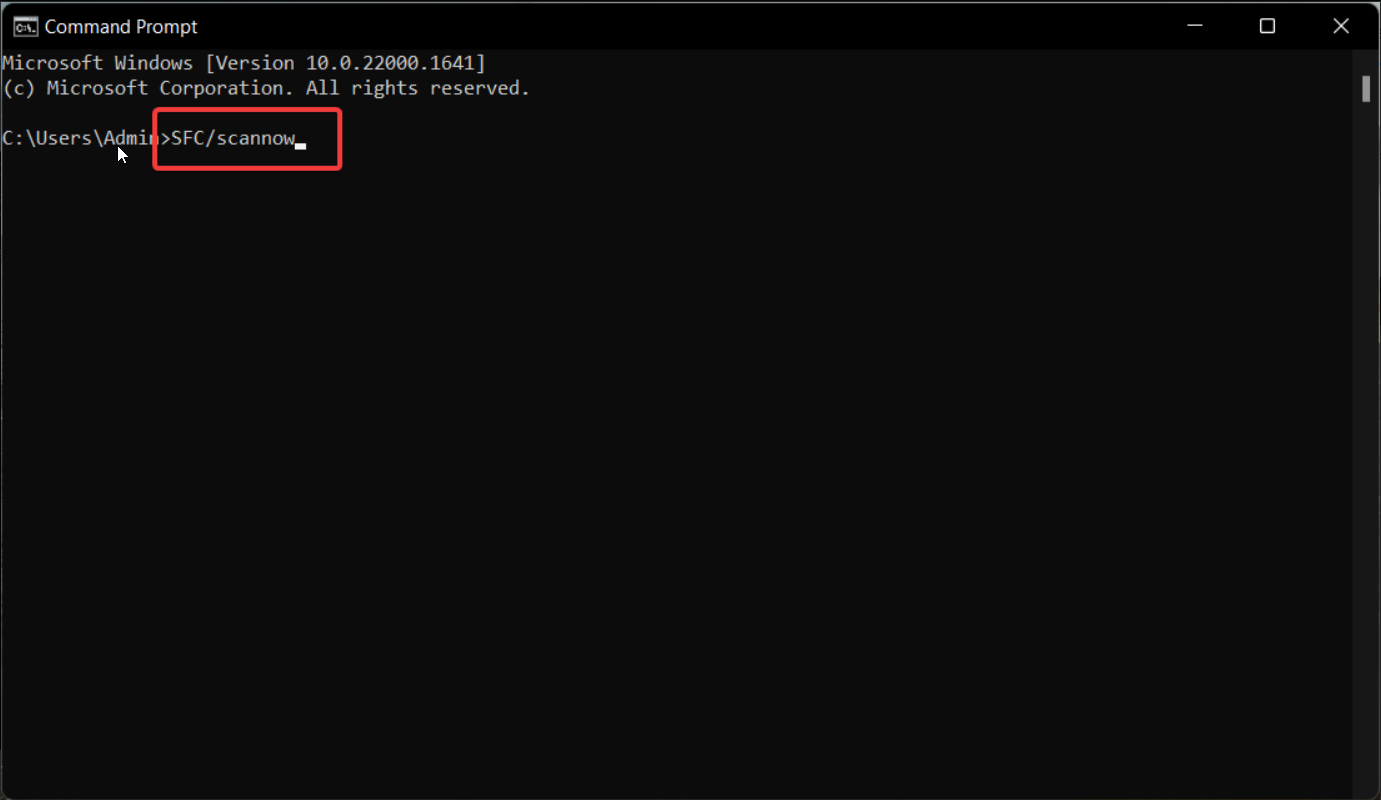
- Type or paste the following command and press Enter to initiate the SFC scan.
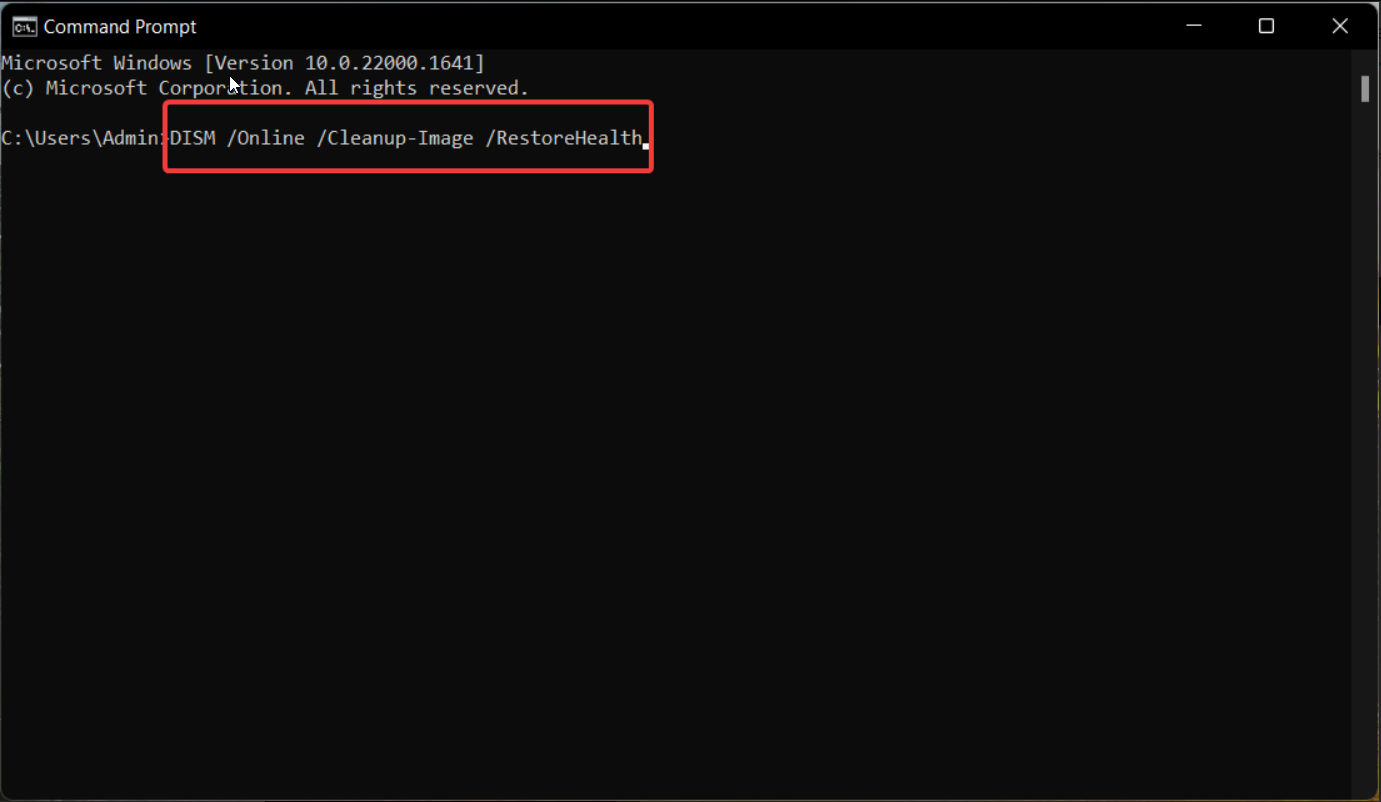
SFC /scannow - Once the SFC scan is completed, type the following command and press Enter to run the DISM scan.
DISM /online /cleanup-image /restorehealth
After the SFC and DISM scan repair the broken system files, restart your PC and see if the issue is resolved.
2. Disconnect the work or school accounts
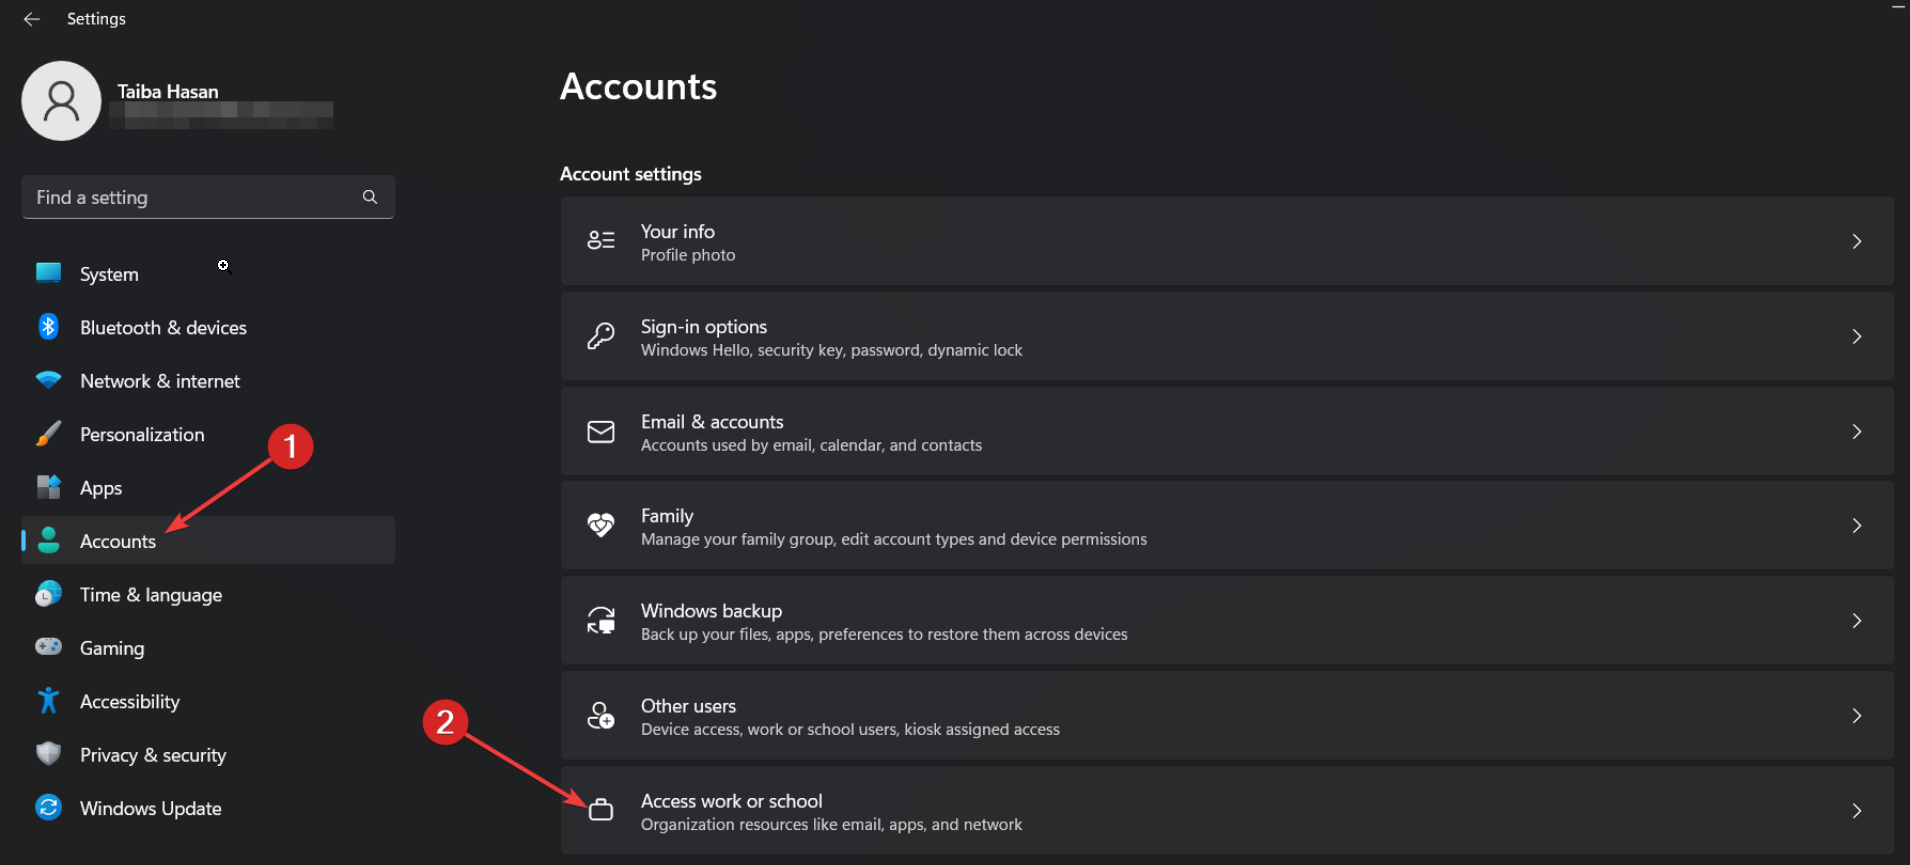
- Launch the Settings window using the Windows + I shortcut.
- Switch to Accounts settings from the left navigation pane and click the Access work or school option present under Account settings.
- In the next window, check if any work or school accounts are currently connected to your PC. If you find any, click them to expand the related settings and press the Remove button.
As reported by several Windows users on different help forums, this issue primarily arises on PCs having work or school accounts connected. So disconnecting these accounts should be effective in resolving this problem.
If you face problems removing the work and school accounts from your PC, refer to this guide to get much-needed help.
3. Repair Windows Defender
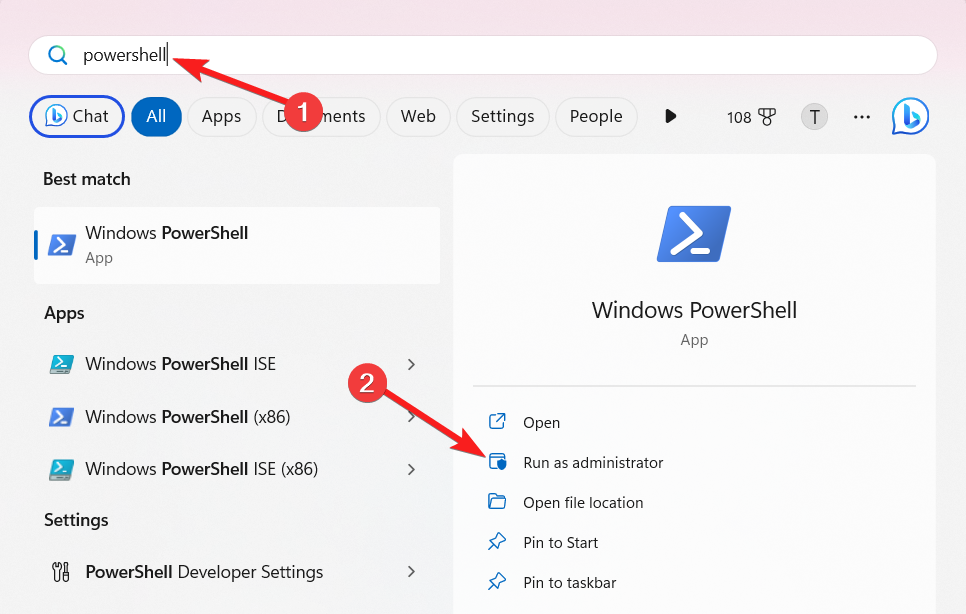
- Press the Windows key to bring up the Start menu, type powershell in the search bar on top, and choose Run as administrator from the search results.
- Click Yes on the User Action Control prompt to launch Windows Powershell with administrative privileges.
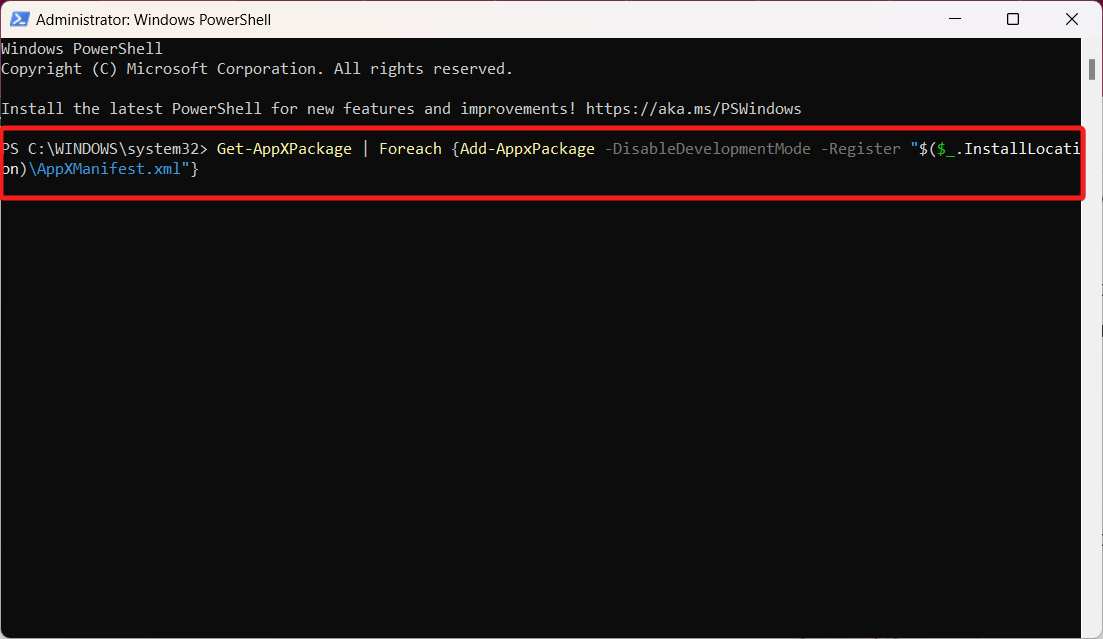
- Now type or paste the following command in the Powershell window and press the Enter key to execute it.
Get-AppXPackage | Foreach {Add-AppxPackage -DisableDevelopmentMode -Register "$($_.InstallLocation)\AppXManifest.xml"}
After Windows Defender and other Microsoft Store apps are repaired successfully on your Windows PC, close the Powershell window and reboot your system.
Now go back to check the Device Security status in the Windows Security app. It will no longer show the status as Unknown.
4. Reinstall Windows Defender
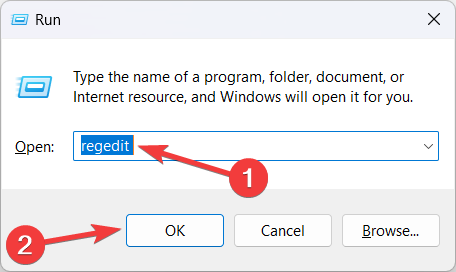
- Use the Windows + R shortcut key to launch the Run dialog box. Type the following command in the text box and press the Enter key.
Regedit.msc - Access the following location in the registry editor window.
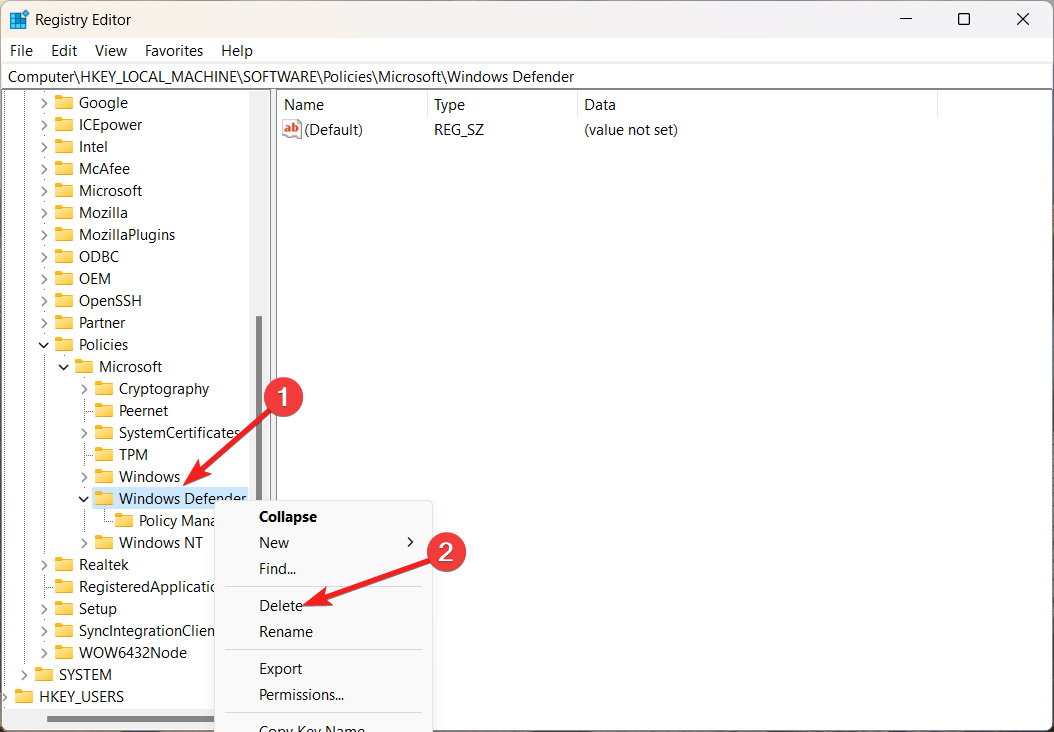
Computer\HKEY_LOCAL_MACHINE\SOFTWARE\Policies\Microsoft\Windows Defender - Now, right-click the Windows Defender subkey on the left panel and choose Delete from the context menu.
- Now restart your PC and check whether or not the unknown status in Windows Security is resolved.
Deleting the Windows Defender key will reset the misconfigured Windows Security settings, which may be the reason for the unknown status of device security on your Windows PC.
5. Restart the Windows Security service
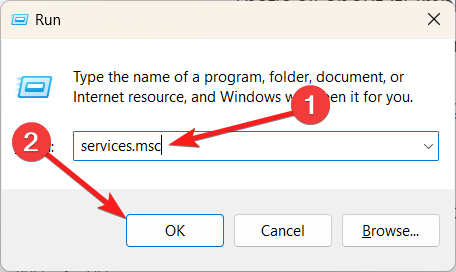
- Use the Windows + R shortcut to launch the Run dialog box, type the following command and press the OK button.
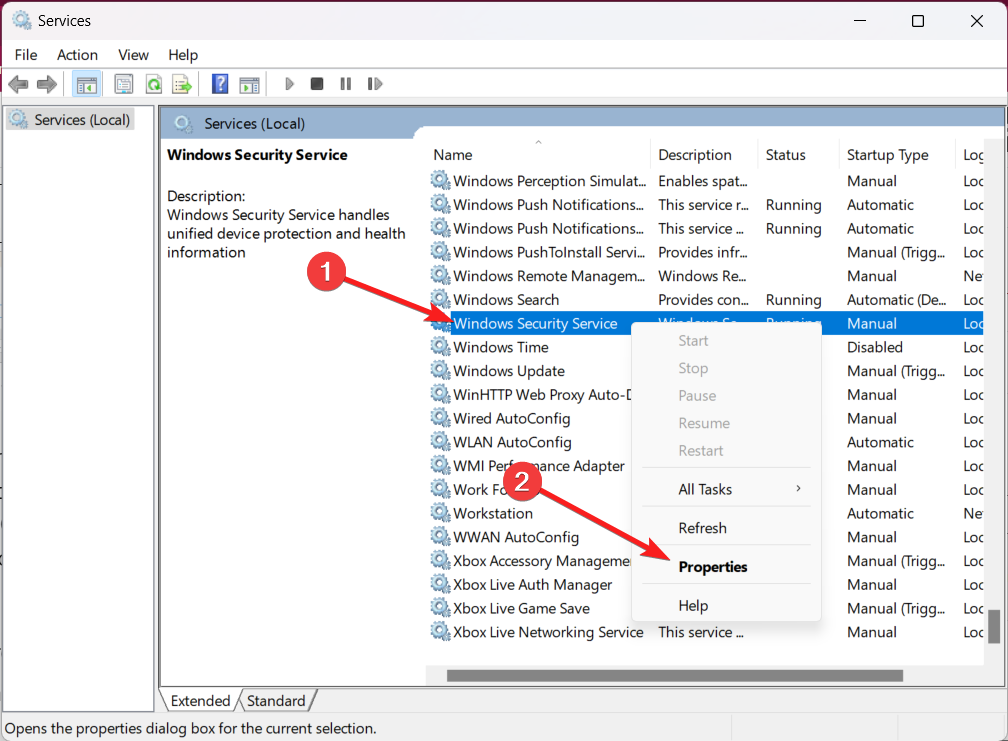
services.msc - Scroll down the services window until you reach the Windows Security Service, and double-click it to access its Properties.
- If the Windows Security Service is currently running, press the Stop button under the Service status to stop the service and then press the Start button to restart the service.
- Press the Apply button to save the changes and OK to close the properties window.
- Now reboot your Windows PC and see whether or not Windows Defender still shows unknown status.
If the Windows Security Service running in the background encounters a glitch, Windows Defender may malfunction and run into bizarre problems like the one at hand.
That’s all about it! Implementing these methods will help you remove the unknown status in Windows security if it is bothering you.
In case you have trouble opening Windows Security in Windows 11, refer to this guide for effective solutions.
If you have other feedback and suggestions, let us know in the comments below.
 Protect your PC now!