No WiFi Networks Found: 7 Ways to Make Them Show up
Updating the Wifi adapter often works
- If you can't find any WiFi networks on your Windows 10 PC, laptop, or tablet, get started by running initial checkups to determine the cause of the problem.
- You can roll back, reinstall or update the WiFi driver, run the network adapter troubleshooter, deactivate any faulty VPN, and run a full computer scan to check for malware.
If you’re trying to connect to the Internet on your Windows PC, but you encounter issues of no WiFi network found, we’re here to help.
Even if you were previously able to join a wireless network connection but can’t anymore, it’s likely an issue you can quickly resolve at the software level to regain Internet access.
So, before buying a new WiFi adapter for your Windows desktop, laptop or tablet, follow the intuitive troubleshooting guide below.
Why are no WiFi networks appearing?
There are a few reasons why you may experience this. On top of the list are the following:
- WiFi turned off – While this may not bring any error code, the oversight of switching on your WiFi could be responsible for this problem.
- Disabled network adapter – While by default they are enabled, in some cases, if you have disabled the network adapter, you will not be able to connect to any network.
- Issues with the network drivers – Drivers play a vital role in adequately running your PC; if they are corrupted or outdated, you may expect a few problems.
- Virus infection – Malware on your computer can also hinder WiFi connection, and in some cases, using an incompatible antivirus may also be a trigger.
No WiFi networks found on Lenovo, Dell, or HP laptops are not uncommon. However, it cuts across the different popular manufacturers and brands.
Let us introduce you to some of the best solutions.
How can I fix the no WiFi networks found error?
Before proceeding, we suggest doing the following:
- Restart the computer – A reboot can shut down some processes and allow the computer to work correctly.
- Remove peripherals – If you have devices connected to your computer, you may have to unplug them as, in some cases, they may hinder the computer from locating WiFi networks.
1. Correctly update your WiFi adapter driver
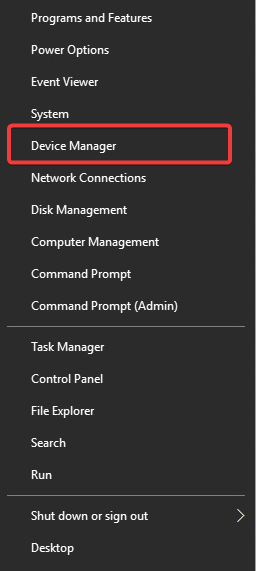
- Press Windows + X and select Device Manager to open it.
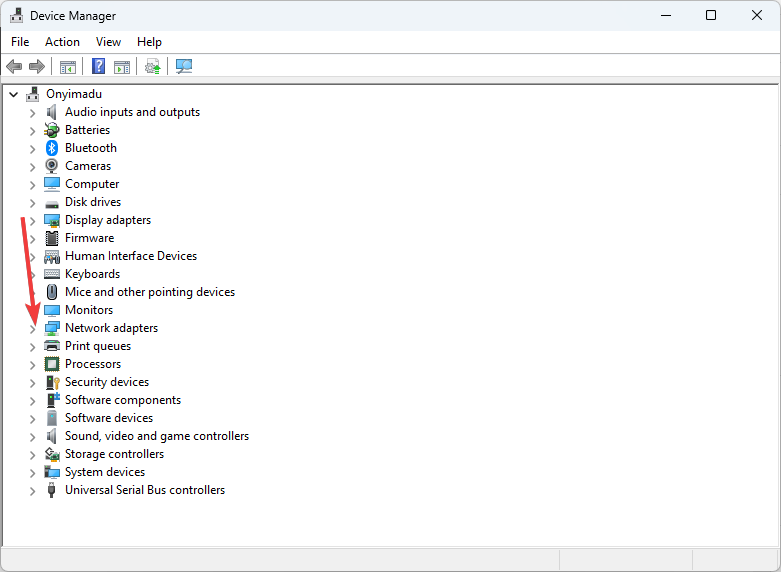
- In the Device Manager window, scroll down and expand Network adapters.
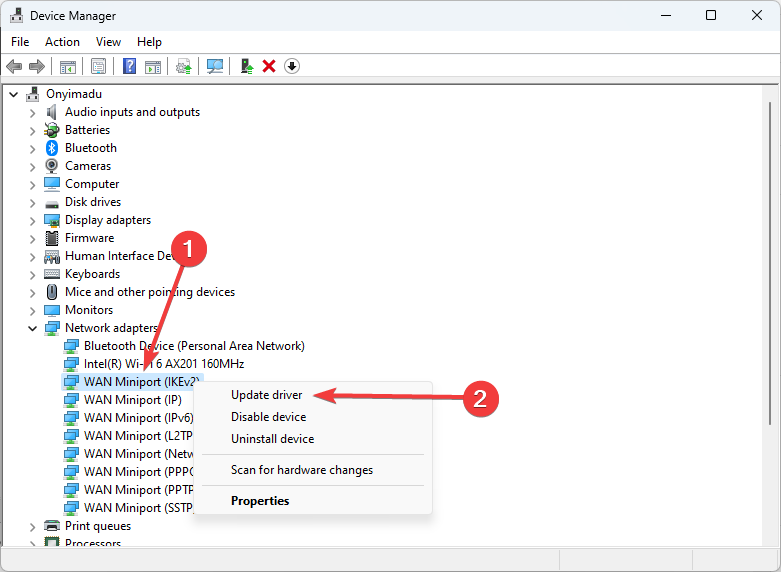
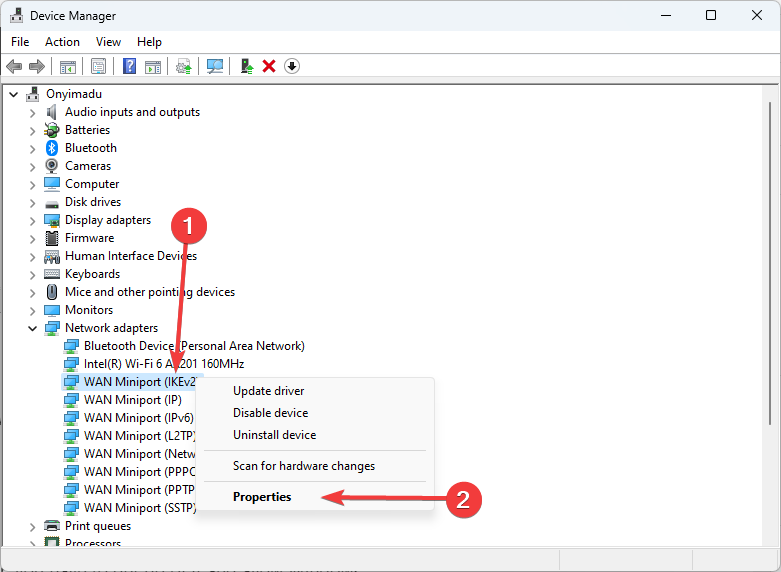
- Right-click on the WiFi adapter and select Update driver.
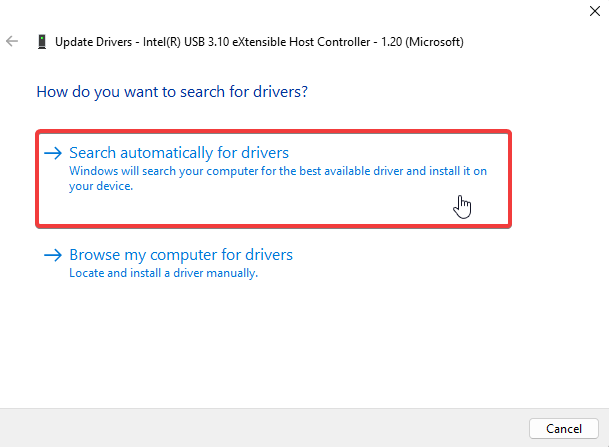
- Next, click on Search automatically for updated driver software.
These tasks can be a bit laborious, especially if you have to do them often, so we recommend using an automated driver update tool.
Wrapped in a super-intuitive interface, Outbyte Driver Updater automatically detects all obsolete drivers on your system, not just the network drivers.
The main reason to have it installed is the massive library of driver files available for download and the option to schedule updates when a new WiFi connection is detected on your PC.

Outbyte Driver Updater
Have your Wi-Fi driver updated along with all other outdated drivers for no more errors.2. Roll back the WiFi adapter driver
- Press Windows + X and select Device Manager to open it.
- In the Device Manager window, scroll down and expand Network adapters.
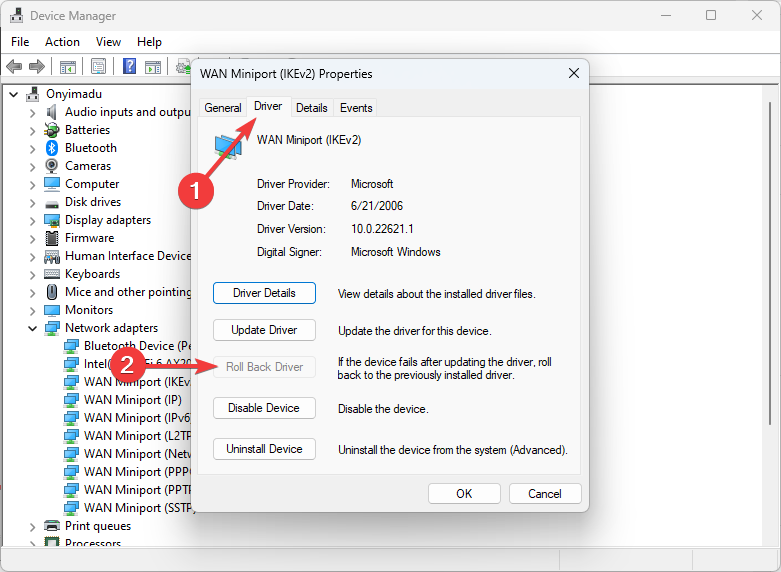
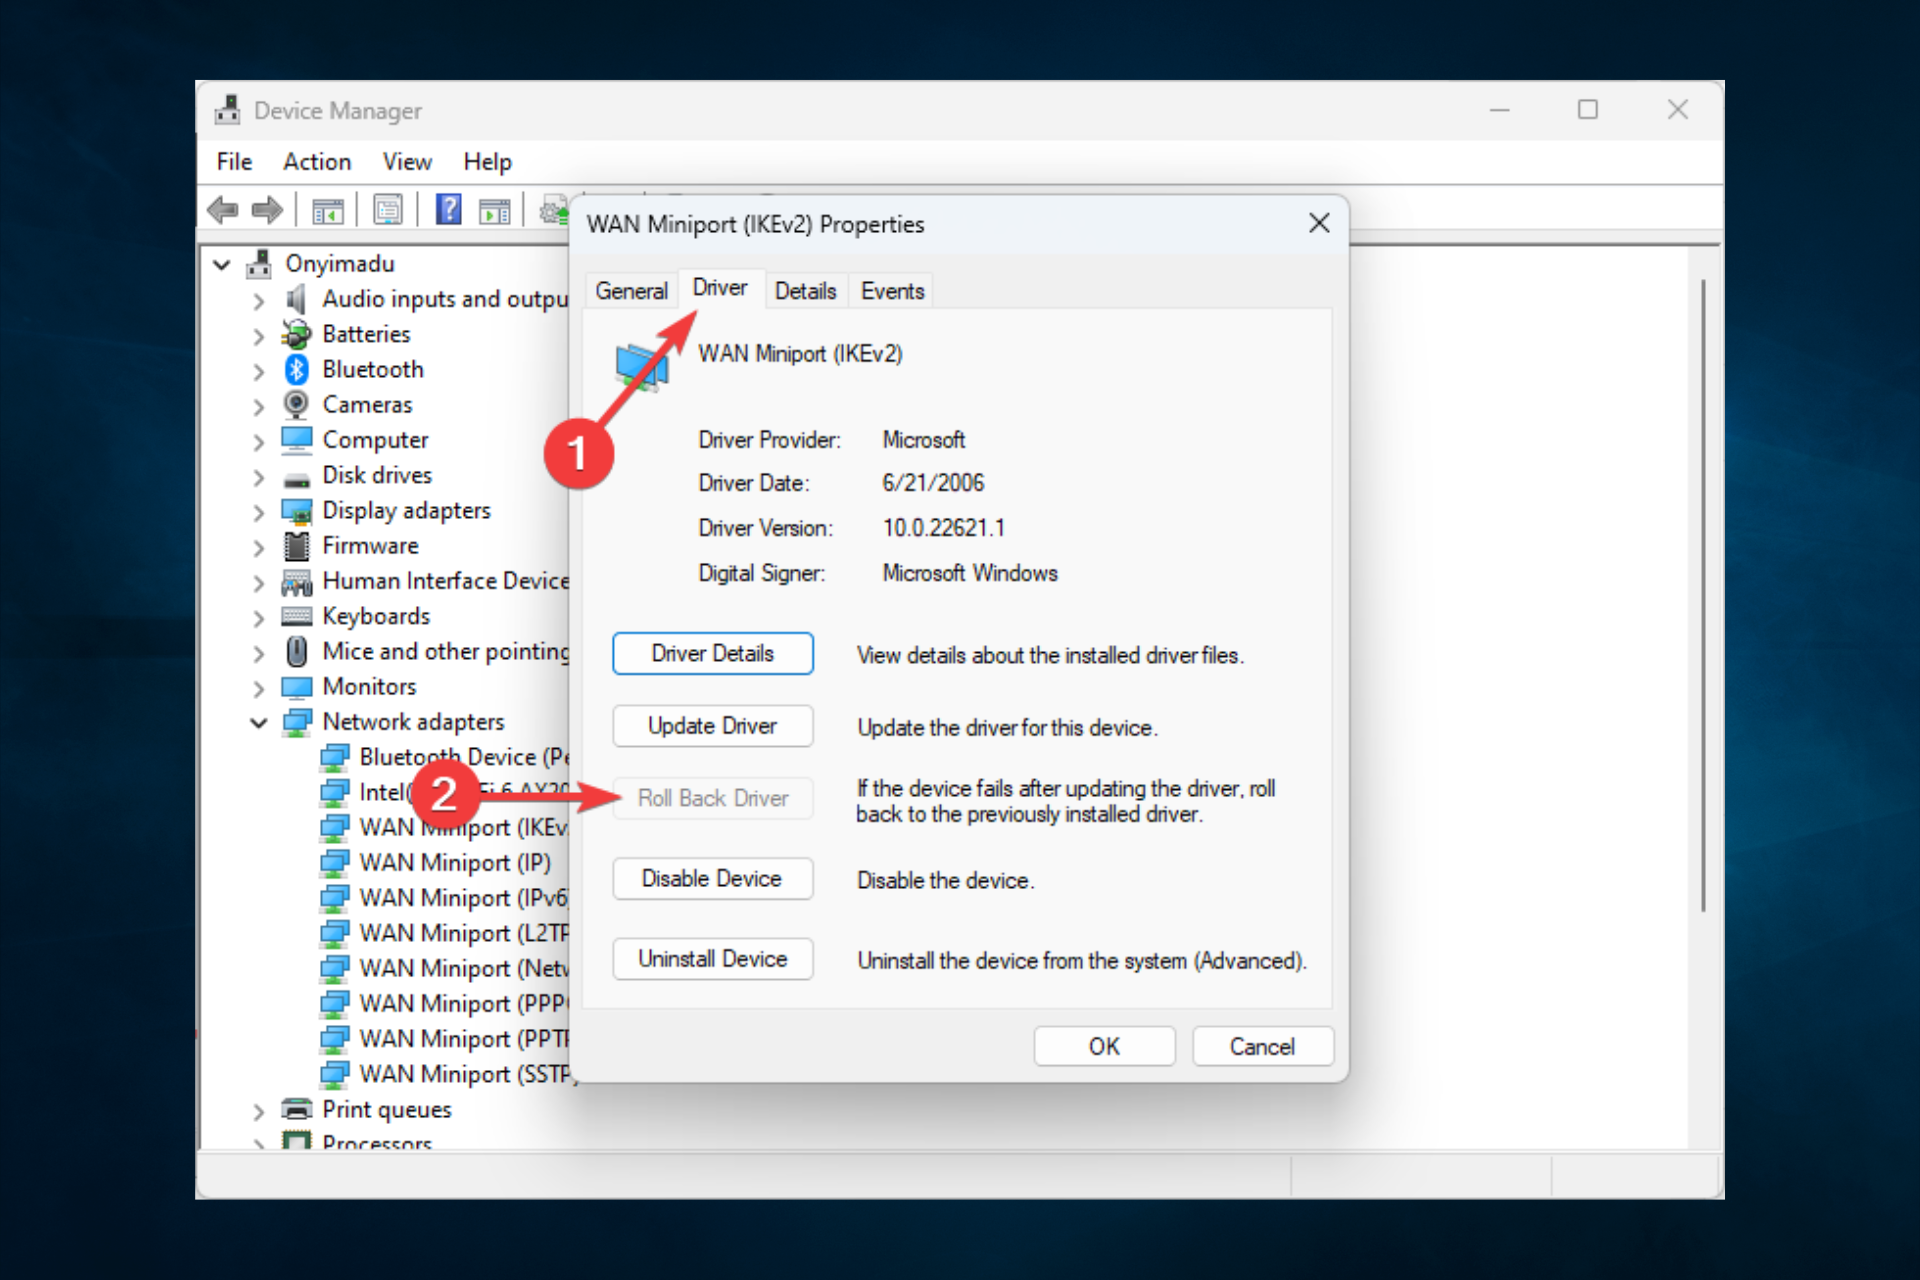
- Right-click on the WiFi adapter and select Properties.
- Click on the Driver tab and click the Roll Back Driver button.
- Follow the instructions to complete the process.
*If the Roll Back Driver button is greyed out, it means that you don’t have a backup of the previous network driver. So, you can skip this step.
3. Reinstall the corrupt WiFi adapter driver.
- Press Windows + X and select Device Manager to open it.
- In the Device Manager window, scroll down and expand Network adapters.
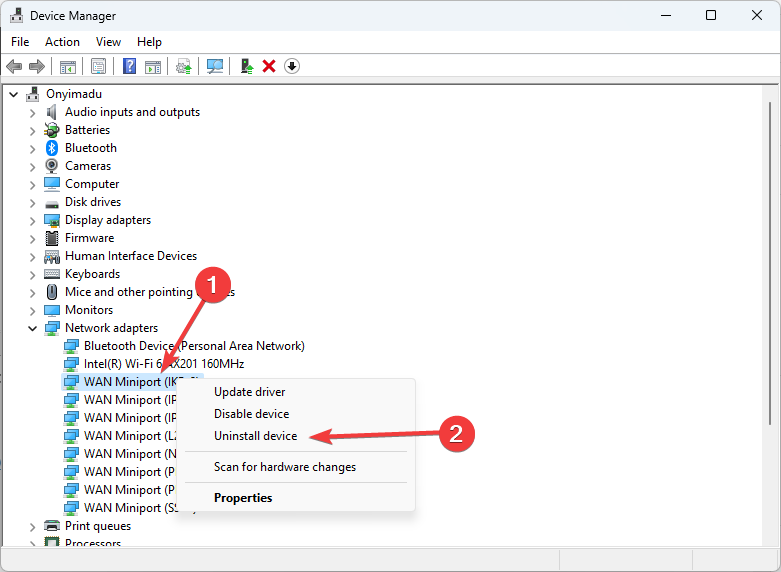
- Select your Network adapter driver and click Uninstall device.
- Click OK when asked to confirm.
- Restart the system, and Windows will automatically reinstall the drivers after the restart.
Discover more easy solutions if your WiFi adapter doesn’t work on Windows 10.
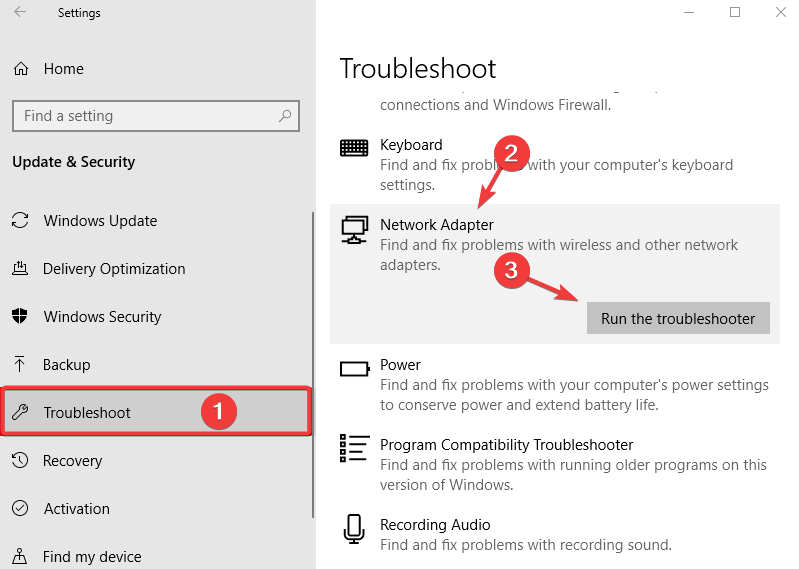
4. Run the network adapter troubleshooter
- Press Windows + I to open the Settings app.
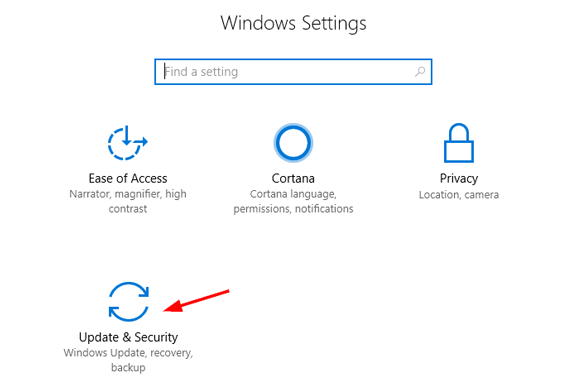
- Open Update & Security.
- From the left pane, click on Troubleshoot, click on Network Adapter from the right pane, and press the Run the Troubleshooter button.
Running the troubleshooter is a good solution if no WiFi networks are found on your Windows 10 devices.
If the Windows Troubleshooter isn’t working correctly, you may also be able to fix that in a few easy steps.
5. Disable your faulty VPN
If not used properly, a VPN can affect your WiFi connection, whether we’re talking about a VPN connection you manually added to Windows, or a commercial VPN service that auto-configures network settings.
For instance, having multiple VPNs installed, each with its TAP drivers, could cause network connectivity issues due to software conflicts. If you connect to the VPN, you might even lose WiFi.
Another good example is the VPN kill switch. It’s an advanced feature provided by some VPN solutions, designed to turn off your network access if the VPN connection drops.
However, some kill switches are extremely severe. They forget to restore Internet access after disconnecting from the VPN and exiting the VPN app.
If you’re keen on protecting your online privacy by using a VPN (which we strongly encourage), consider investing in a premium VPN service that won’t mess up your Internet routing.
We recommend you try a VPN that quickly connects and disconnects from VPN servers, leaving your WiFi connection untouched.
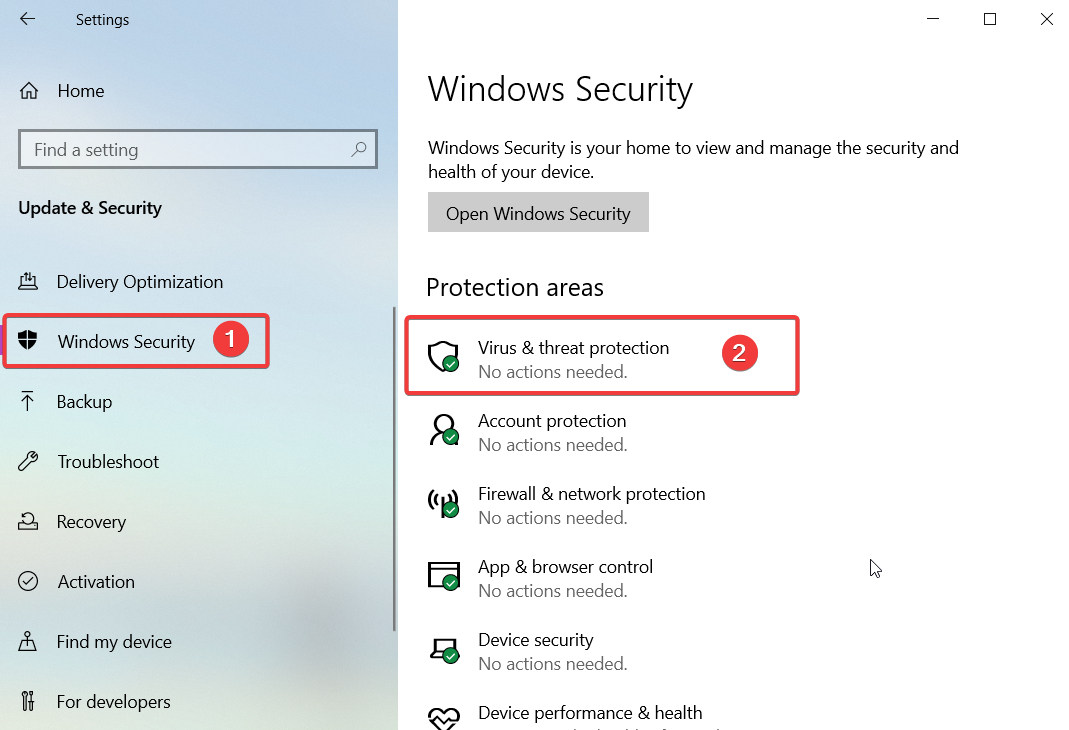
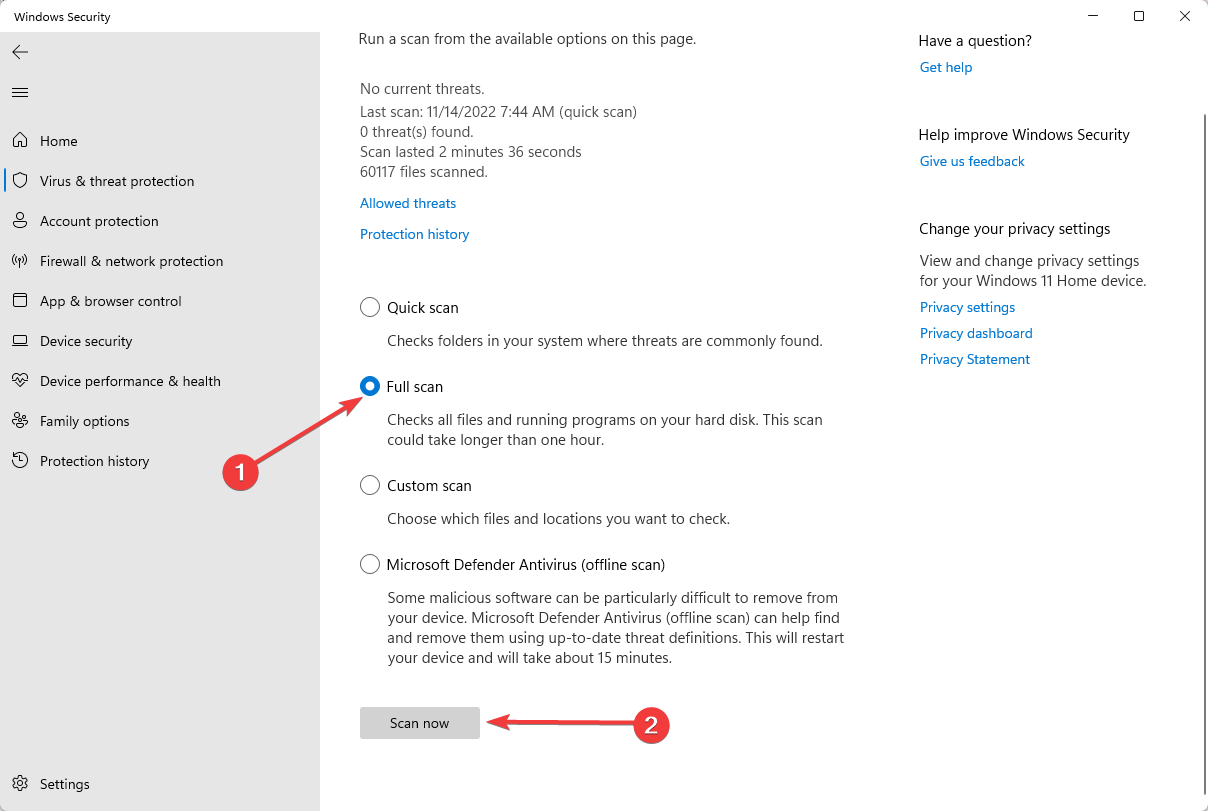
6. Run a full virus scan on your computer
- Press Windows + I to open the Settings app, then select Update & Security.
- Click on Windows Security and then select the Virus & threat protection option.
- Select Scan options.
- Tick Full scan and click the Scan now button.
Some malware agents are sneaky enough to infiltrate your machine and disable Internet access. The best action is to run a full system scan to find and eliminate pests.
Windows Security does a pretty good job. It’s free and already built into Windows 10, so you can give it a shot. But it might not detect zero-day threats.
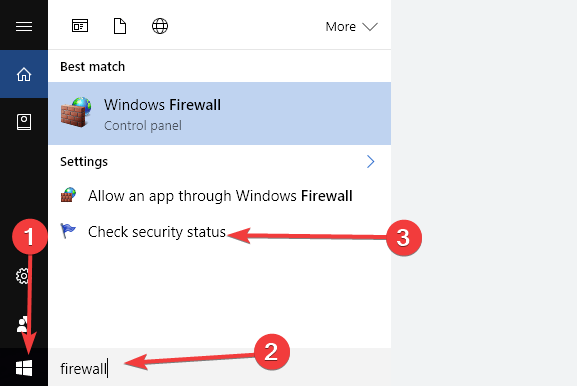
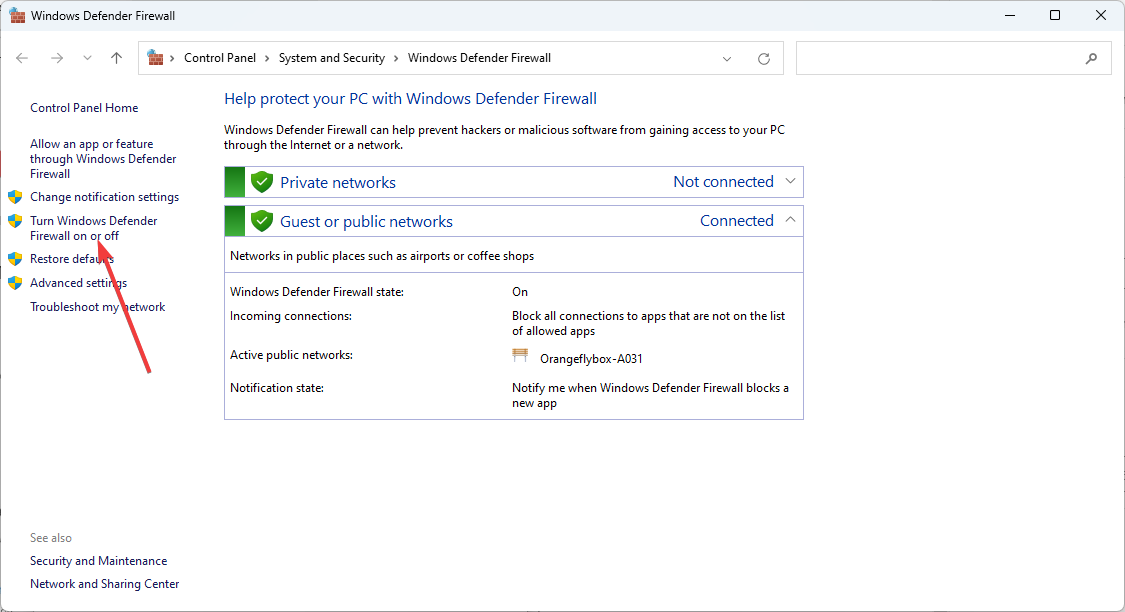
7. Temporarily disable your firewall
- Press the Windows key, type firewall, and select Check firewall status.
- Click Turn Windows Defender Firewall on or off.
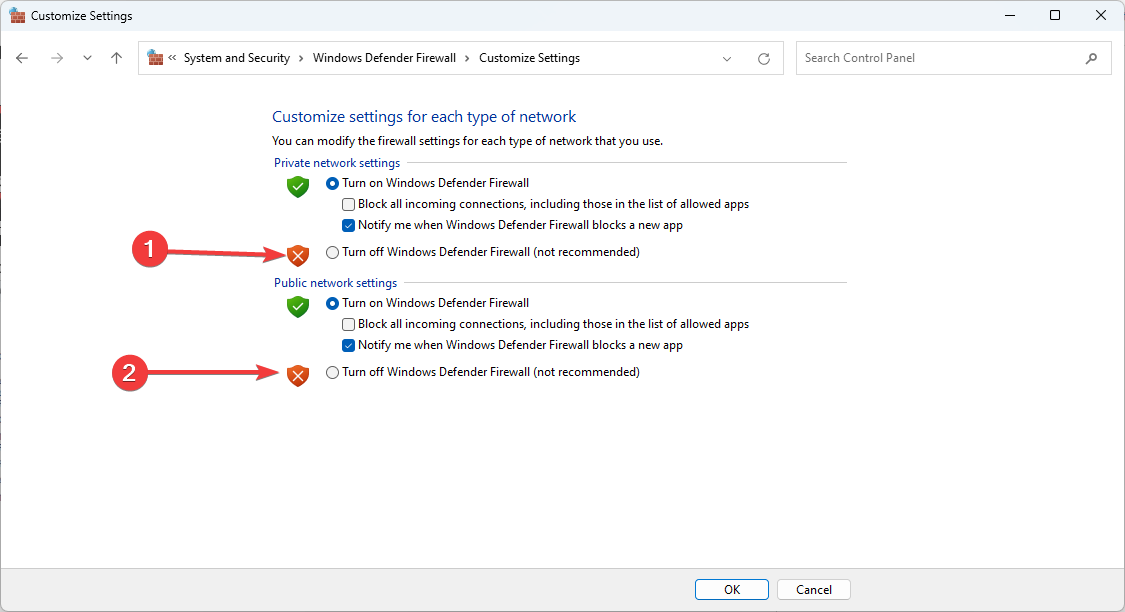
- Set Private network settings to Turn off Windows Defender Firewall (not recommended), and do the same for Public Network Settings.
- Click OK
Try to connect over WiFi now. If it works, it means that your firewall is the culprit.
If no WiFi networks are found on your system, any of the above solutions should come in handy.
It’s also a good idea to temporarily disable your firewall and restore its settings to default.
Did you fix your WiFi issue using the solutions above? However, did we forget to add an important step? Let us know in the comment section below.
