DaVinci Resolve High CPU Usage: How to Reduce It
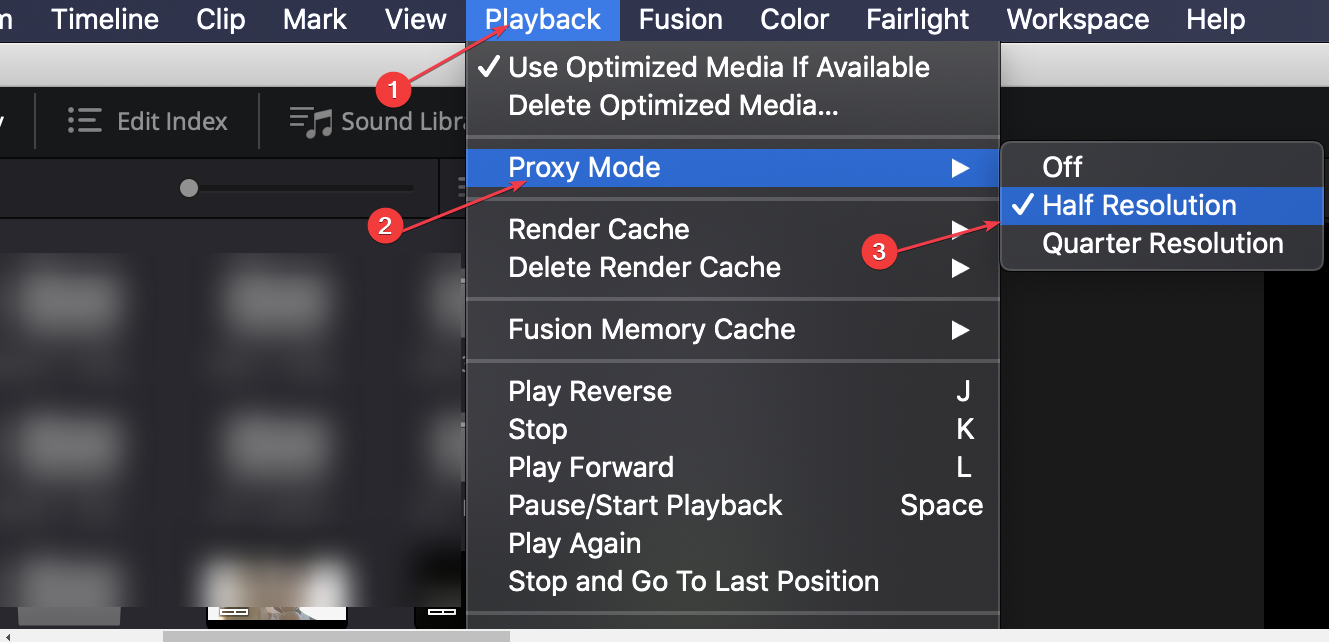
Reduce Playback resolution if this issue occurs on your device
- Ensure your PC meets the minimum system requirements before running DaVinci Resolve.
- Close unnecessary background programs to free up memory.
- It's recommended to adjust the GPU settings of the Davinci Resolve app to fit your PC specs.
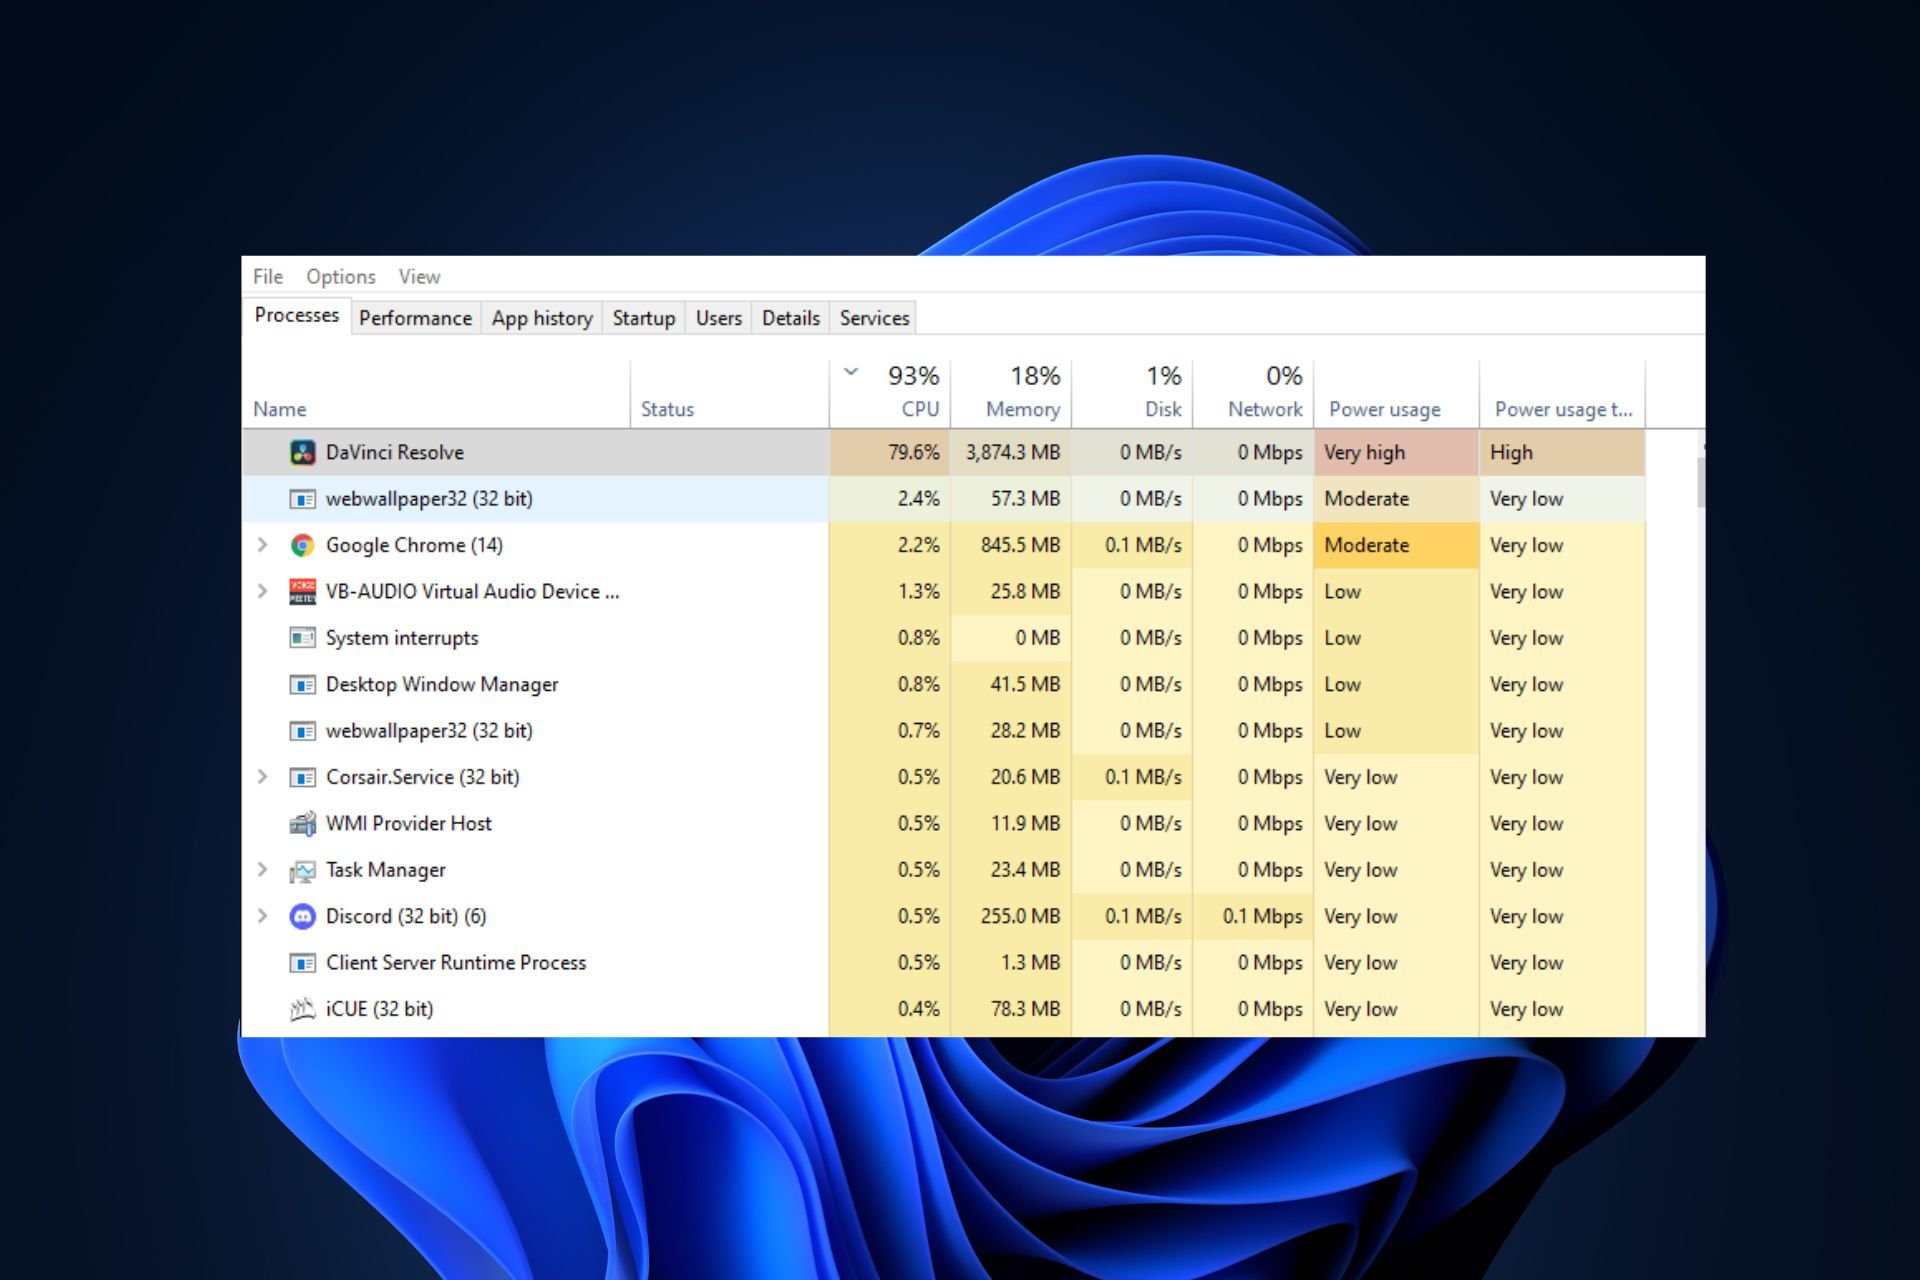
DaVinci Resolve is one of the most popular video editing software available today. However, users have experienced high CPU usage while using the app which can affect your PC’s health and performance.
If your experiencing high CPU usage in DaVinci Resolve, this article will provide you with steps to help you fix the error.
What causes DaVinci Resolve high CPU usage?
The following are some of the most common causes of high CPU usage in DaVinci Resolve:
- PC Doesn’t Meet Requirements: Most modern applications and programs have a specific minimum system requirements PC’s must possess before they can run the software. If your PC doesn’t meet the minimum system requirements for DaVinci Resolve, you’ll experience high CPU usage.
- Outdated Software: Developers usually release updates to fix errors and bugs. If your version of DaVinci Resolve is outdated, you’ll likely experience errors like high CPU usage.
- Corrupt Application Files: Sometimes, you can trigger app errors if the software has corrupt system files. The files can get corrupted by viruses, forced system shutdowns, and more.
How can I fix DaVinci Resolve high CPU usage?
Before we proceed with more advanced solutions, here are a couple of quick fixes you can attempt:
- Restart your PC.
- Close the DaVinci Resolve app and relaunch it.
- Scan for viruses and malware.
If the error persists after applying those quick fixes, here are a couple of advanced solutions you can attempt:
1. Check if your PC meets the Software Requirements
Like most modern software, DaVinci Resolve has a minimum system requirement that all PCs must meet to run the software efficiently. If your PC doesn’t meet the minimum system requirements for DaVinci Resolve, it can cause high CPU usage.
The minimum requirements for DaVinci Resolve to run smoothly on your PC are:
- 16 GB of system memory. 32 GB when using Fusion.
- Blackmagic Design Desktop Video 10.4.1 or later.
- Integrated GPU or discrete GPU with at least 2 GB of VRAM.
- GPU which supports OpenCL 1.2 or CUDA 11.
- NVIDIA/AMD/Intel GPU Driver version – as required by your GPU.
If your PC falls short in any of the above requirements, you’ll experience high CPU usage while using DaVinci Resolve.
2. Update DaVinci Resolve
- Double-click on the DaVinci Resolve shortcut on your Desktop window to open the app.
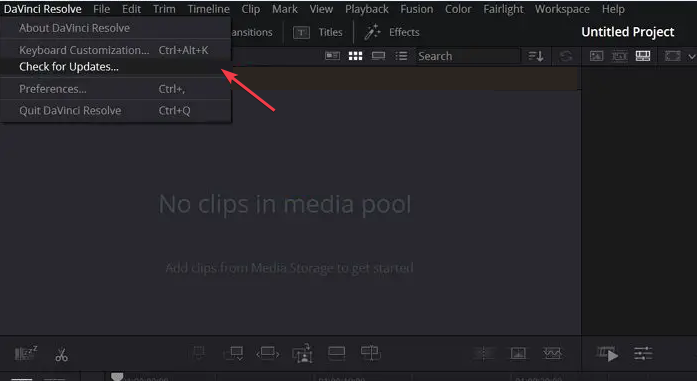
- In the popup window, click on the DaVinci Resolve menu bar, and select Check for Updates.
- If there are available updates, click on it to download and install it on your PC.
Sometimes, you can experience high CPU usage due to bugs in the previous updates. In such a case, you’ll need to update DaVinci Resolve to fix the error.
You can update DaVinci Resolve by navigating to the BlackMagic Design website, and check for the latest version of the program.
3. Close unnecessary background programs
- Right-click on the Start menu, and click Task Manager.
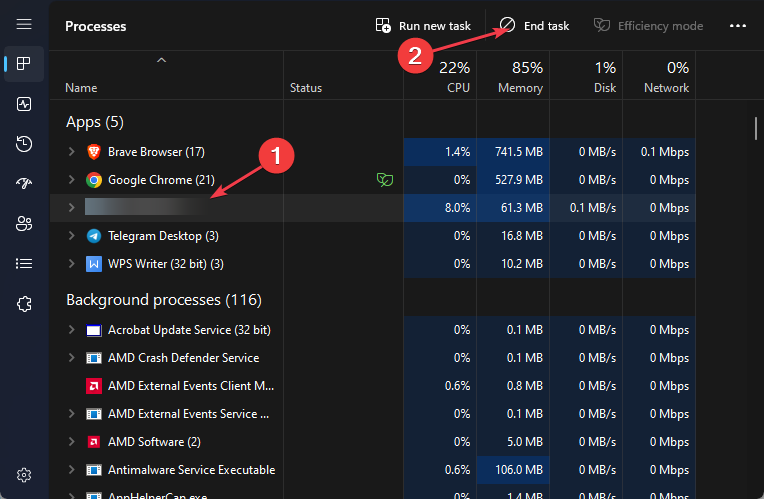
- In the Task Manager window, Click on any of the apps/services draining your memory, and CPU. , and select End Task.
- Repeat the process until you’ve closed all memory draining tasks.
4. Adjust GPU Settings
- Launch the DaVinci Resolve app by double-clicking the icon on the Desktop window.
- In the next window, click on the DaVinci Resolve menu bar, and select Preferences.
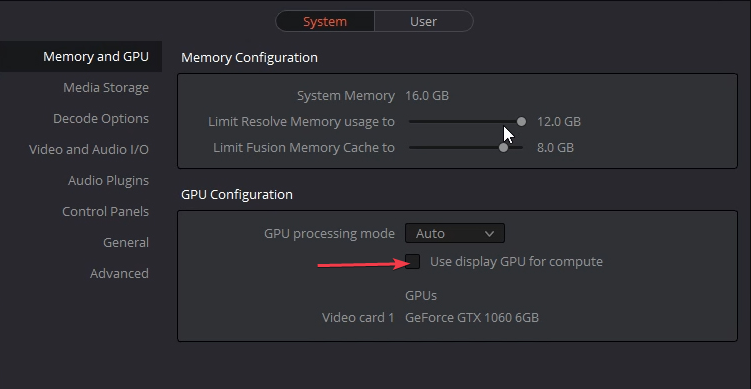
- Navigate to the Memory and GPU tab, and uncheck the button next to GPU processing mode under the GPU configuration section.
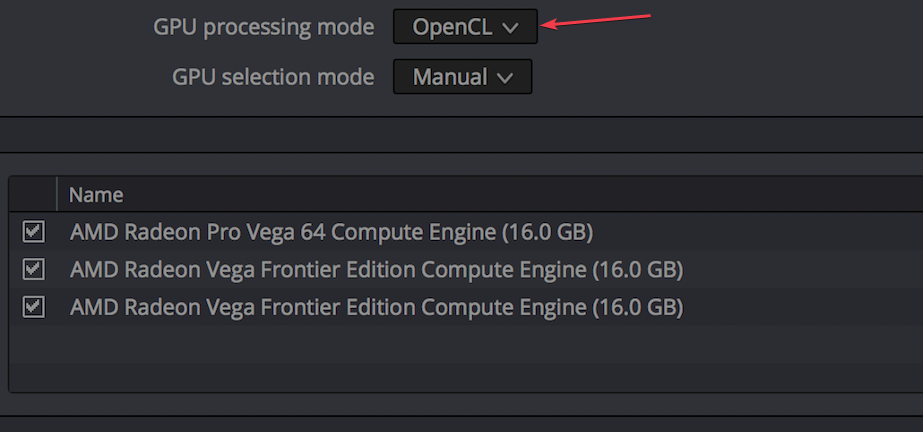
- Click the drop-down menu next to it, and select OpenCL or Metal. Click Save to confirm your changes.
- Restart the DaVinci Resolve app to see if the error is fixed.
If your Graphics card isn’t as powerful as the ones needed to run maximum resolution, you’ll need to adjust your GPU settings to fix high CPU usage with DaVinci Resolve.
5. Reduce Playback resolution
- Launch the DaVinci Resolve app and click on the Playback option in the menu bar.
- Hover over the Timeline Proxy Resolution, and select Proxy Mode.
- Select Half or Quarter resolution to optimize the performance of the app.
In some cases, the Playback Resolution is set to High by default. For high-end PCs, this doesn’t affect the PC’s performance, but for lower PCs, you’ll need to reduce the Playback Resolution to fix high CPU usage.
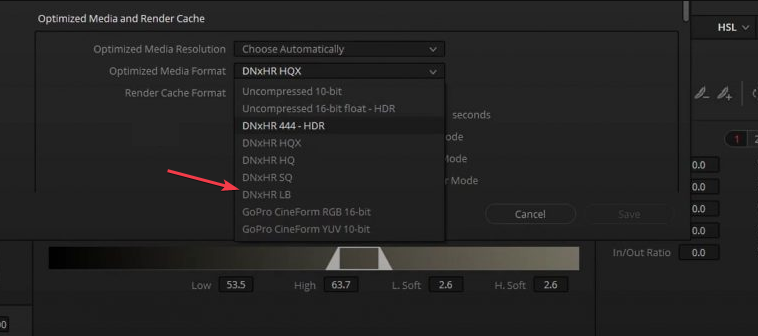
6. Adjust the settings to Optimized Media
- Launch the DaVinci Resolve app and press Shift + 9 to open Project Settings.
- Navigate to Master Settings, and locate the Optimized Media and Render Cache section.
- Select DNxHR from the drop-down menu or choose DNxHR LB for smaller size and faster media generation.
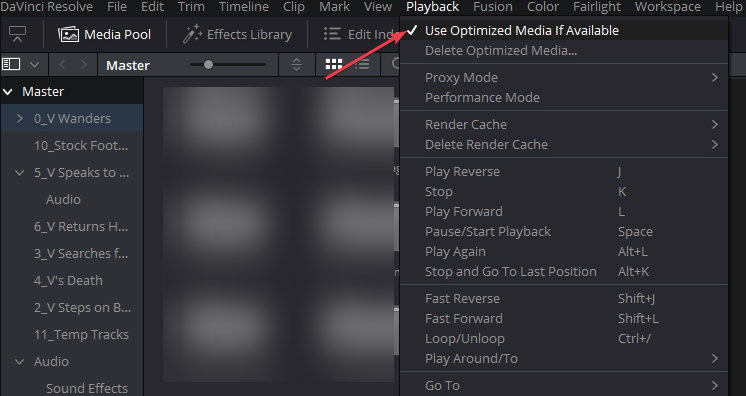
- Navigate to the Media page in the Media pool, right-click on the clip you wish to optimize, and select Optimize Media.
- Click Playback at the top of the window, and select Use Optimized Media if available.
- Close the app and relaunch it to see if the error is fixed.
The media you import into DaVinci Resolve must support your PC’s specs and resources. Full HD is the recommended resolution for running DaVinci Resolve, but if you opt for 4K or higher resolutions, you’ll experience high CPU usage.
Therefore, you’ll need to convert the media to an optimized resolution that doesn’t affect your PC’s performance.
High CPU usage in most applications is triggered when your PC doesn’t meet the minimum system requirements. However, as we’ve seen in this article, it can also be triggered by other factors.
Nevertheless, you can fix the error by using the steps outlined in this article. If you’ve previously resolved the error using alternative methods, you can let us know in the comments below.
Still experiencing issues?
SPONSORED
If the above suggestions have not solved your problem, your computer may experience more severe Windows troubles. We suggest choosing an all-in-one solution like Fortect to fix problems efficiently. After installation, just click the View&Fix button and then press Start Repair.
