Acer fan Control: 3 Easy Methods to Adjust the Fan Speed
Everything you need to gain full control of your Acer fan speed
- It may be required to adjust the fan speed on an Acer laptop under certain circumstances.
- To control Acer laptop fan speed, you can use different software or do it manually from your BIOS.
- Another option is to tweak some settings in the Control Panel.
Your Acer laptop uses a fan to cool down the Central Processing Unit (CPU). This stops your computer from overheating.
Every CPU fan has a specific speed, measured with RPM (Rounds Per Minute), set by its manufacturer. However, there are times when you want to control your Acer laptop fan speed.
This article shows you how you can achieve this.
Can I manually control my laptop fan speed?
There are various methods for controlling your laptop fan speed manually. For example, you can use the Control Panel and tweak the settings in BIOS.
Below are some of the benefits of controlling fan speed:
- Increases reliability: If you want to ensure the reliability and longevity of your processor, you need to control the fan speed accordingly. This is because it can reduce overheating and provide the necessary cooling for your processor to run smoothly.
- Decreases system noise: Another benefit of fan speed control is reducing unnecessary Acer fan noise.
- Reduces power consumption: If your PC is overheating, it consumes more power. This is why you must control your fan speed to minimize overheating and its effect. When the control feature is coupled with a fan speed monitor, you can effectively increase your PC’s battery life.
How do I use Acer fan control?
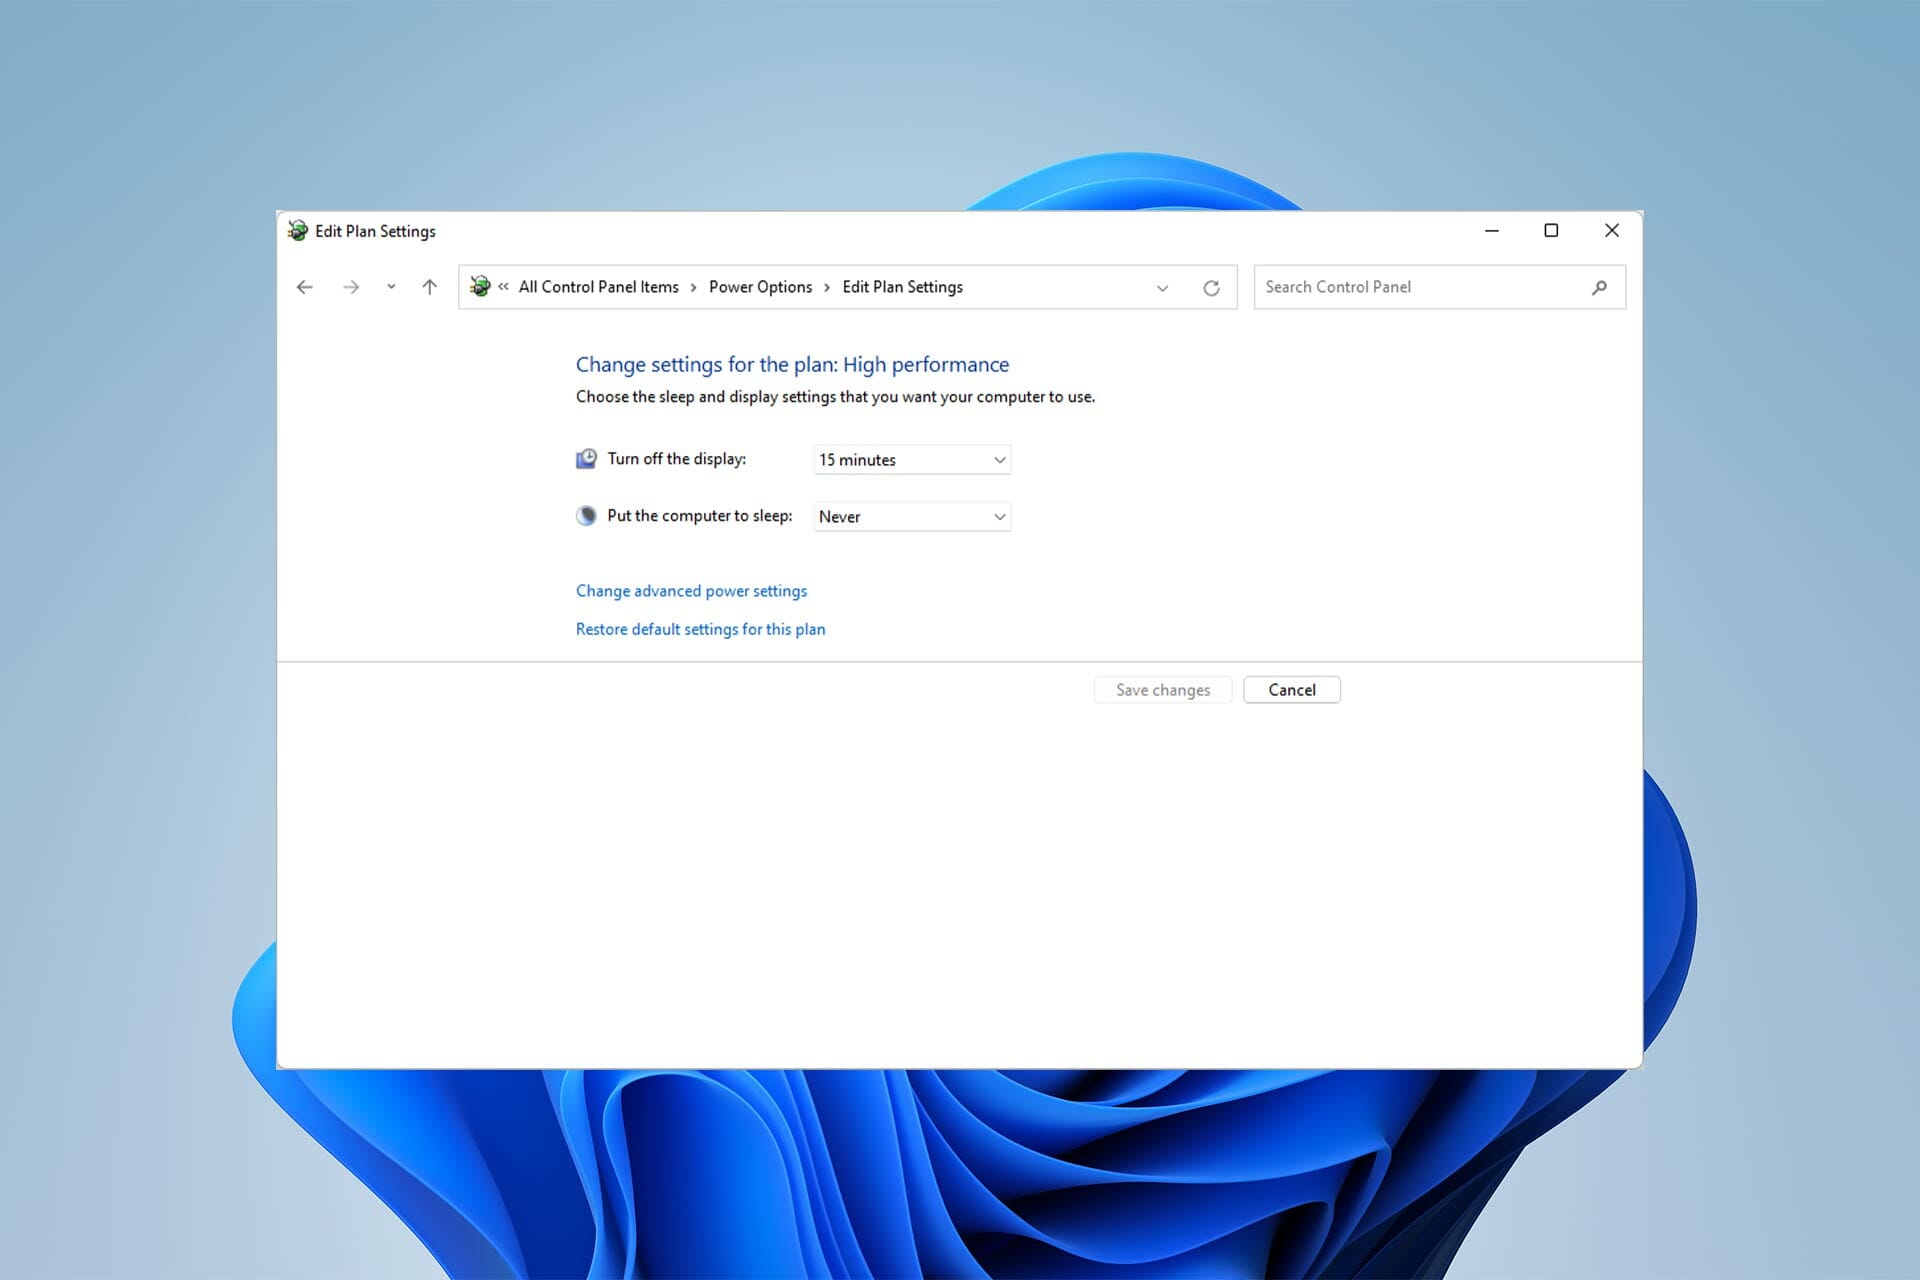
1. Change the system cooling policy
- First, click on the Start menu, search for Control Panel, and click on Open.
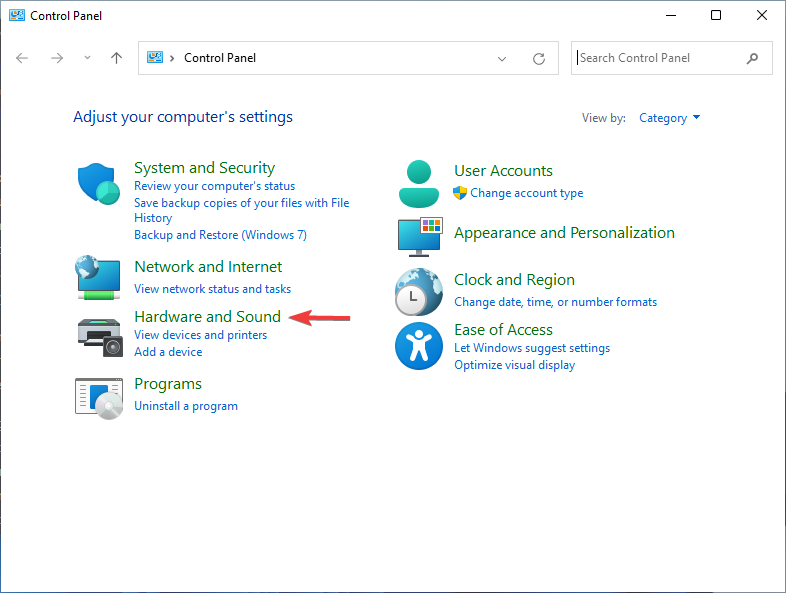
- Then, click on Hardware and Sound and then Power Options.
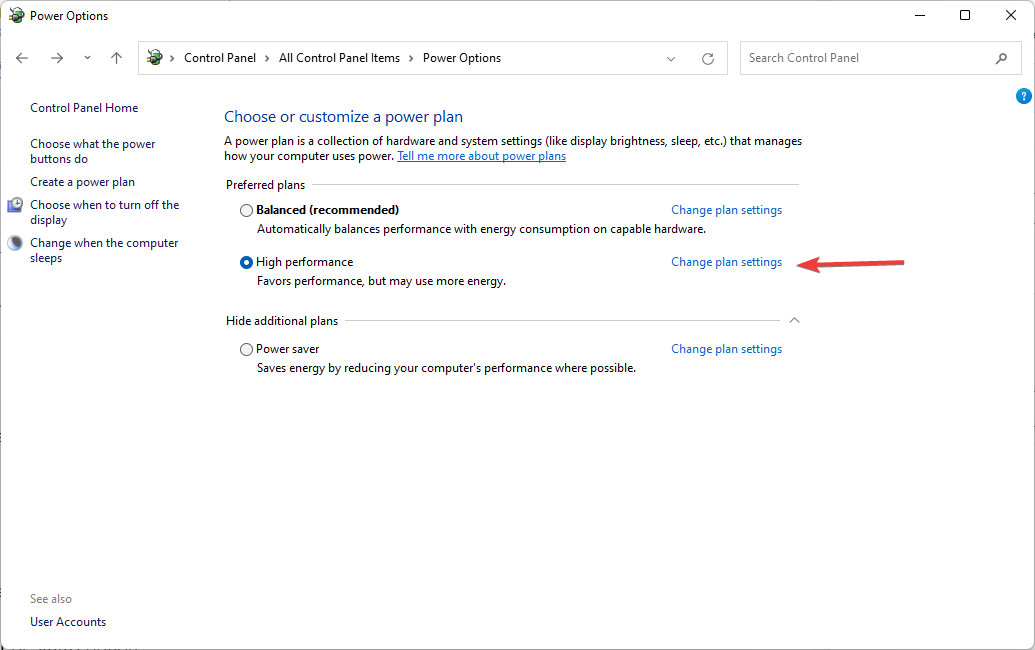
- Click on Change Plan Settings.
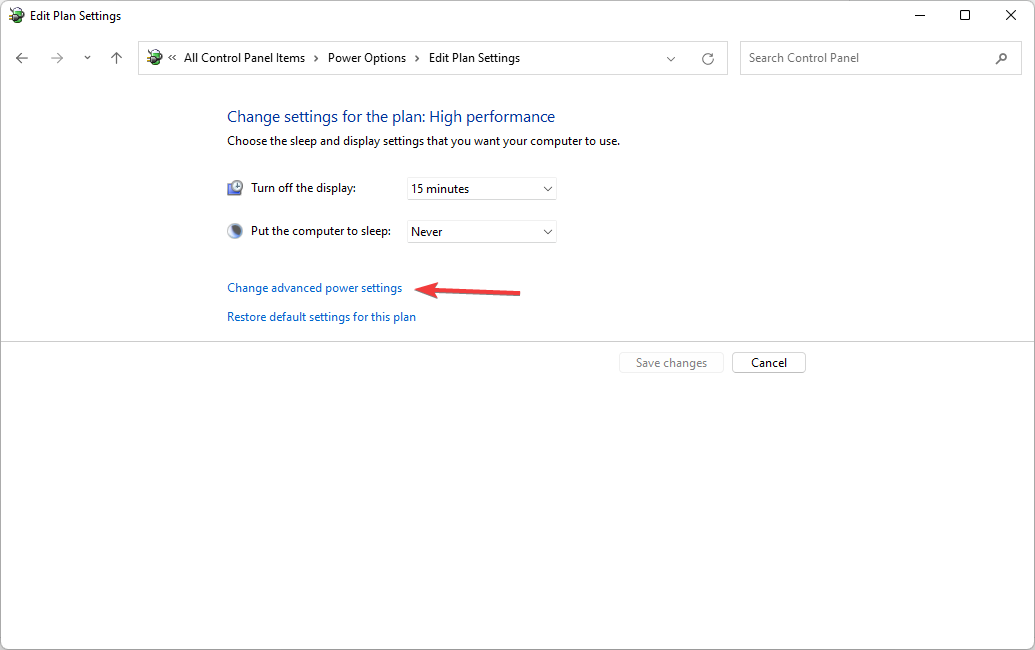
- Then click on Change Advanced Power Settings.
- After that, under the Advanced Settings tab, click on the plus symbol under Processor Power Management.
- Choose System Cooling Policy from the menu. Then, click on the down arrow under System Cooling Policy.
- Finally, select Active from the menu to increase the speed of your CPU fan. Then, click on the OK button.
2. Change BIOS settings
- Start/Restart your Acer laptop.
- Then, based on your motherboard manufacturer, you will need to repeatedly press the Del, F2, F10, and F12 keys to load the BIOS menu.
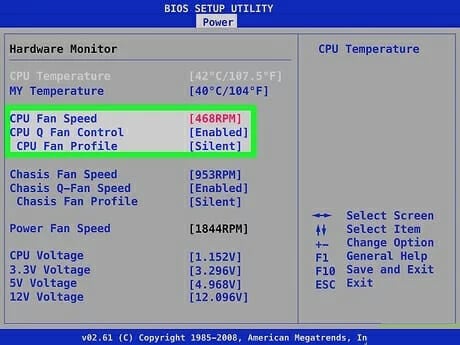
- Using the arrow keys, head over to the Monitor or Status option.
- Next, open Fan Speed Control and select Fan Control Setting.
- Choose the fan whose speed you want to change, and choose your desired speed from the list. Finally, press Enter and save the settings.
The second method on this list is to use the Acer BIOS smart fan control. This method requires you to know what you are doing and avoid making unnecessary changes to your BIOS settings.
3. Use Acer fan control software
Acer fan control software helps you control Acer laptop fan speed inside your Windows environment.
However, its effectiveness is limited by your firmware. For example, to control fan speed in an Acer Nitro laptop, you can use NitroSense.
NitroSense software enables you to check your CPU and GPU temperatures. You can also adjust fan speed and power plan settings.
If you use Acer Aspire 7 laptop, you should use the Acer Aspire fan control utility called Acer Quick Access.
It is a software tool developed by Acer that lets you control different settings, such as laptop fan speed, from within your Windows environment. So there are other options available to you.
We have reached the end of this article on controlling Acer fan speed. Also, if your CPU fan is not spinning, check out this article.
Let us know whether you can control the fan speed on your Acer laptop in the comments section below.
