FIX: File Explorer Crashes When Searching in Windows 10 & 11
- If File Explorer crashes when searching in Windows 10, then this post will help you resolve the problem.
- Deleting Registry Keys or disabling cloud storage extensions are two efficient ways to solve the issue.

Windows 10 is mostly a stable system that can be installed on both portable and desktop devices. Even though Microsoft tried to address all the Windows issues by releasing different OS updates, one problem is still present in the platform: File Explorer crashes during searches.
Why does File Explorer keep crashing? Improper system settings, permission issues, or graphics card driver errors are all potential causes to take into consideration.
In case you are experiencing multiple File Explorer (explorer.exe) issues, then you should follow this tutorial in order to learn how to easily fix these bugs and how to enjoy a stable and smooth OS.
The troubleshooting solutions detailed here will address the most common Explorer bugs and issues from Windows 10, thus don’t hesitate and give them a try as soon as possible.
How can I fix the Windows 10 File Explorer crash issue?
1. Delete Registry Keys
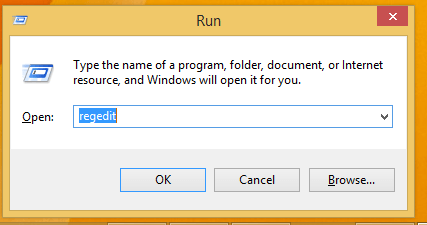
- To access the Registry Editor in Windows 10, press Windows + R keyboard shortcut to open the Run Dialog box.
- Enter regedit in this box and press OK.
- In the prompt asking for permission, don’t hesitate to click Yes.
- Go to:
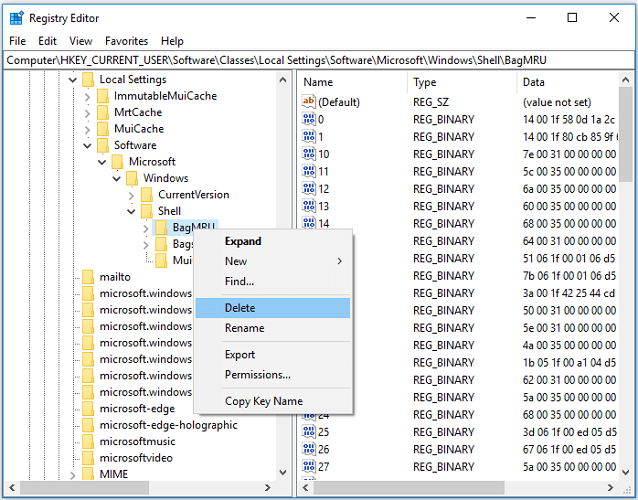
HKEY_CURRENT_USERSoftwareClassesLocal SettingsSoftwareMicrosoftWindowsShell - Expand Shell and delete BagMRU and Bags by right-clicking the folders and choosing Delete.
- Finally, you need to restart your computer and confirm that File Explorer doesn’t crash any longer.
Windows Registry remains one of the main components of the Windows operating system. The Bag keys store information about each folder including its display settings, so don’t hesitate to delete these keys.
This will reset the settings for all folders on your computer. You may safely do so as long as Windows will automatically rebuild them after a restart and helpfully fix the issue you’re currently facing.
2. Disable cloud storage extensions
- On your computer, use the keyboard shortcut Windows Key + R to launch the Run window.
- On the Run box, type regedit and click OK.
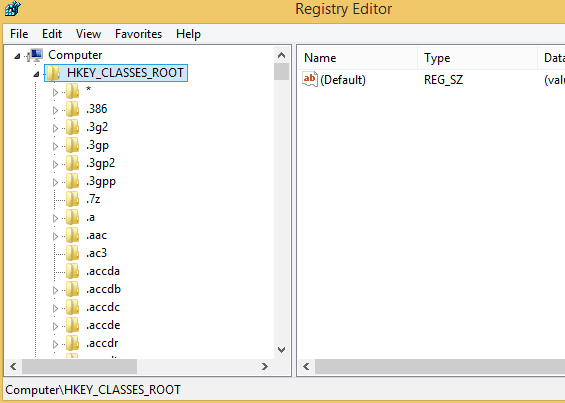
- From left panel of Registry Editor go to HKEY_CLASSES_ROOT > CLSID{8E74D236-7F35-4720-B138-1FED0B85EA75} ShellFolder key.
- Right-click on the ShellFolder key, head towards Permissions and select advanced.
- Tap on the Owner and select change. You should be the owner, so type in your username and confirm.
- Under your username, check to Replace owner on sub containers and objects.
- Furthermore, from the bottom of the same window check Replace all child object permissions with inheritable permissions from this subject, then click OK.
- You will be set back on the Permissions section for the SellFolder window.
- From there, check the full control box and click OK – now you will be back on Registry Editor.
- From the right pane of Registry Editor, click on Attributes key and set the value to 0.
- Save your changes and reboot your Windows 10 device.
3. Scan system directory and repair issues automatically
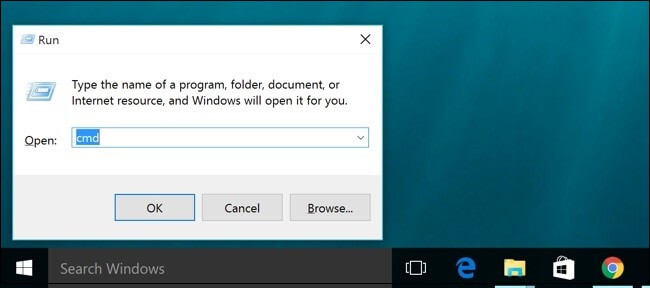
- Press the Windows key + R key, which opens the Run dialog box.
- On the Run box, type cmd and click OK.
- On the cmd window, type sfc /scannow and press Enter.
- Wait while System File Checker is repairing your computer.
- When it completes the procedure, restart your PC. Check if the issue is resolved at the next system startup.
If File Explorer still crashes on startup, let the System File Checker built-in administrative tool step in. You may actually run this SFC command every time when troubleshooting a buggy Windows system.
When all previous methods failed, our last recommendations are to take into consideration clearing the File Explorer History or updating the graphics card driver.
The truth is that the majority of Windows 10 users have outdated drivers. Be a step ahead using this guide to update drivers like a pro.
Congratulations, you have successfully fixed the File Explorer crashing issue from your Windows 10 OS. Don’t forget to share your experience with us by using the comments field from below.


