How to View Active Directory Groups on Windows 10 & Windows 11
View Active Directory groups easily on Windows
- Active Directory from Microsoft is one of the most popular directory services that your company may need.
- You may have noticed that sometimes, it may not be easy to view the AD groups from Windows 10 or 11.
- However, you can manage AD and view groups using a third-party tool or view them using existing features of Windows, as described in this article.
If you want to view Active Directory groups on Windows 10 and 11, this article will help you with all the related steps.
The Active Directory or AD from Microsoft is one of the most popular directory services in the industry. It is like a network address book that helps to search and find users, devices, groups, apps, etc. However, finding things on it may be easier. But how to do it from Windows 10?
Do I need any tools to manage Active Directory?
In general, you don’t need. But, to manage AD with a better experience, you may need to use a third-party tool. Often, these tools come with the ability and automation, which is hard to achieve manually.
Which are the recommended Active Directory tools?
1. ADManager Plus
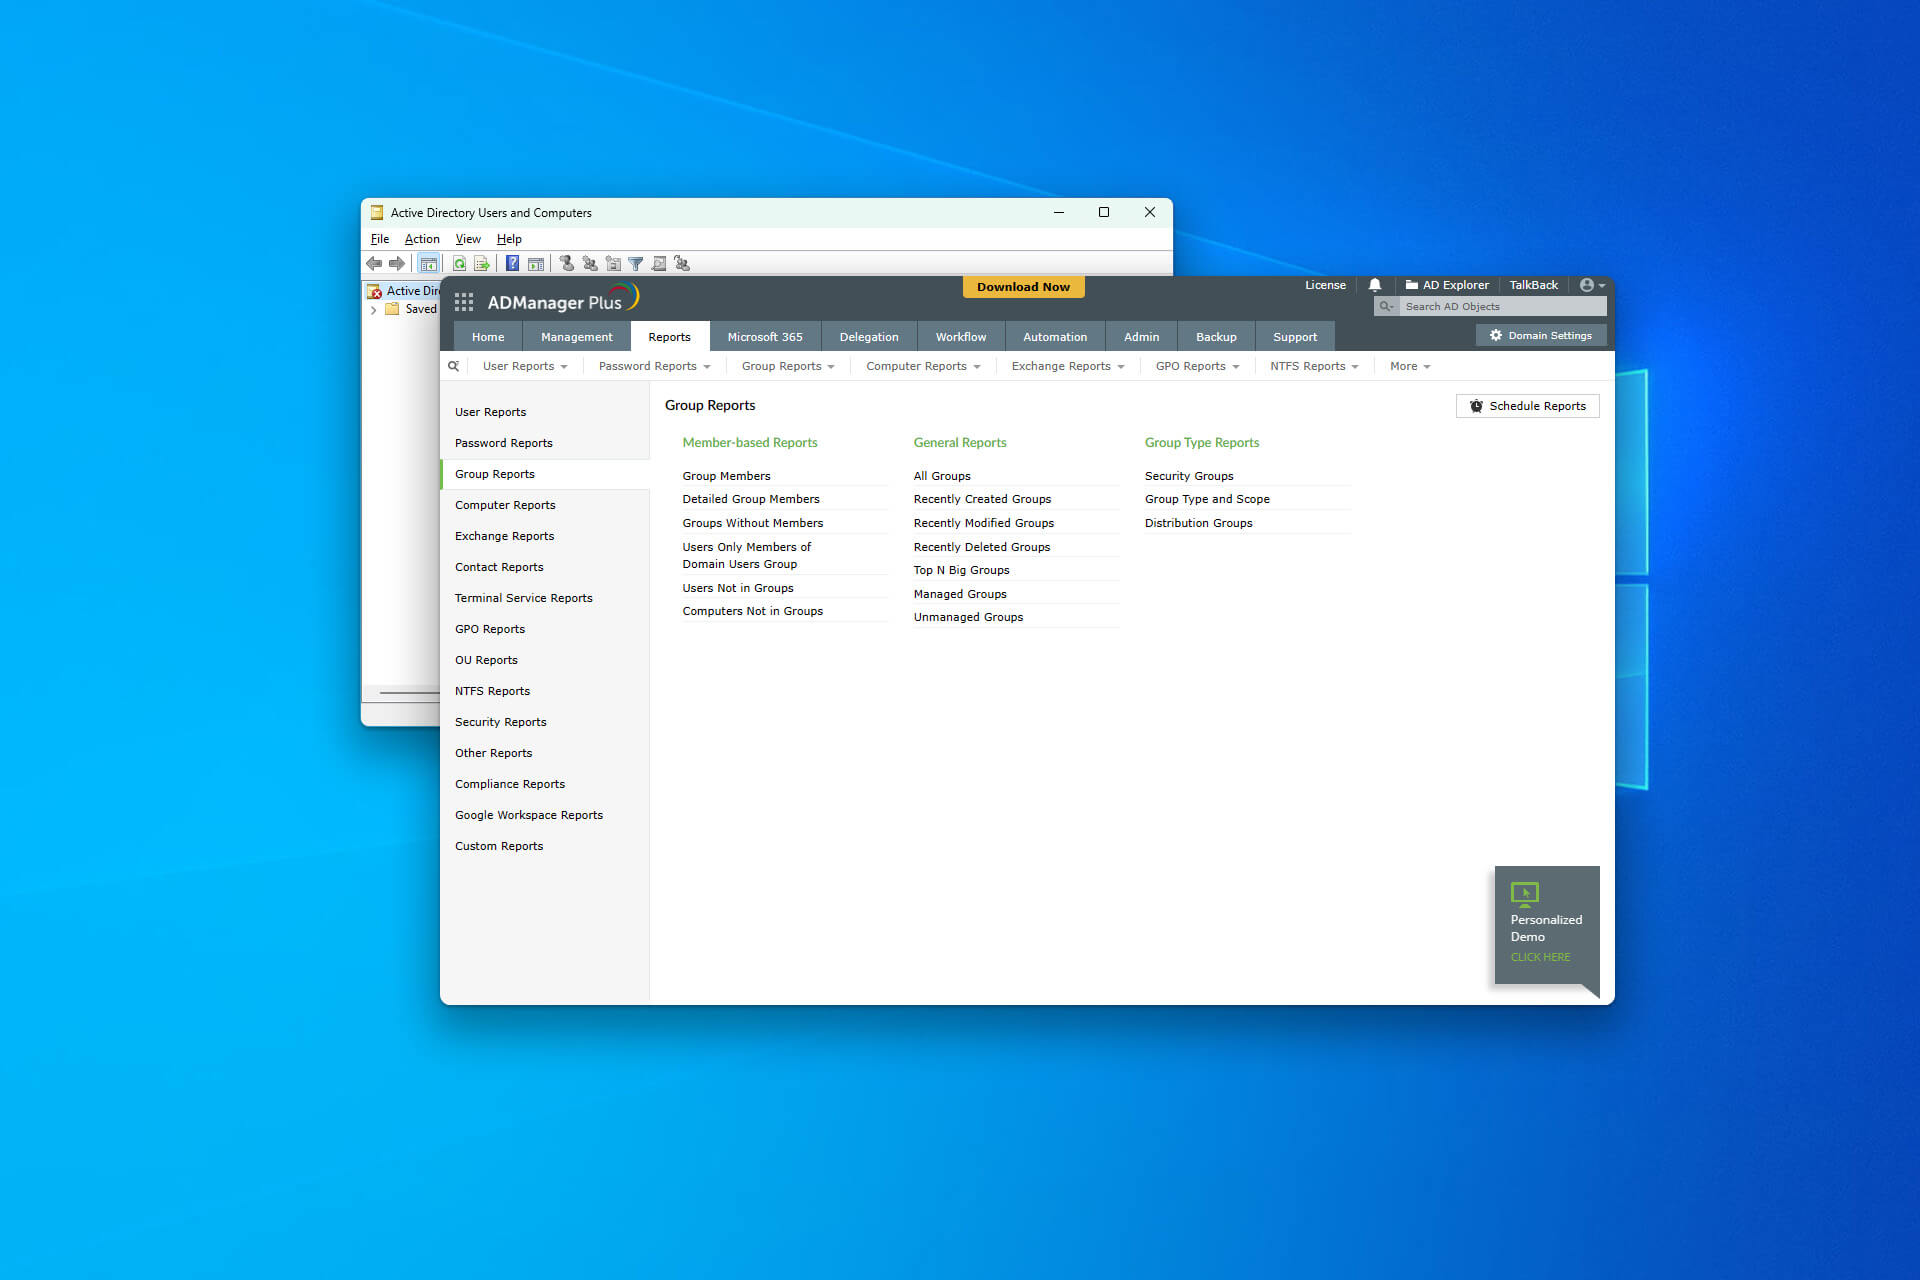
If you want to manage Active Directory and generate reports, ManageEngine’s ADManager Plus is one of the best options available in the industry right now. Using this tool, you can do many things, including viewing AD groups.
2. ADAudit Plus
The ADAudit Plus is from the same company, ManageEngine. However, this product is a bit different. The main focus of this tool is reporting. You can also view groups based on various filters on this tool.
How can I view Active Directory groups on Windows 10 & 11?
You can easily view any AD users, groups, etc. However, before that, you must ensure the following things:
- Make sure a proper domain controller name is configured for your computer or Windows server.
- Ensure that there is no configuration error on your computer or server.
After ensuring everything is OK, you can continue using any AD tools to view and manage groups. In this case, you can follow these methods.
1. Use ADManager Plus/Audit Plus
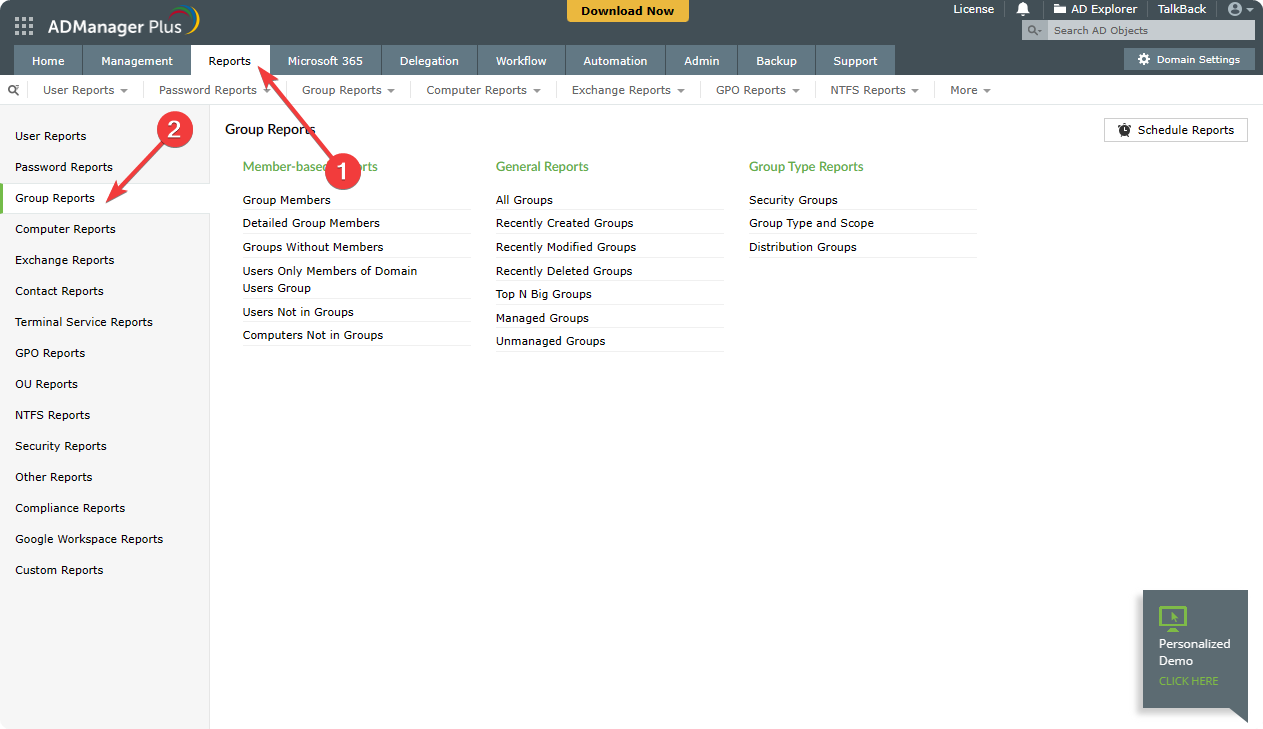
- Go to the Manager Plus portal and log in.
- Click on Reports and go to Group Reports.
- Then, click on All Groups.
These steps are for ADManager Plus. However, if you use ADAudit Plus, you may not find the options exactly like our steps to view Active Directory groups. But, it will be mostly similar.

ADManager Plus
The ADManager Plus is a very powerful tool that can help you to manage your Exchange server in a more user-friendly way.2. Manually
2.1 Enable necessary services
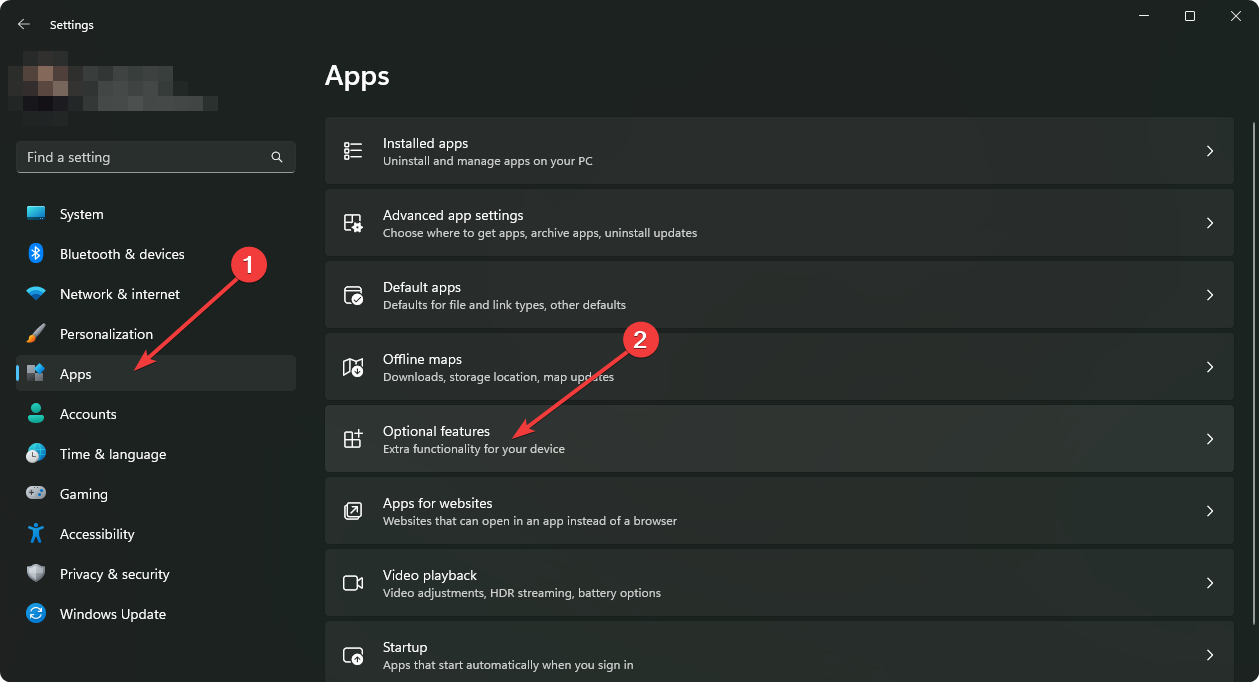
- Press Win + I to open Windows Settings.
- Go to Apps and click on Optional features.
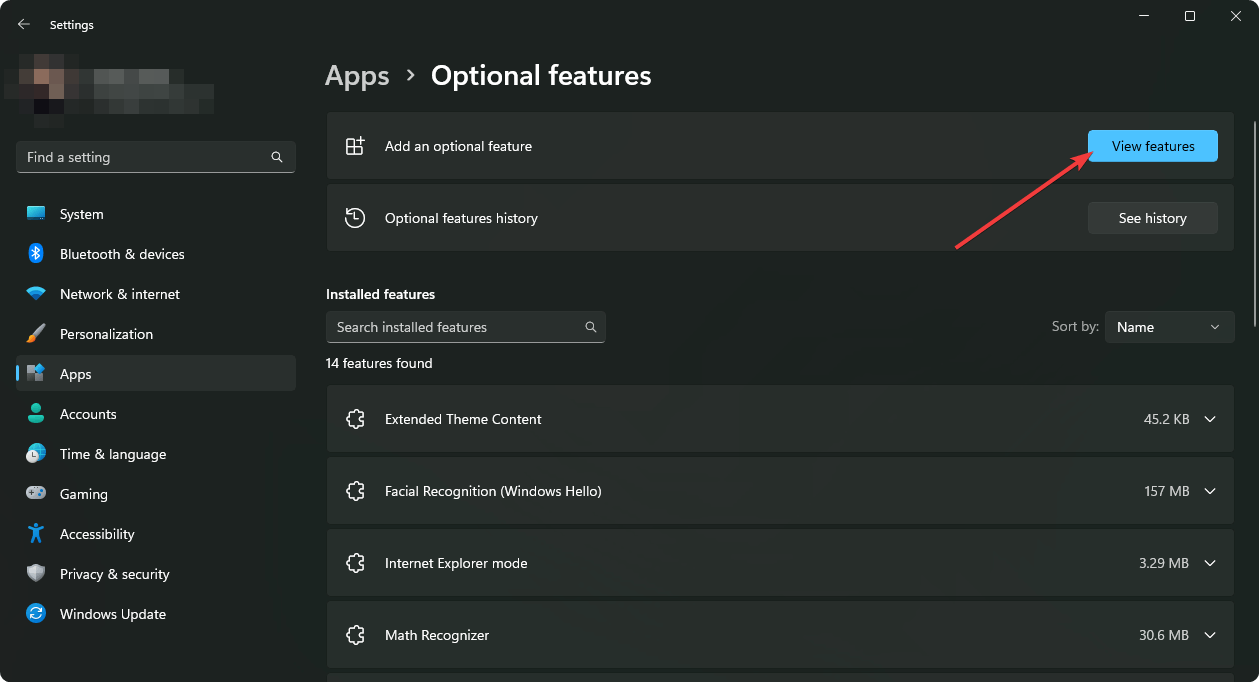
- Click on View features, as shown in the screenshot.
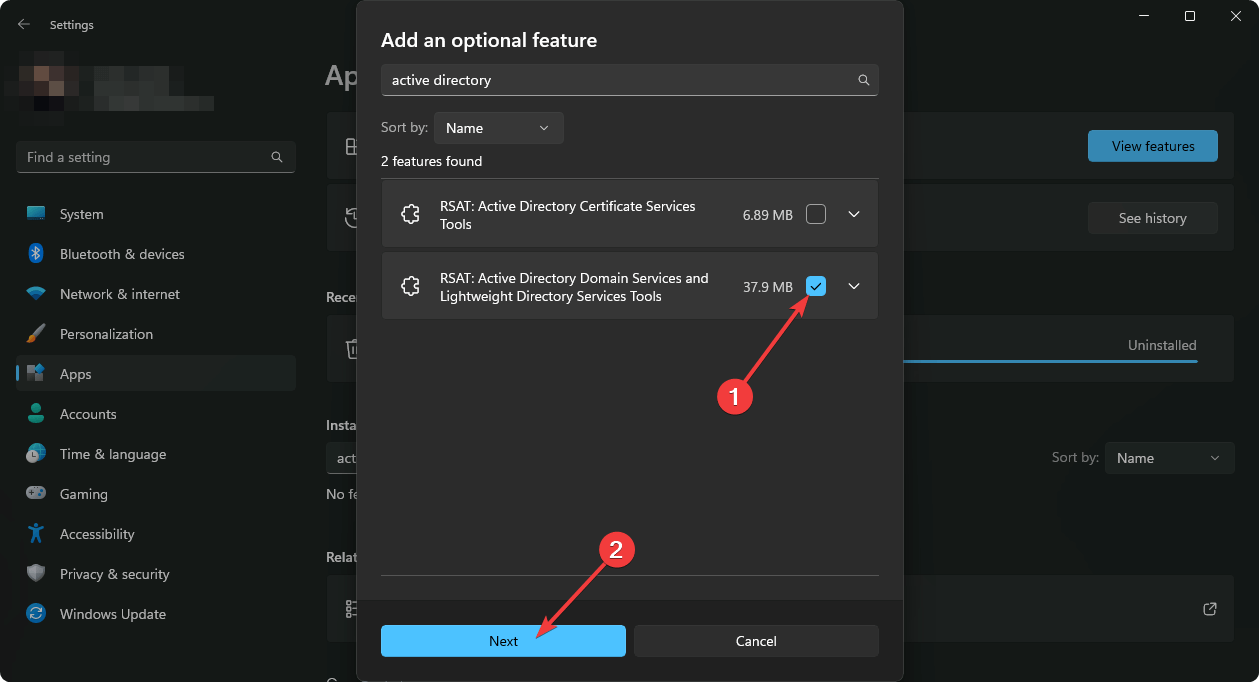
- Search for Active directory.
- Choose Active Directory Domain Services and Lightweight Directory Services tools and click on Next.
- Finish the installation process.
2.2 View AD Groups
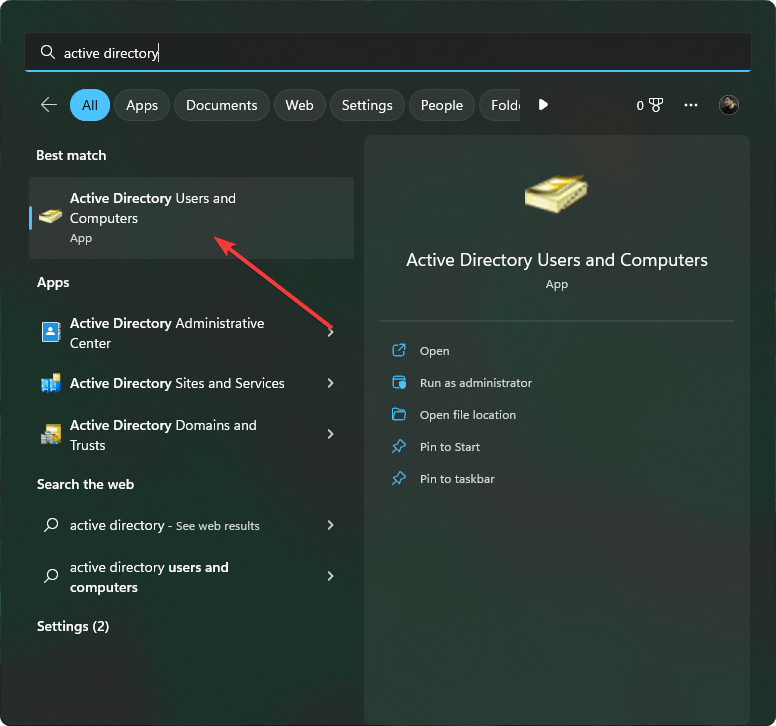
- Open the Start Menu, search for the active directory users and computers and open it.
- Now, you can view all of the AD groups there.
- You also can open Run by pressing Win + R on the keyboard.
- Then, type the following command and hit Enter:
rundll32 dsquery.dll,OpenQueryWindow - There, you can search for any users or AD groups easily.
You also may need to enable additional features based on your needs on Windows 10 or 11. However, the above steps will surely help to view the Active Directory groups.
Because of some complexity, we suggest you use any of the tools mentioned in this article. We have tested and found them very useful, like many other users worldwide.
This article has explained how can you view Active Directory groups on Windows 10 and 11. If you have any opinions or suggestions, feel free to let us know in the comment box.
Still experiencing issues?
SPONSORED
If the above suggestions have not solved your problem, your computer may experience more severe Windows troubles. We suggest choosing an all-in-one solution like Fortect to fix problems efficiently. After installation, just click the View&Fix button and then press Start Repair.
