Error 0x80071129 in OneDrive? 3 Ways to Fix it
OneDrive errors can be quickly tackled thanks to our solutions below
- Error code 0x80071129 often arises because of a corrupted OneDrive cache or On-Demand junction file.
- Some users have confirmed running a disk scan can fix OneDrive error 0x80071129.
- As an alternative, you can also find the exact steps that will help you reset OneDrive to fix this dreaded error.
OneDrive is the default cloud storage app that comes with Windows 11/10. That app has an On-Demand sync feature that enables users to view and access files within their OneDrive cloud without downloading them.
However, some users have reported a OneDrive 0x80071129 error arising when they try to move, copy, or extract files and apply folder properties with the On-Demand feature enabled.
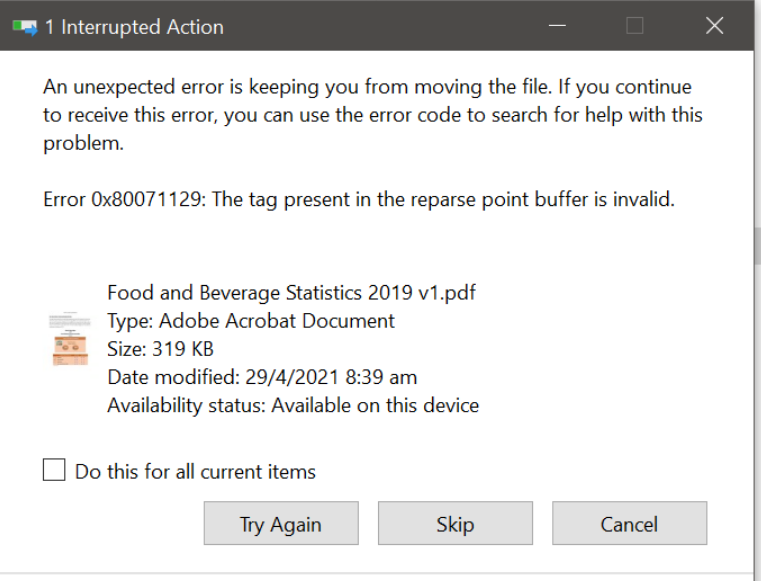
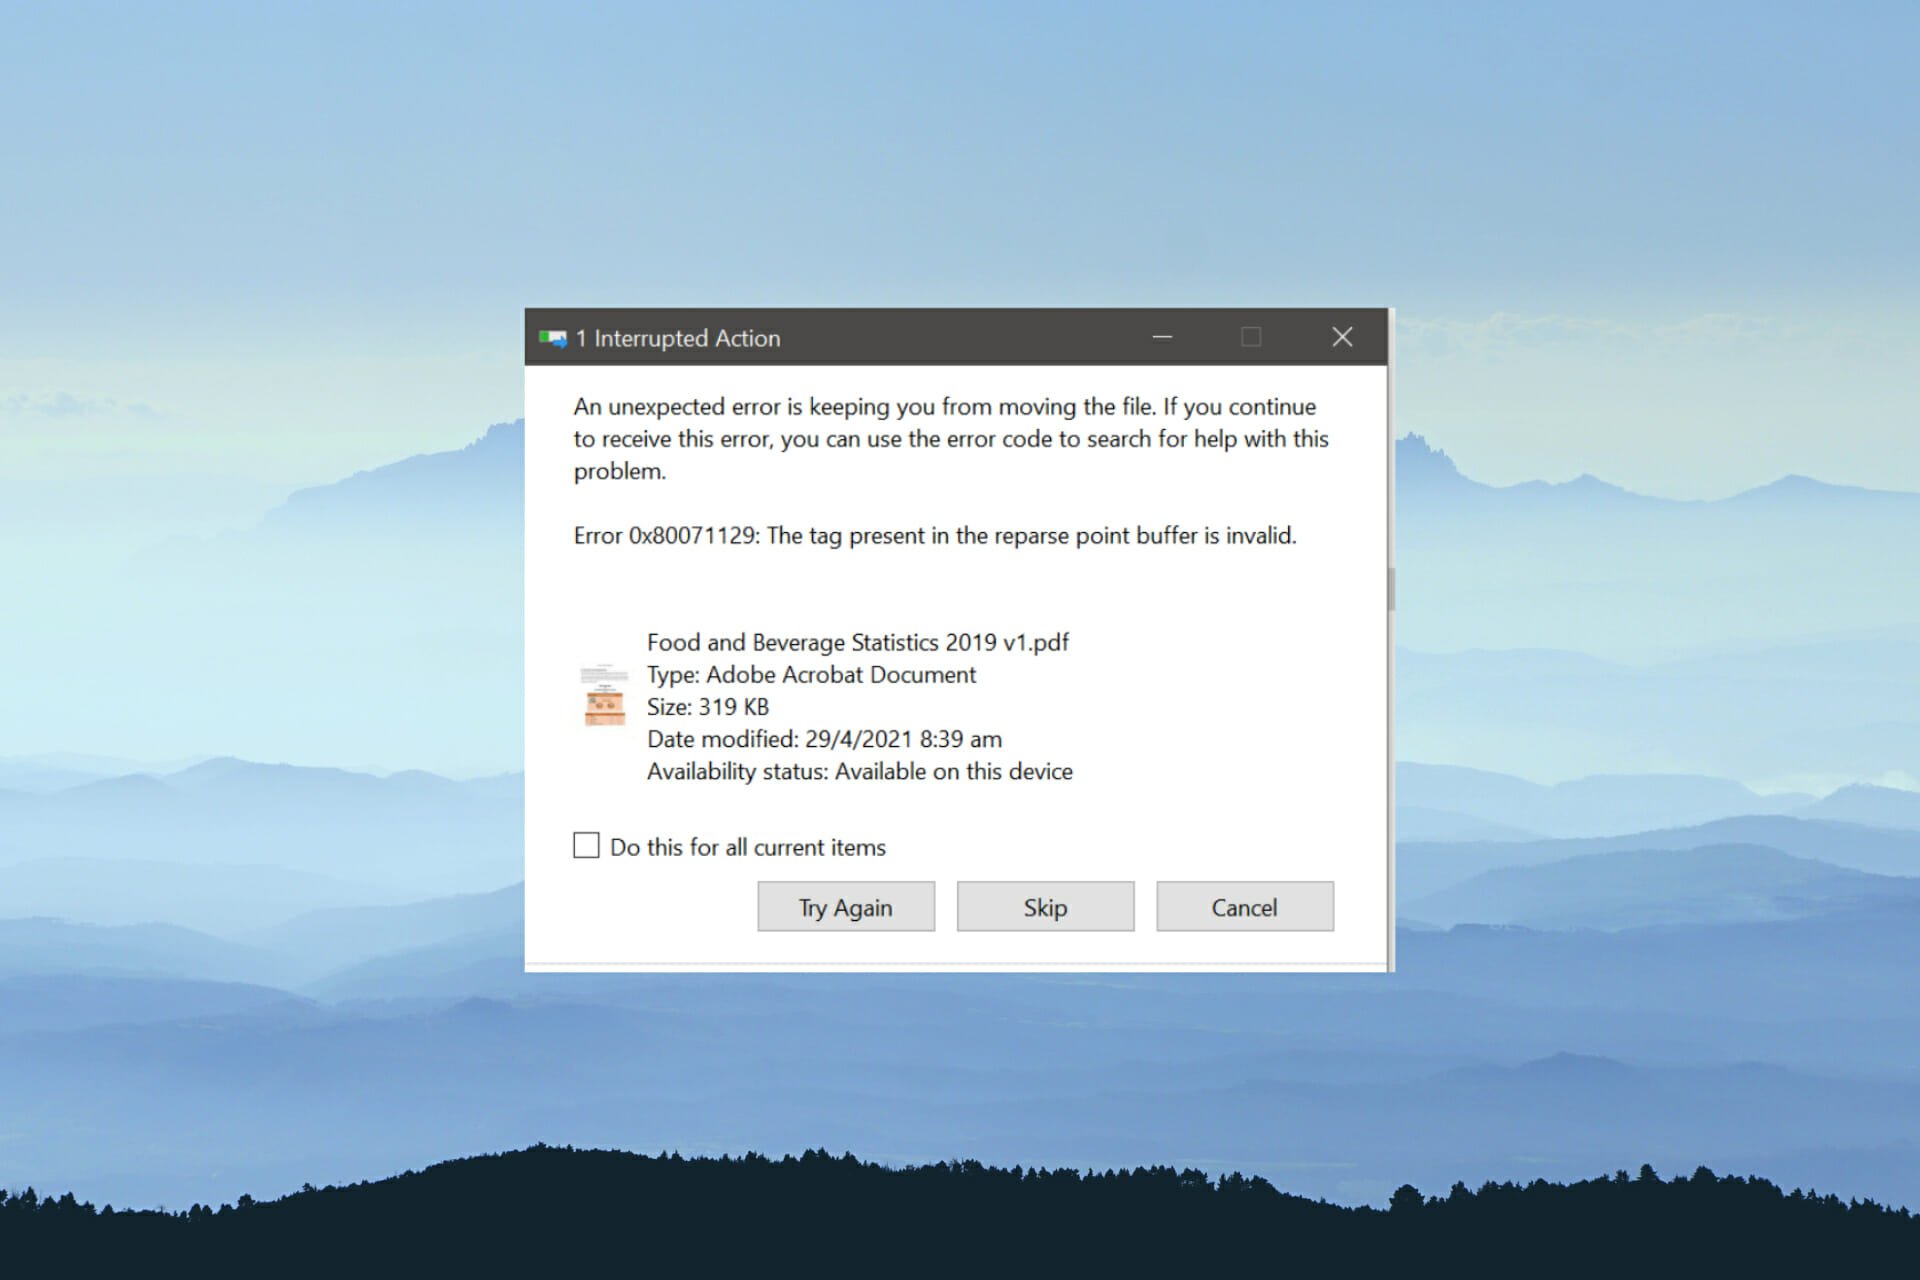
That error displays the reparse point buffer is invalid message shown directly below when it arises. Users can’t carry out OneDrive file or folder actions whenever that issue occurs.
So, for those wondering how do you fix Error 0x80071129: The tag present in the reparse point buffer is invalid, keep reading to find out!
What causes OneDrive error 0x80071129?
The first most probable cause for error 0x80071129 is a corrupted cache. OneDrive’s cache might include some corrupted temporary files. Clearing that cache by resetting OneDrive would then be a likely solution.
The 0x80071129 error message’s description says The tag present in the reparse point buffer is invalid. To put that in clearer English, that description highlights that OneDrive has some corrupted (damaged) On-Demand junction files. CHKDSK scans can fix OneDrive’s junction files.
How do I fix error code 0x80071129?
1. Run a CHKDSK scan
- Open your Start menu, click in the search box, and type cmd there to search for the Command Prompt. Launch it with elevated rights by clicking Run as administrator for its search result.
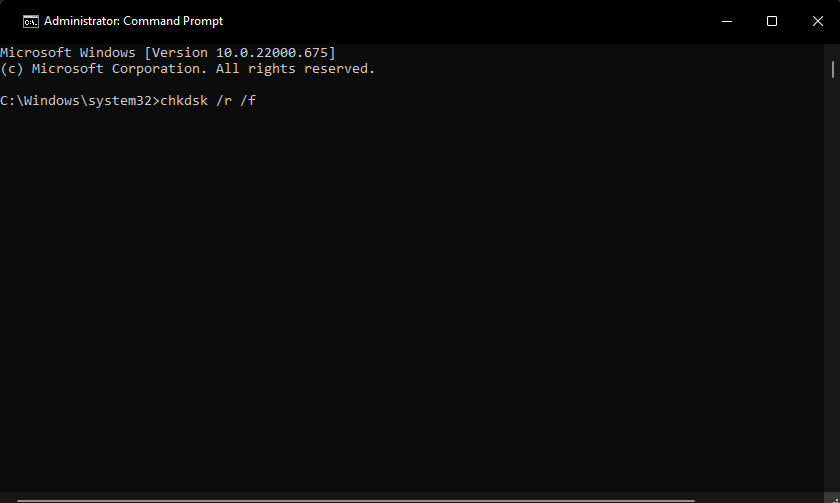
- To run a Check Disk scan, type in this CHKDSK command and press Enter:
chkdsk /r /f - Press the Y keyboard key to schedule the scan.
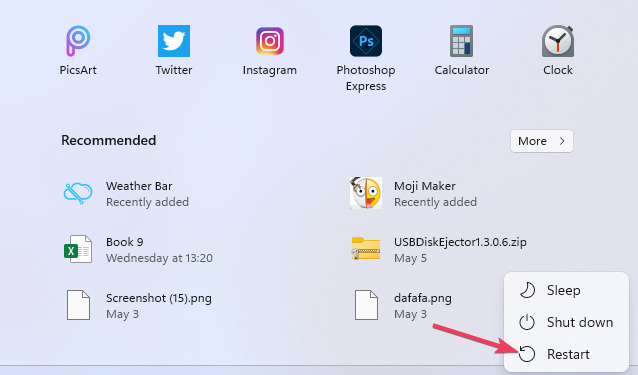
- Press the Power Start menu button, and click the Restart option.
2. Scan system files
- Open Command Prompt as specified in steps one and two of the previous resolution.
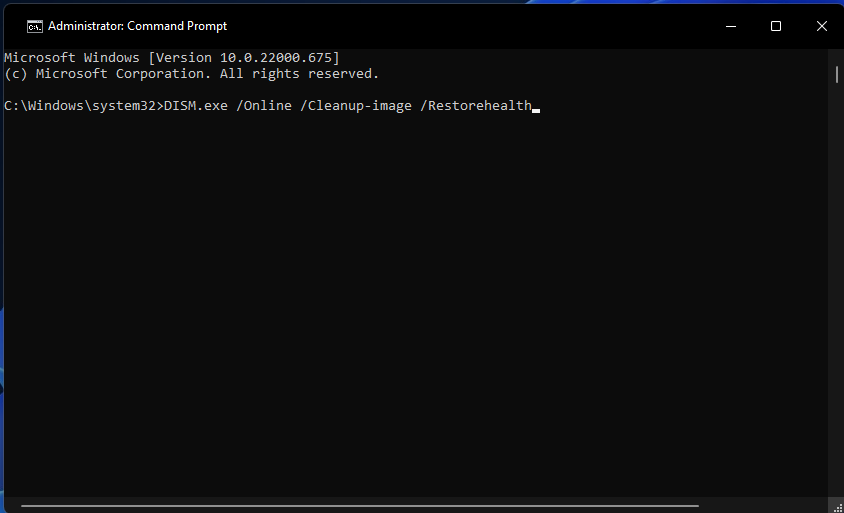
- First, input the following text in the Command Prompt:
DISM.exe /Online /Cleanup-image /Restorehealth - Press Enter to initiate the command.
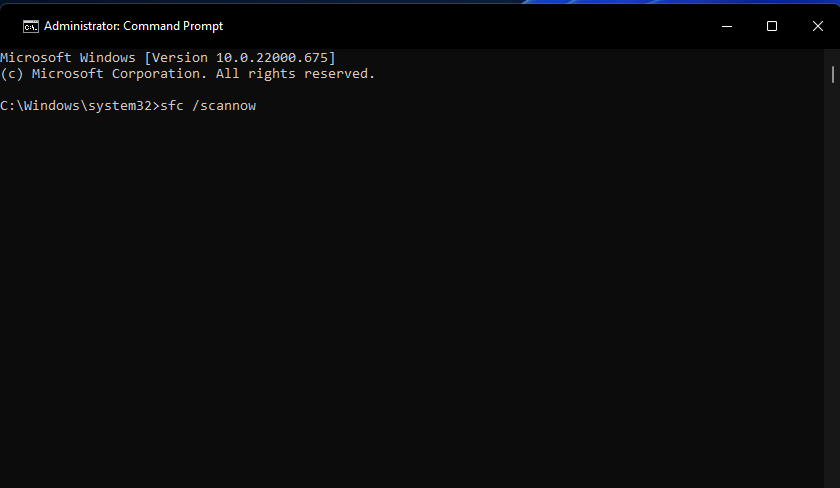
- Input this SFC command and press Enter:
sfc /scannow - The SFC scan will take a while. Make sure you wait until the scan is fully completed before closing the Command Prompt.
3. Reset the OneDrive app
- Bring up the Command Prompt’s window (again, as covered in resolution one).
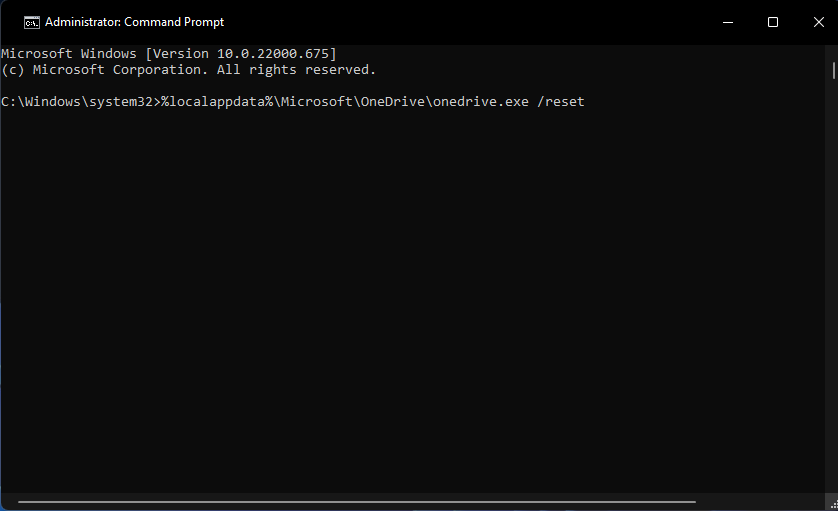
- Run this reset command and press Enter:
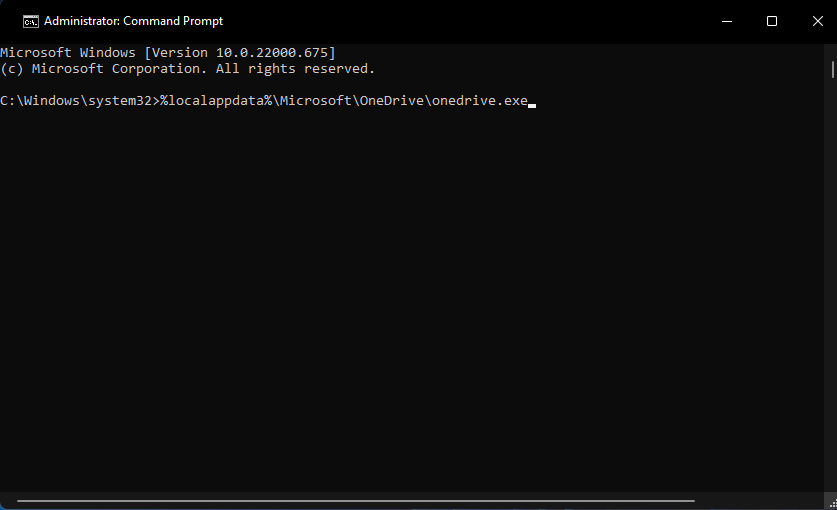
%localappdata%\Microsoft\OneDrive\onedrive.exe /reset - If OneDrive doesn’t automatically restart, type in this text and hit Enter:
%localappdata%\Microsoft\OneDrive\onedrive.exe - Some users might need to input a modified reset command. If the command specified above returns a Windows cannot find message, try entering these modified commands:
C:\Program Files\Microsoft OneDrive\onedrive.exe /resetC:\Program Files (x86)\Microsoft OneDrive\onedrive.exe /reset
There aren’t that many possible fixes for the OneDrive error 0x80071129. However, many users have confirmed in forums they’ve been able to fix that issue with the resolutions above. So, you might not need any other potential resolutions to resolve error 0x80071129.
However, reinstalling Microsoft OneDrive might also be worth a try. Doing so will completely reset the app’s settings.
Microsoft’s Reinstall OneDrive app page provides instructions for how you can reinstall that cloud storage app.
Have you discovered any other way to fix error 0x80071129? If so, let us know about it in the comments section below. You can also add any questions about the OneDrive error 0x80071129 there.
Still experiencing issues?
SPONSORED
If the above suggestions have not solved your problem, your computer may experience more severe Windows troubles. We suggest choosing an all-in-one solution like Fortect to fix problems efficiently. After installation, just click the View&Fix button and then press Start Repair.
