How to Create a Custom Keyboard Layout in Windows 11
Check the quickest way to add a custom keyboard
- You can change your keyboard layout in Windows 11 to many other different international alternatives.
- The Time & language tab in Settings includes the options for installing, adding, and removing different keyboard layouts.
- Alternatively, you can add a new keyboard layout in Windows 11 by entering some commands into PowerShell.
- You can also change Windows 11’s default keyboard layout with the Microsoft Keyboard Layout Creator app.
You don’t have to stick with just one keyboard layout for your PC. Windows 11 includes settings that enable you to add keyboard layouts to your desktop or laptop. You can become acquainted with different keyboard layouts by adding them via the Settings app.
When you’ve added new keyboard layouts, you can easily switch between them via the Windows 11 taskbar. Having different keyboard layouts available can come in handy when adding characters and symbols (such as currency) unique to foreign languages to documents.
What are the three different types of keyboard layouts?
QWERTY is by far the most standard layout for keyboards the world over. That was originally a 19th-century typewriter layout carried over to PC keyboards.
It has QWERTZ and AZERTY variations in some European countries, but QWERTY is the universal layout.
Colemak is an alternative layout that alters the position of 17 keys from QWERTY. Most of the non-alphabetical keys have the same position for the Colemak layout. However, unlike the Mac OS, Windows doesn’t natively support Colemak.
DVORAK is a keyboard layout specifically designed to increase typing speeds over the more traditional QWERTY alternative. The fact that typing speed records have been set with DVORAK keyboards highlights it’s a more efficient alternative. However, it’s also very different from the QWERTY layout.
DVORAK is available for English and other international keyboard layouts in Windows 11. So, that’s a layout you can add and switch to via Settings. This is how you can change, remove, and install different keyboard layouts in Windows 11.
How can I change, remove, and add keyboard layouts in Windows 11?
1. How to add and change keyboard layout
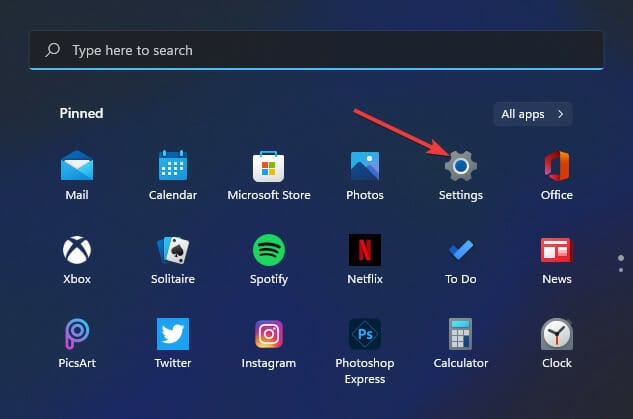
- Open your Start menu, and select the pinned Settings app to launch it.
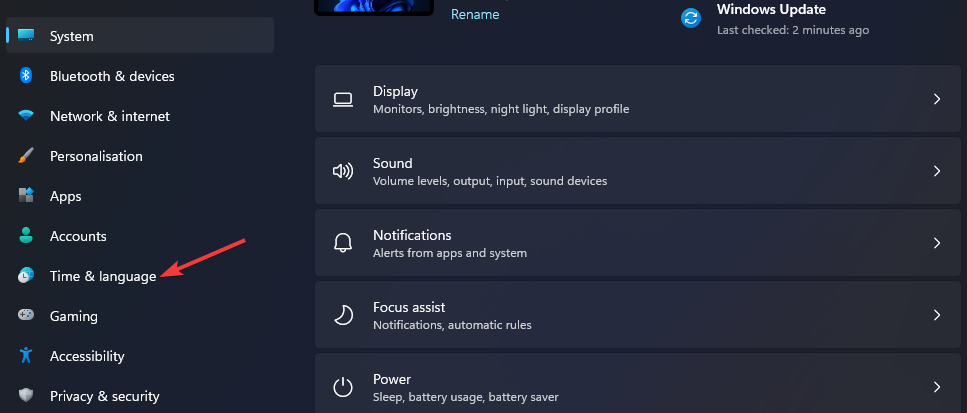
- Click the Time & language tab.
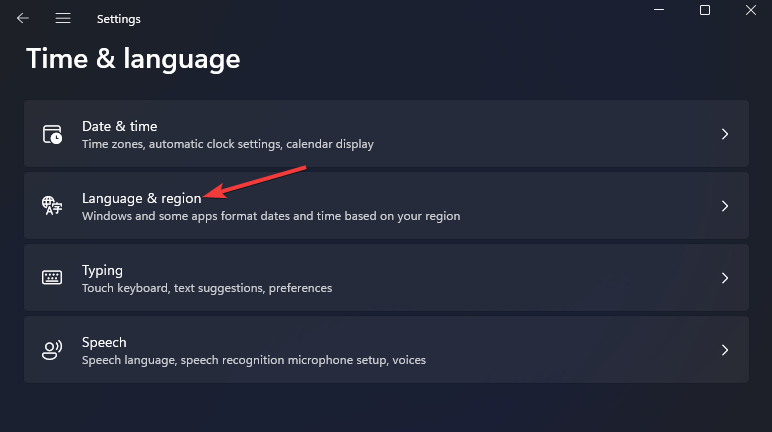
- Select the Language & region navigation option.
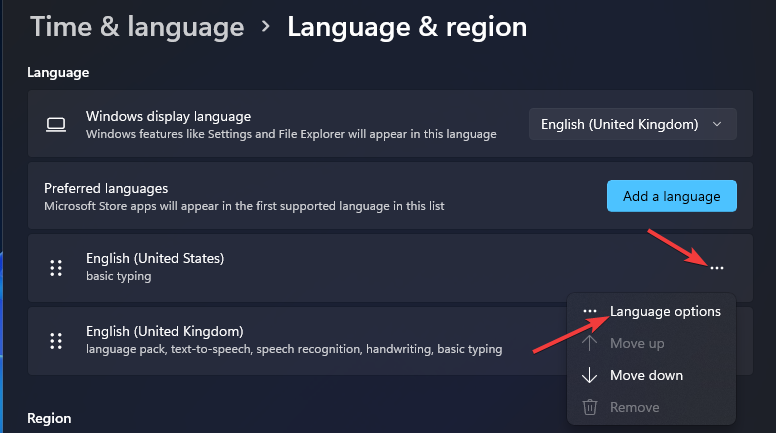
- Click the … button for your basic typing pack listed in Settings, and select Language options on the menu.
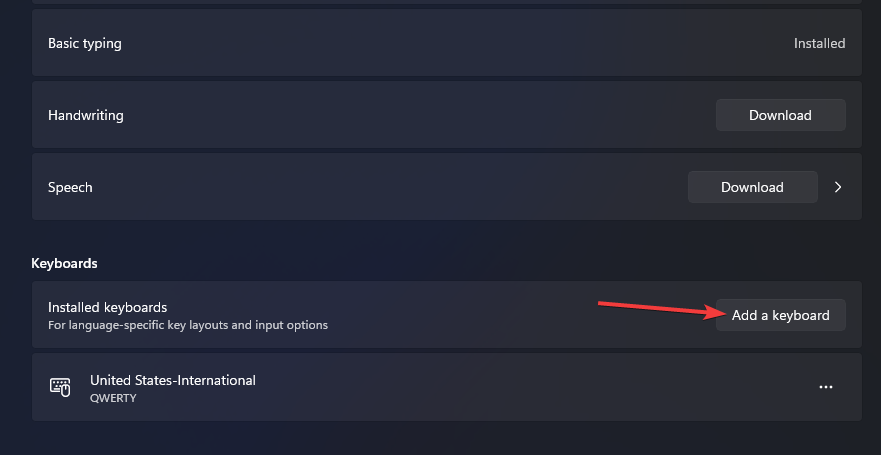
- Press the Add a keyboard button.
- Select an alternative keyboard layout on the menu.
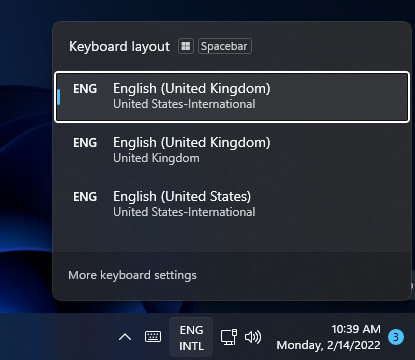
- Then you can change your keyboard layout to the one added by pressing the Windows + Space hotkey. That keyboard shortcut opens the system tray menu below, from which you can select different layouts added via Settings.
If you were wondering how to add a new language to keyboard in Windows 10, it could quickly be done via Settings.
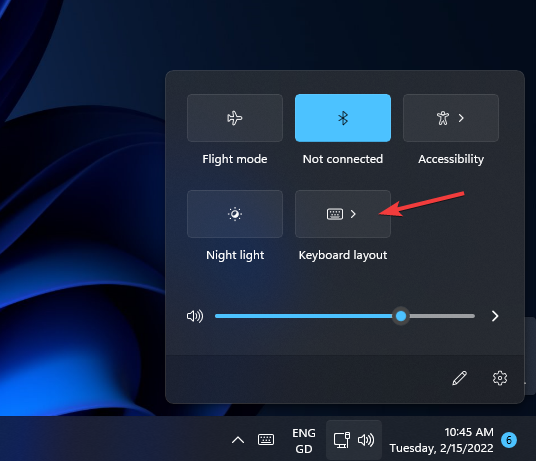
2. How to change keyboard layouts with Quick Settings
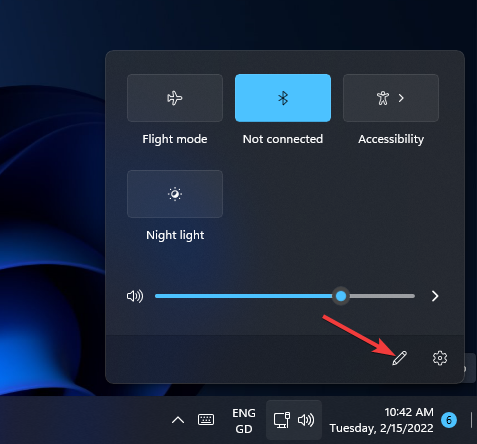
- Click the Quick Settings system tray icon.
- Press the Edit Quick Settings button.
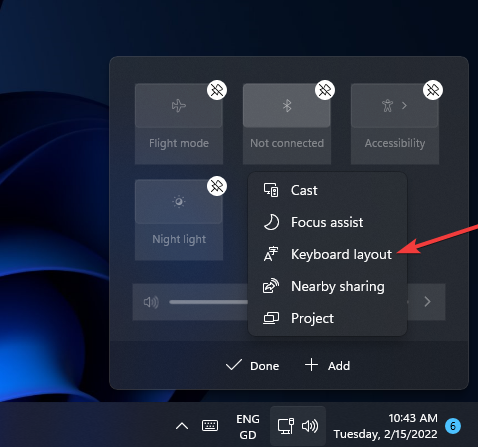
- Click the Add button, and select Keyboard Layout on the menu.
- Select the Done option.
- Then click the Keyboard layout option in Quick Settings.
3. How to remove a keyboard layout
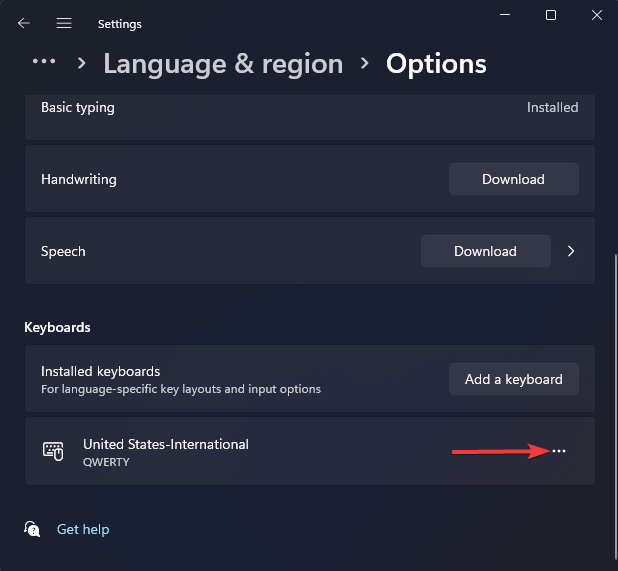
- Open Language & region options in Settings as outlined in the first three steps of the previous method.
- Then click the … button for your typing pack and select Language options.
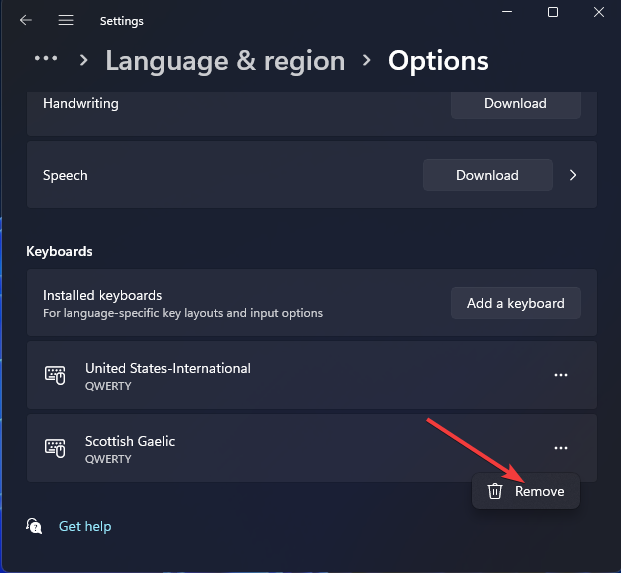
- Press the … button for an installed keyboard layout there.
- Select the Remove option.
This way, you can delete a keyboard layout in Windows 11.
4. How to install new keyboard layouts
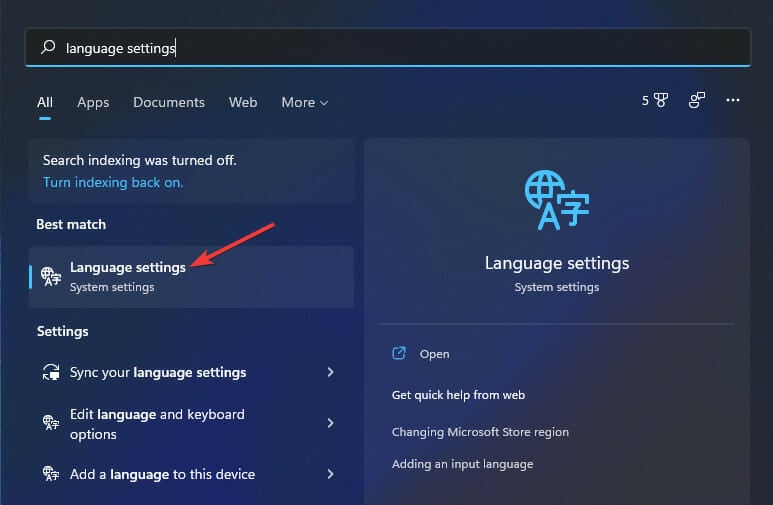
- Press the Windows + S keyboard keys simultaneously to bring up a search box.
- Type language settings in the search box.
- Select Language settings in the search results.
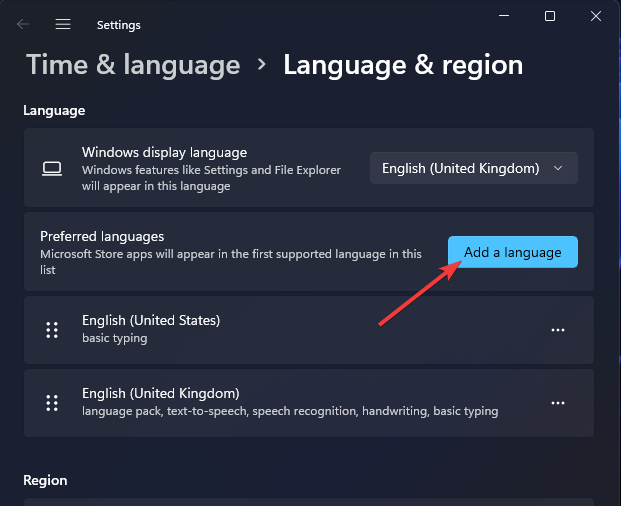
- Click the Add a language button shown directly below.
- Enter a language in the search box to find different keyboard layouts for it.
- Choose a keyboard layout to add.
- Press the Next button.
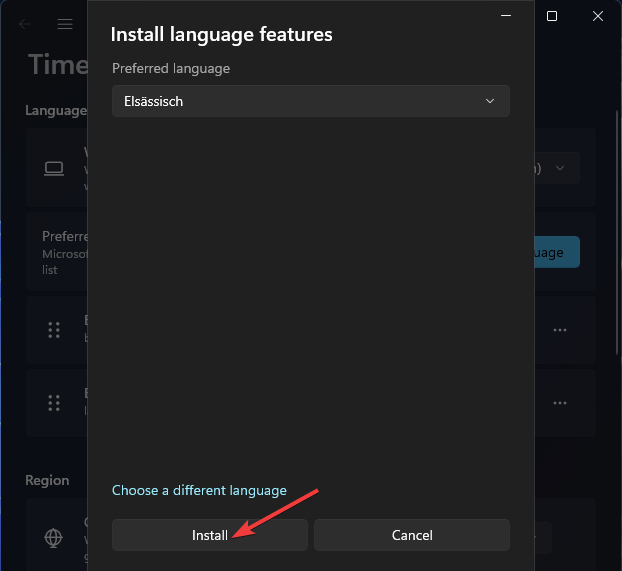
- Click Install to add the keyboard layout.
5. How to add new keyboard layouts With PowerShell
- Launch the search tool by simultaneously pressing the Windows key + S.
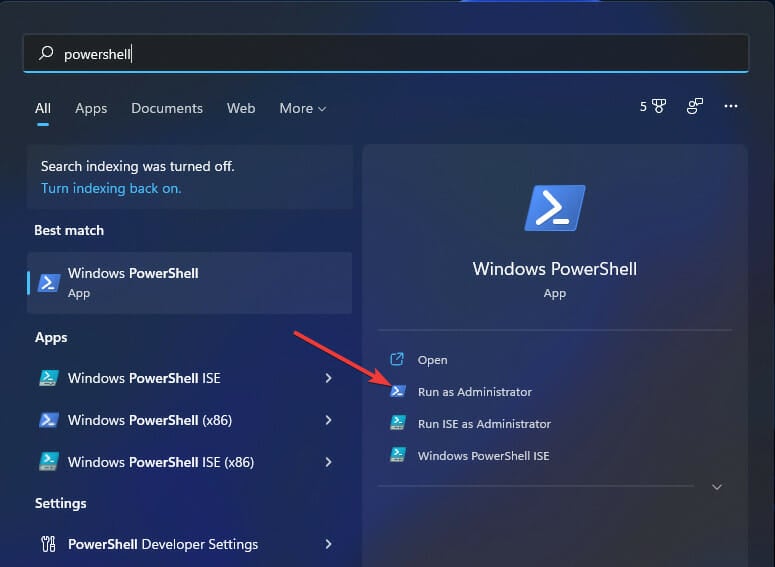
- Type Windows PowerShell in the search tool’s text box.
- Then click the Run as administrator option for PowerShell on the right of the search utility.
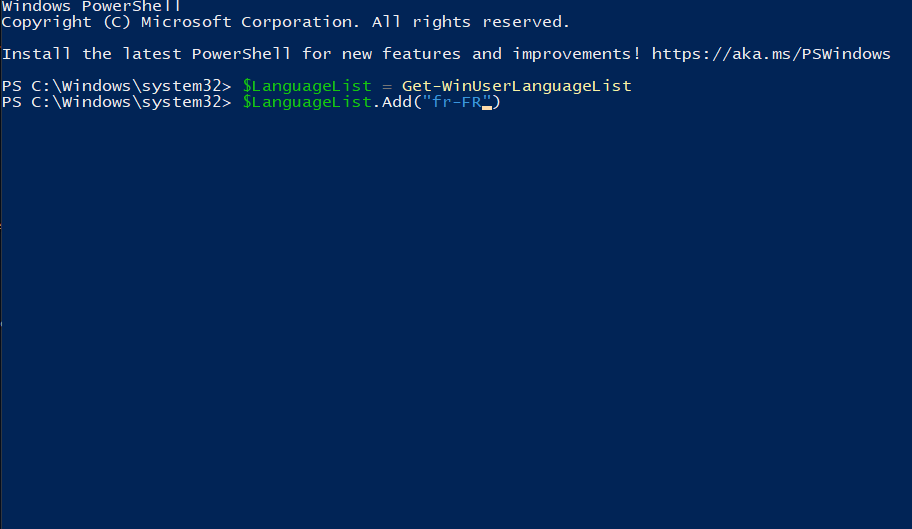
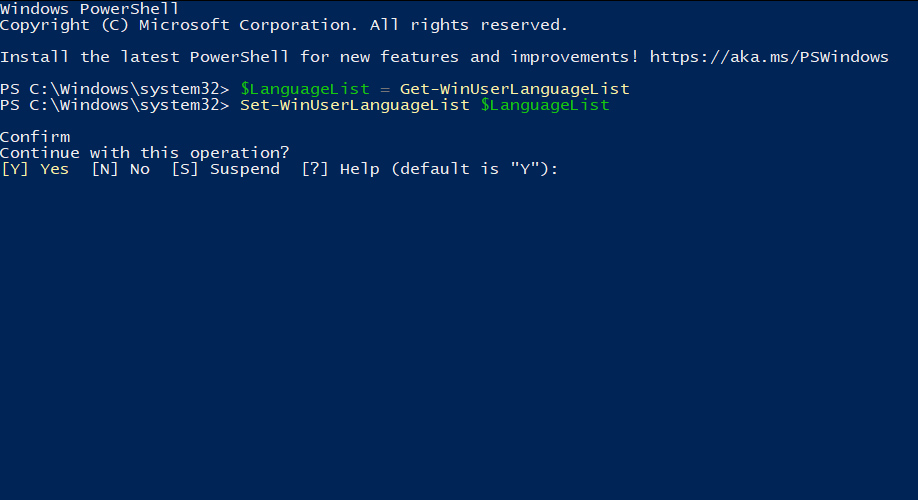
- Input this PowerShell command, and press Enter:
$LanguageList = Get-WinUserLanguageList - To add a new keyboard layout language, input the following command and press Return:
$LanguageList.Add("language") - Then type in this PowerShell command and press Enter to execute:
Set-WinUserLanguageList $LanguageList - Press the Y keyboard key to confirm and continue.
- Restart Windows 11 after entering those commands.
- Then you can switch to the new keyboard layout you just added via Settings.
You now know how to add language to keyboard in Windows, along with everything there’s to the process.
 NOTE
NOTE
Is there a way I can set up a custom keyboard layout in Windows 11?
There are various desktop apps for the job, but the one offered by Microsoft is the shortcut to change the keyboard layout in Windows 11. with which you can set up custom keyboard layouts.
Microsoft Keyboard Layout Creator 1.4 is one you can utilize in Windows 11. That app enables you to set up new layouts by remapping keys. This is how you can create custom layouts with Keyboard Layout Creator.
Download and Install the Software
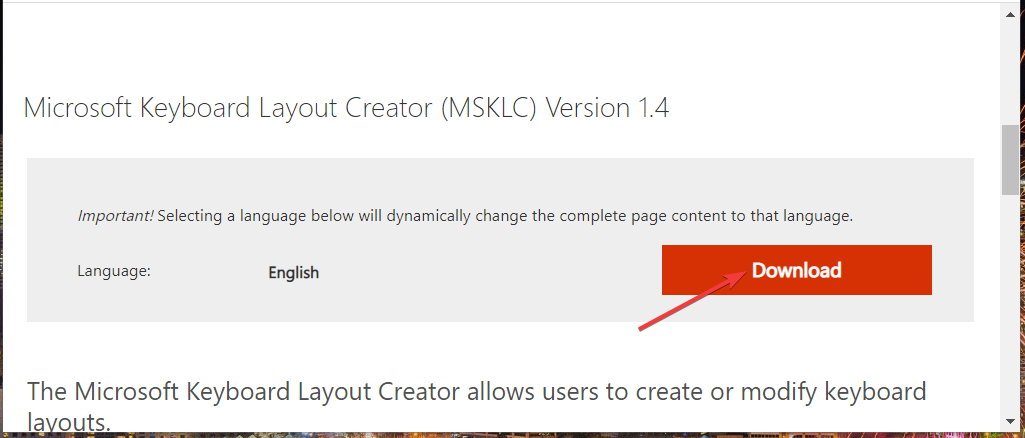
- Open the Microsoft Keyboard Layout Creator download page.
- Click Download on that page.
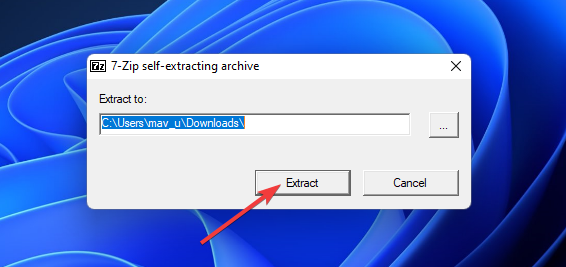
- Open the folder you downloaded the app to in File Explorer, and double-click the MSKLC.exe archive to extract it.
- Next, open the extracted MSKLC folder.
- Double-click the MSKLC.msi file to open its installer. Then install the software with its setup wizard.
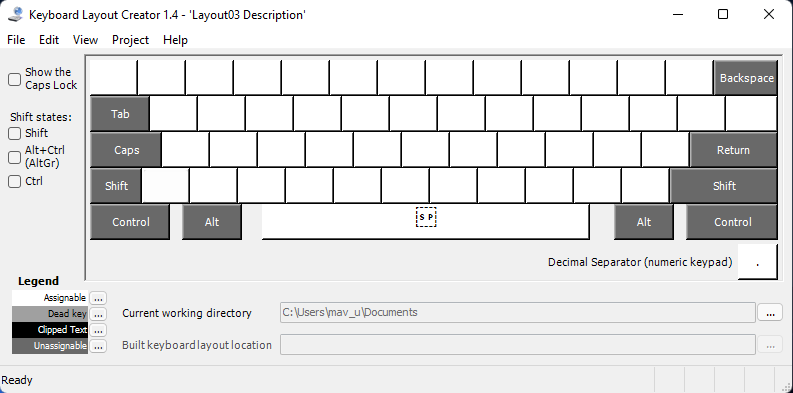
- Open the Keyboard Layout Creator app.
Set up a new keyboard layout
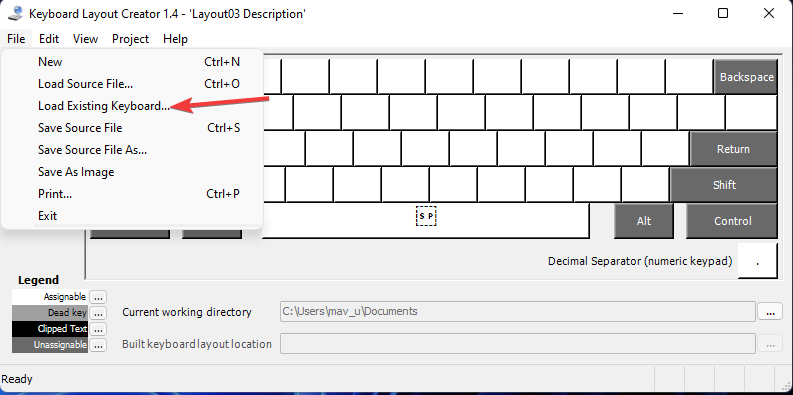
- Click the File menu, and select the Load Existing Keyboard option there.
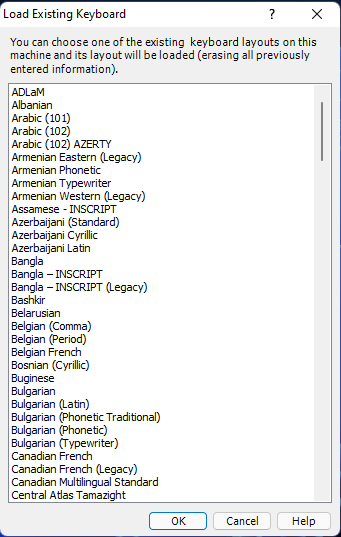
- Select a keyboard layout to customize that matches your current one.
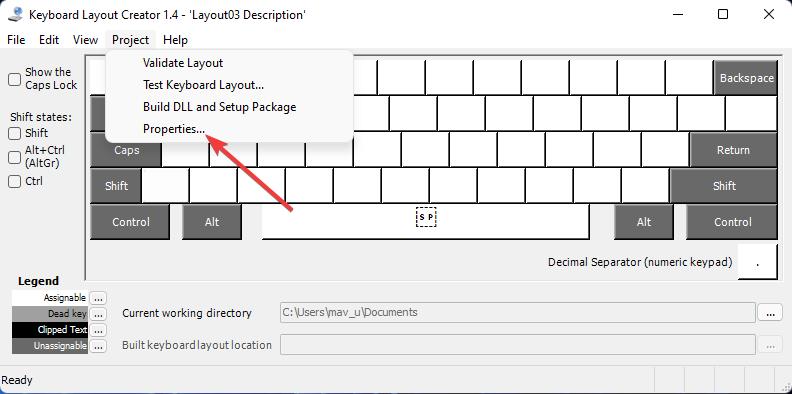
- Click the Project menu and select Properties there.
- Enter the name and description details for your custom keyboard layout, and click the OK button.
- Now you can remap the keys on the on-screen keyboard to set up a new layout. Click keys on the keyboard to bring up text boxes where you can enter different ones to change them.
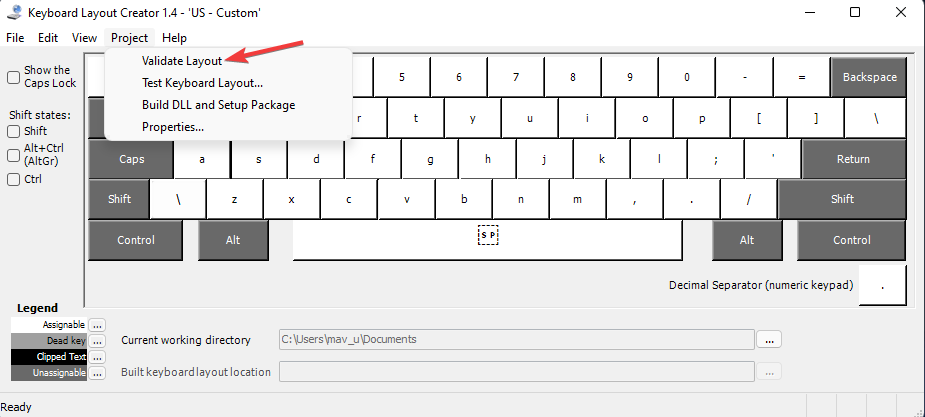
- When you’ve finished setting up your new keyboard layout, click the Project menu. Select the Validate Layout option there to verify.
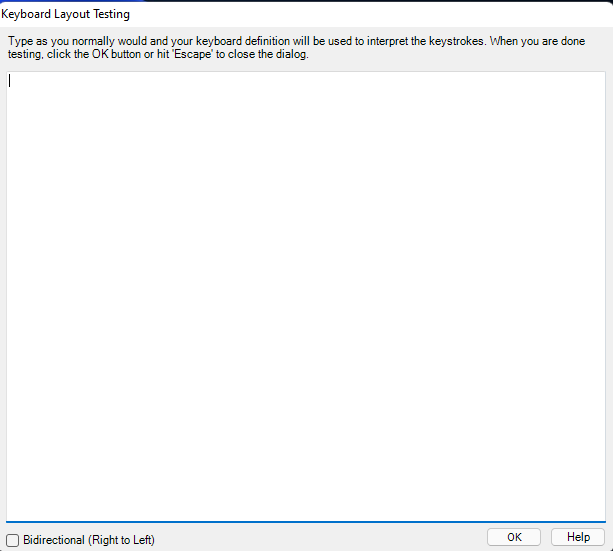
- Click Test Keyboard Layout to try out the new layout within a text editor.
Install the custom keyboard layout
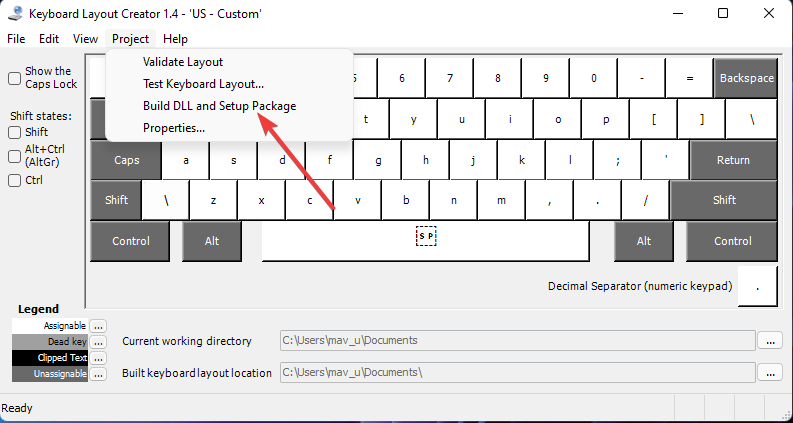
- If you’re satisfied with your new keyboard layout, you can apply it by clicking Project > Build DLL and Setup Package.
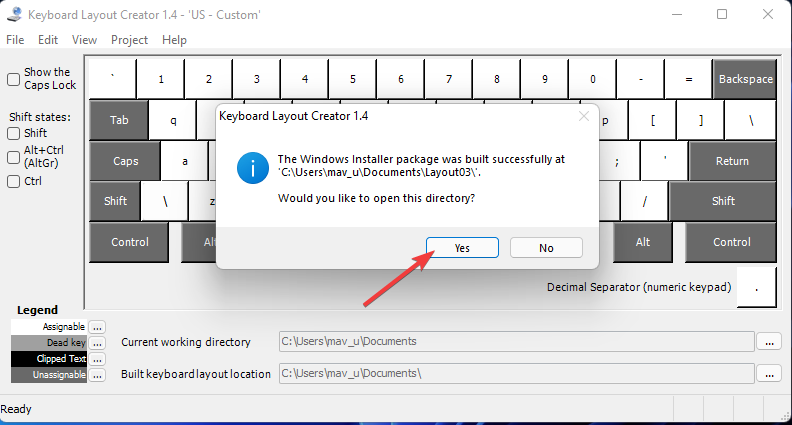
- Click Yes on the prompt that opens asking to open the directory for the keyboard layout’s installer package.
- Then double-click the setup.exe file for the custom layout to install it.
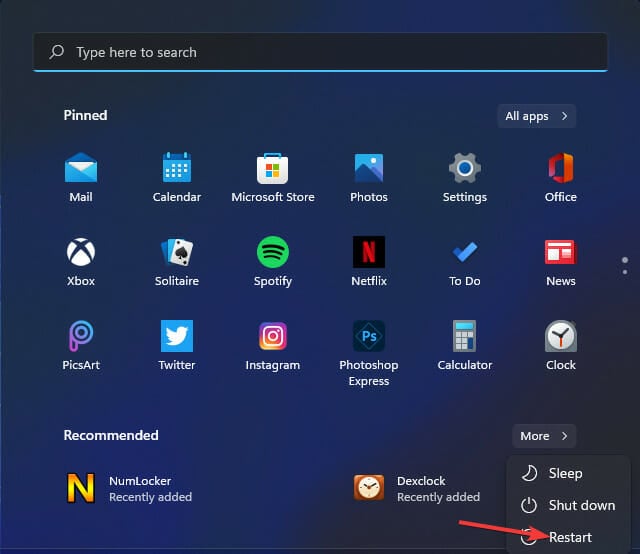
- Click Power > Restart on the Start Menu after installing the new layout.
Does the on-screen keyboard change for selected layouts?
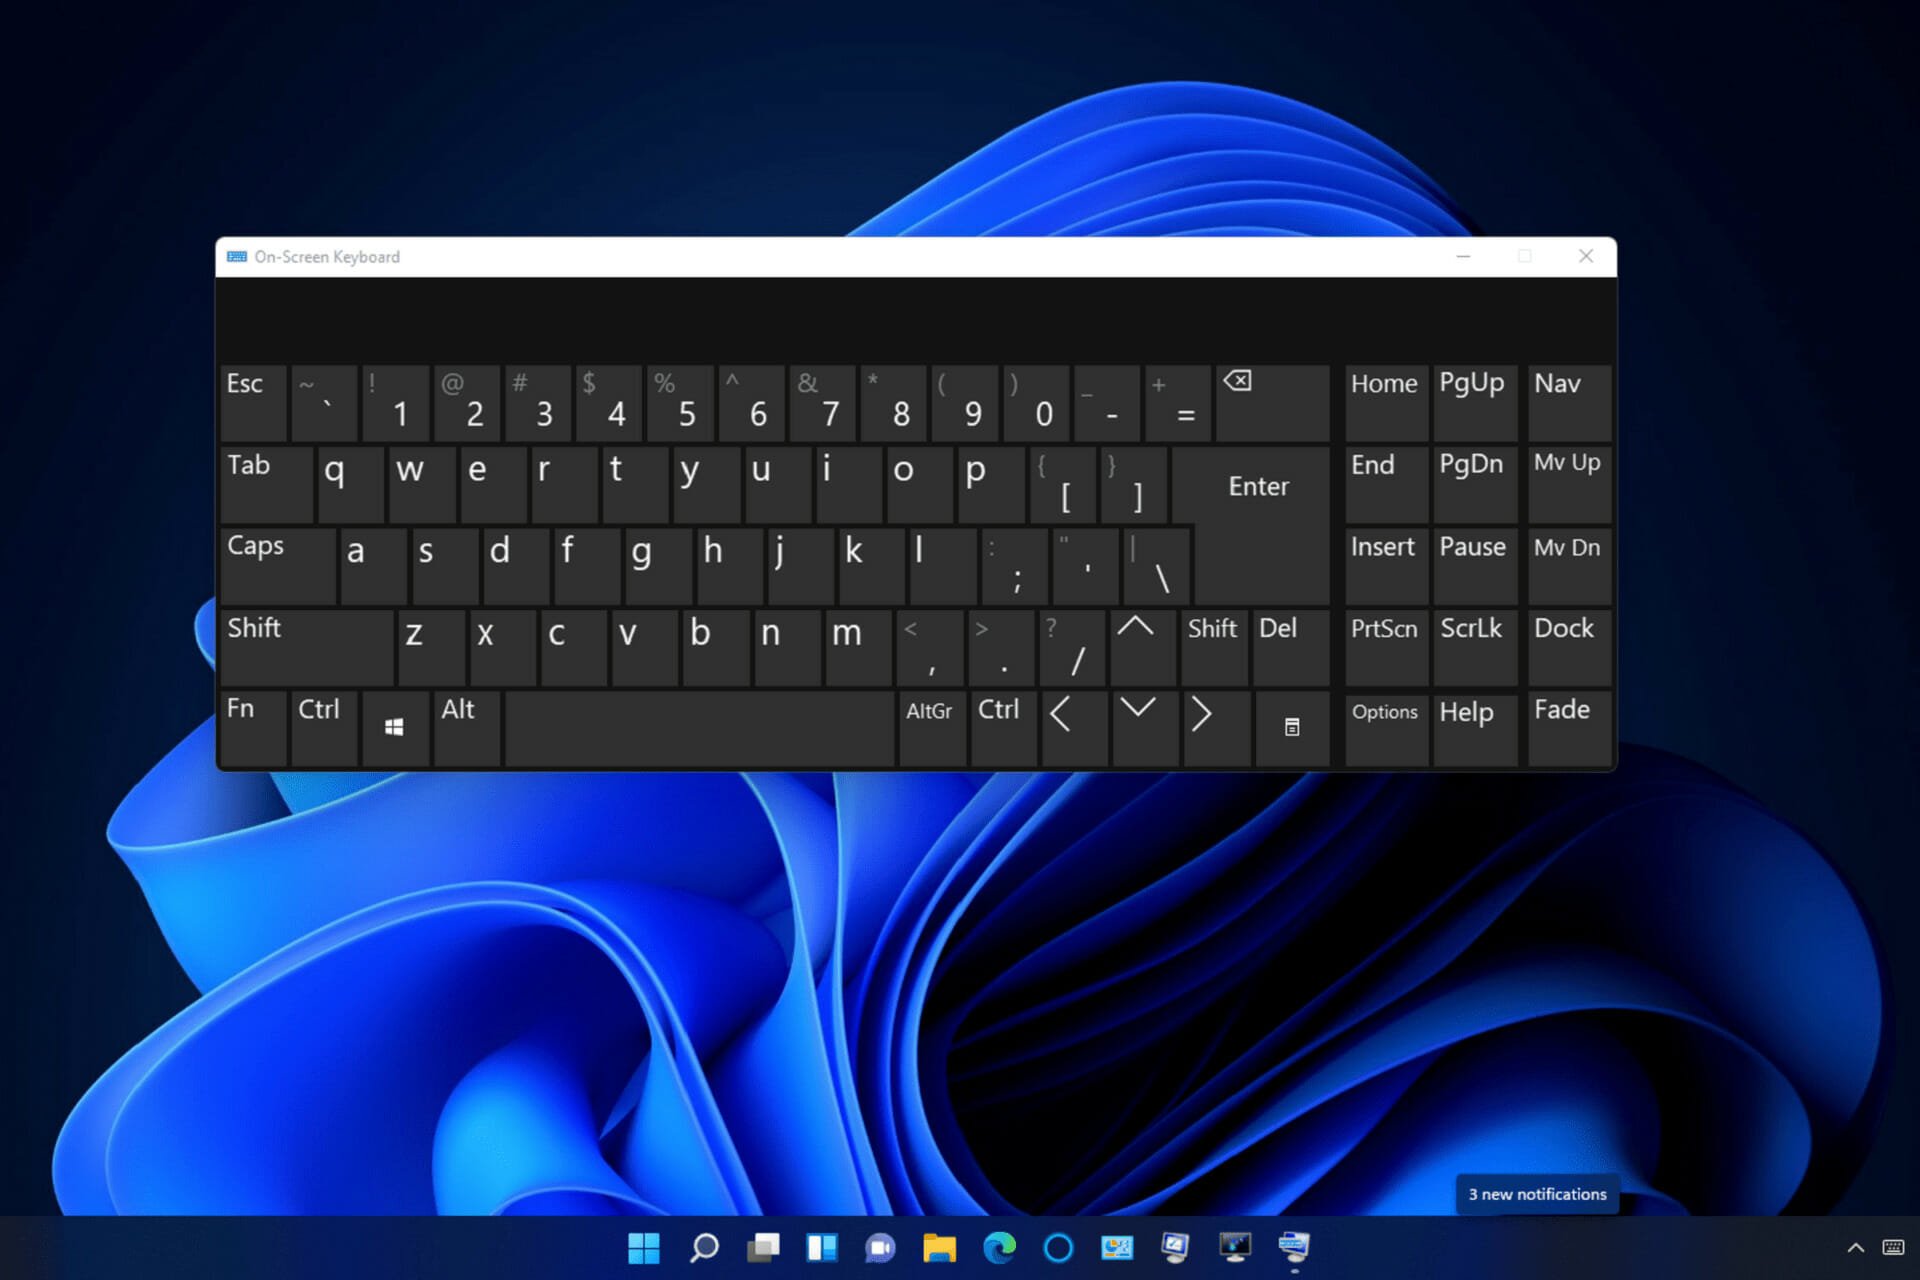
Yes, the On-Screen Keyboard app will match whatever layout you’ve selected. So, it’s worth opening that app to view a selected keyboard layout that doesn’t match your actual keyboard. You can open the On-Screen Keyboard like this.
Expert tip:
SPONSORED
Some PC issues are hard to tackle, especially when it comes to missing or corrupted system files and repositories of your Windows.
Be sure to use a dedicated tool, such as Fortect, which will scan and replace your broken files with their fresh versions from its repository.
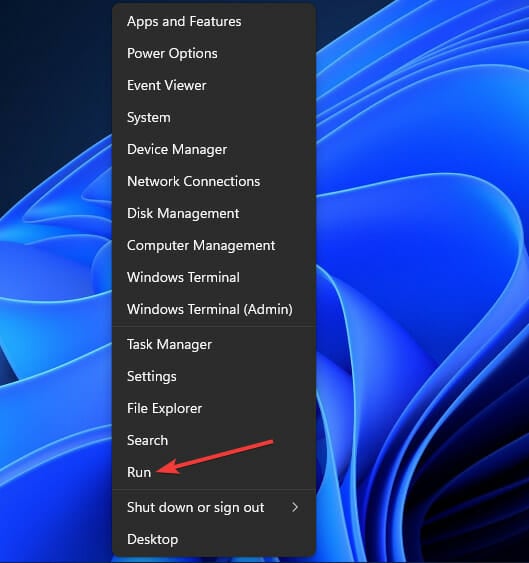
- Open the Power User menu by right-clicking the Start taskbar button.
- Click the Run shortcut on that menu.
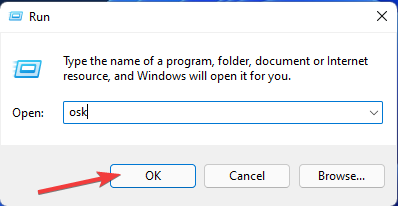
- Type this text in Run:
osk - Click OK to bring up the On-Screen Keyboard window.
Is there a way to add a Colemak keyboard layout in Windows 11?
As Windows doesn’t natively support that layout, you can’t add it with the methods above. However, you can manually set up a Colemak layout with the Microsoft Keyboard Layout Creator app and image references. There’s also a Colemak layout pack available for download at the Colemak website.
You can set up completely new keyboard layouts with Microsoft Keyboard Layout Creator. However, that’s not the only software you can customize keyboard layouts with. Our keyboard mapping software guide provides further details for other software you can customize keys with.
Also, find out what to do when the positions of ( @ ) and ( “) have changed in my keyboard on Windows 11.
Overall, installing and adding new keyboard layouts via Settings is pretty straightforward. So, why not experiment with different keyboard layouts in Windows 11? Let us know your thoughts in the comments section below.
